


The Right Type of Paint for Every Type of Project (Plus, How to Prep for That Paint)
You can’t use the same paint on all surfaces. Learn the best type of paint for common household materials such as brick, tile, porcelain, concrete, fiberglass, fabric and more.
Paint is the ultimate designer's medium. For only a few dollars, paint can transform nearly anything into something fresh, dazzling and new. Discover the materials that accept paint and those that you should avoid. Note: Many manufacturers make specialty paints for specific applications; ask your paint dealer.
Brittney Gazaway
How to Prep + Paint:
- Brick
- Ceramic Tile and Porcelain
- Concrete Slabs
- Concrete Block
- Drywall
- Fabric
- Fiber-Cement Siding
- Fiberglass Exterior Doors
- Fiberglass Tubs and Showers
- Glass
- Laminate Countertops
- Metal
- Plastic
- Vinyl Flooring
- Vinyl Shutters
- Vinyl Siding
- Wicker or Rattan
- Wood (Bare)
- Wood and Paneling (Painted or Sealed)
Brick
Set-up and Prep: Clean the brick with a wire brush to remove dirt and grime; be careful not to dig out any mortar. Scrub the masonry with soapy water and rinse thoroughly. Let dry for 48 hours.
Painting: First, apply a coat of quality latex primer. When the primer is dry, apply top-quality latex paint that's formulated for use on masonry. Use a long-nap roller to cover most of the surface, and a brush to get into grout lines and crevices. Watch for drips — there's a lot of texture to a brick surface, so keep an eye out for runs. A second coat is recommended.
Heads-up: Don't use a pressure washer to clean your brick; the risk of gouging out mortar is too great. Note that painting brick is a one-way decision — it's almost impossible to remove paint from brick surfaces.

How to Paint a Brick Fireplace White
If your brick fireplace is looking dated or has stains and discoloration, it’s time to freshen it up with a quick coat of paint.
Ceramic Tile and Porcelain
Set up and Prep: Sand with 150-grit sandpaper to improve adhesion. Clean the tile surfaces with TSP or another non-residue cleaner.
Painting: Use a top-quality acrylic primer. Finish with semi-gloss acrylic interior paint. If you want, paint the grout a contrasting color — but you'll need patience and a steady hand.
Heads up: For best adhesion, allow the paint to cure for 10 days to two weeks before using the surfaces. Don't paint tile floors; there's just too much traffic and abrasion.

How to Paint & Stencil Ceramic Tile
Remodeling on a budget? Give outdated floors a refresh with our step-by-step guide to painting and stenciling ceramic tile. You can do it all for less than $100 and without special equipment.
Concrete Slabs
Set up and Prep: Wash the slab with TSP or another non-residue cleaner. Remove any old, flaking paint. Treat oily spots with a degreaser. Let everything dry for 48 hours. Etch the surface of the concrete with a mild (10 percent) solution of muriatic acid (make sure you have plenty of ventilation).
Painting: Use a primer and paint specifically formulated for concrete floors. Apply the paint according to the manufacturer's instructions.
Heads up: Make sure your concrete isn't wicking moisture up from underneath. To find out, tape a 2x2-foot piece of plastic to the floor (tape all edges) and wait a couple of days. Check underneath the plastic to make sure no moisture has formed on the underside of the plastic. If it has, your slab isn't a good candidate for paint.
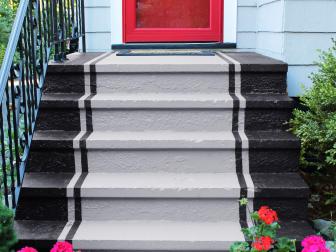
The Dos and Don'ts of Painting Concrete Steps
HGTV Magazine has the tips and tricks you need to know.
Concrete Block
Set up and Prep: Remove any loose particles and mortar with a wire brush. Remove any efflorescence with a bleach solution made from 1 cup bleach in 1 gallon of water. Clean the entire surface with TSP or another non-residue cleaner. Let everything dry 48 hours before painting.
Painting: Prepare raw block with a masonry sealer. Let dry thoroughly, then apply a high-quality acrylic latex primer. Finish with acrylic latex paint.
Heads up: For new concrete and block installations: Wait 90 days before applying paint.
Drywall
Set up and Prep: Make sure the drywall is free of dust (there's usually a lot of it from sanding). Wipe the surfaces lightly with a damp rag. For painted drywall, repair any cracks and holes with a spackling compound.
Painting: Use a top-quality acrylic latex primer. For previously painted drywall, use a stain-blocking primer to cover any marks or blotches. Finish with good-quality acrylic latex paint.
Heads up: The higher the paint sheen, the easier it is to wash and clean the surface. Semi-gloss is good for kids' rooms and kitchens.

How to Repair Cracks and Holes in Drywall
Drywall damage can range from small cracks to large holes, but most repairs are easy and inexpensive to fix. We have six different ways to make the repair depending on the size, type and place of the damage.
Fabric
Set up and Prep: Wash fabrics without detergent and let dry. If possible, stretch out the fabric and lay it flat.
Painting: Use water-based paint specifically formulated for use with fabrics. A crafts store will usually have a good selection.
Heads up: You may have to fix the paint by putting the material in a dryer. Read the paint manufacturer's instructions carefully.
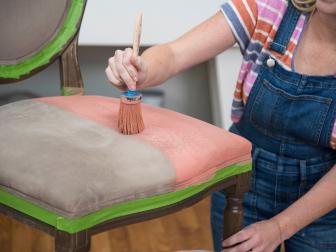
How to Paint a Velvet Chair
We've researched and tested so you don't have to. We share steps and tips on how to seamlessly paint velvet. (Yes, it really does work!)
Fiber-Cement Siding
Set up and Prep: Don't pre-sand fiber-cement; the dust may cause respiratory ailments.
Painting: Use a primer specifically formulated for cement and masonry products. Apply top-quality exterior paint according to the manufacturer's instructions.
Heads up: Don't apply oil-based paint directly to fiber-cement without priming — you may void the manufacturer's warranty.
Fiberglass Exterior Doors
Set up and Prep: Set the door flat on a pair of saw horses. Remove all hardware. Lightly sand with 320-grit sandpaper. Remove the dust using a rag dampened with acetone. Allow it to dry thoroughly.
Painting: Prime with an acrylic latex primer. When dry, apply two coats of top-quality, exterior-grade latex paint, using a brush. Sand lightly between coats.
Heads up: Don't use regular household cleaners to prep your door — they may leave a residue.

Read This Before You Paint Your Front Door
So, you’re ready to paint your front door. Whether it’s just a touchup with a favorite hue or an entirely new shade, take note of these helpful hints before you pick up your brush.
Fiberglass Tubs and Showers
Set up and Prep: Sudden blasts of hot water are hard on painted fiberglass bathtubs and showers, and various DIY methods for refinishing have mixed results. The most effective way we've found calls for finishing with automotive paint. The paint should be applied with a high-volume, low-pressure paint (HVLP) sprayer.
Sand the surfaces lightly with 220-grit sandpaper. Wash the surfaces thoroughly with TSP or non-residue cleaner, and rinse with water. When dry, wipe all surfaces with lacquer thinner. Make sure you have plenty of ventilation.
Painting: Apply an auto primer. When dry, lightly sand with 320-grit sandpaper, and wipe away the dust with damp rags. Apply a polyurethane-based automotive paint, using an HVLP.
Heads up: Another solution is to opt for Rust-Oleum's Tub and Tile Refinishing Kit.

The Art of Refinishing Bathroom Fixtures
Rescue that tub! Save that sink! Fixing up your old bathroom fixtures can cost hundreds less than full-out replacing them, whether you do it yourself or hire a pro.
Glass
Set up and Prep: Clean the surface with a glass cleaner.
Painting: Glass painting is a popular hobby or craft project. Check your local hobby store for paints formulated to use with glass. Some may require an undercoating or special surface application.
Heads up: Lighter colors are better for light transmission.
Laminate Countertops
Set up and Prep: Rough up the surfaces with 150-grit sandpaper. Remove all dust and wash with TSP or another non-residue cleaner.
Painting: Use a primer specifically formulated for non-porous surfaces. Finish with at least two coats of acrylic latex enamel, using a short-nap roller.
Heads up: Painting laminate countertops isn't a permanent solution; consider it a stopgap until you can replace the countertops.

How to Paint a Laminate Countertop to Look Like Natural Stone
Learn the secrets to freshening up a worn or dated-looking countertop with paint.
Metal
Set up and Prep: Remove any rust and flaking with a wire brush. Sand with 220-grit sandpaper. Rinse with plain water, let dry.
Painting: Use an exterior-grade primer and paint that are formulated for metal.
Heads up: The method is the same for steel, aluminum and iron.
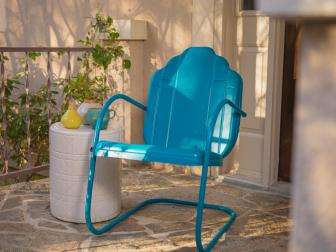
How to Refinish Metal Furniture
Learn how to strip rust off a piece of outdoor metal furniture and repaint it for a brand new look.
Plastic
Set up and Prep: Sand lightly with 320-grit sandpaper. Wash with TSP or another non-residue cleaner, and rinse thoroughly.
Painting: Use spray paint formulated for plastic. Alternative: Use exterior-grade acrylic enamel.
Heads up: After prep, don't touch the plastic with your bare hands — you'll leave oil residue that keeps the paint from sticking.
Vinyl Flooring
Painting: Sorry, not a good candidate for painting. The surface offers poor adhesion, and flexing from foot traffic and day-to-day abrasion soon wears away paint.
Vinyl Shutters
Set up and Prep: New shutters should be wiped with mineral spirits to remove any factory-applied mold-release agents, then washed with a mild detergent. If your shutters have been outside for more than two years, you can skip the mineral spirits wipe.
Painting: Prime the shutters, using a primer specifically made for plastic and vinyl. Finish with top-quality latex paint.
Heads up: Vinyl products are tricky to paint. Once painted, you'll want to keep your shutters undisturbed for five days in a protected location — a garage is great — to let the paint cure thoroughly. Avoid dark paint colors that absorb heat and make the vinyl expand and warp.
Vinyl Siding
Painting: The debate rages here, but the best advice is: Don't do it. A big surface area and a tricky material add up to lots of opportunities for paint failure. A lot of work for a result that could deteriorate in a year or two.
Wicker or Rattan
Set up and Prep: The terms wicker and rattan often get mixed up. Wicker is a type of weave and rattan is a natural material. So your wicker furniture may be made of plastic while rattan furniture is made from natural grass. Thus, how you paint each is going to be slightly different. Synthetic wicker will need a coast of primer, while natural rattan won't need to be primed. With all its cracks and crevices, the important prep for wicker or rattan furniture is to make sure it's clean. On a warm day, give it a hard spritz with a garden hose and wipe it dry immediately. If previously painted, sand lightly to remove any gloss.
Painting: Prime with a top-quality primer. Paint with exterior-grade acrylic latex paint; a brush helps get into the crevices.
Heads up: Make any repairs before painting. Natural rattan is porous, so you may need a second coat.

How to Refresh a Rattan Peacock Chair
Add a pop of color to a woven rattan chair with a fun ombre paint treatment and a vibrant ribbon trim.
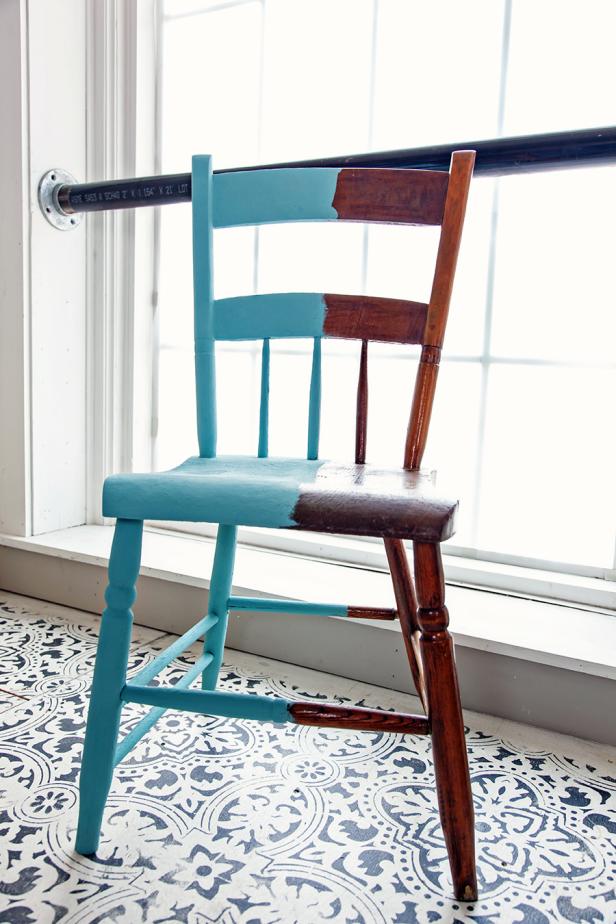
Wood (Bare)
Set up and Prep: Sand with progressively fine sandpaper until the surface is smooth. Remove dust with a tack rag.
Painting: Coat the entire surface with a stain-blocking primer. Finish with high-quality latex or oil-based paint. Sand between coats with 320-grit sandpaper.
Heads up: After priming, check to make sure any knots aren't showing through. If they are, spot prime.
How to Paint Wood Furniture
Learn how to strip, sand and paint wood furniture.
Wood and Paneling (Painted or Sealed)
Set up and Prep: Clean surfaces with TSP or another non-residue cleaner. Roughen the surfaces with 150-grit sandpaper; clean off the dust with a damp rag.
Painting: Coat surfaces with stain-blocking primer. Finish with topcoats of latex paint.

You Can Chalk Paint That! 29 Photos
If you think chalk paint is only reserved for farmhouse vibes, think again. Chalk paint creator Annie Sloan shares 12 tips for working with chalk paint that’ll inspire your next weekend DIY.

How to Stain & Stencil a Concrete Patio
Transform your drab slab into a bright, beautiful outdoor oasis with this easy stenciling project inspired by colorful Morrocan tile.


