


How to Make an Adjustable Dog Ramp
Are your fur babies having trouble getting up on the sofa or getting into the car? Build a portable ramp that extends from 16 to 30 inches so they can always be right next to you.
Cost: $
Difficulty: Intermediate
Time: 1/2 Day

Tools and Materials
- (3) 1x2 x 8' board
- (1) 3/4” plywood, 15-3/4” x 47-3/4”
- (2) small hinges
- 3/4” dowel rod at least 14” long
- wood glue
- primer and paint
- paintbrush
- carpet 49” x 17”
- 1-1/2” screws
- nail gun with 1-1/4" nails
- drill
- circular saw or table saw
- jigsaw
- sander and sandpaper
- spray adhesive
Cut List:
- 3/4” plywood 15-3/4” x 47-3/4”
- From (1) 1x3 x 8' - cut (1) @ 37” and (1) @ 49-1/4” for the long sides of base and platform
- From (1) 1x3 x 8' - cut (1) @ 37” and (1) @ 49-1/4” for the long sides of base and platform
- From (1) 1x3 x 8' - cut (3) @ 15-3/4" for the short sides of platform and inset piece, (2) @ 14” short sides of base, (1) @ 15-1/2" (ripped to 3/4” x 3/4” for legs)
- (1) 3/4” dowel rod @ 14” long
Step 1: Build Platform
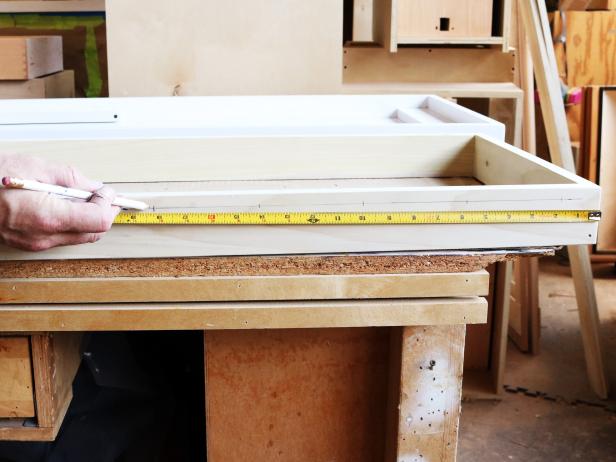
Fasten the two shorter side pieces (15-3/4-inches) onto the ends of the plywood with 2-inch nails (Image 1). Apply glue on all contact points before nailing (Image 2). Set the pieces flush with the top of the plywood. Nail the long sides (49-1/4 inches) onto the plywood and short sides, making sure the ends are flush and that you nail into the 1x3 ends as well as the plywood (Images 3 and 4).

Jacquelyn_McGilvray

Jacquelyn_McGilvray

Jacquelyn_McGilvray

Jacquelyn_McGilvray
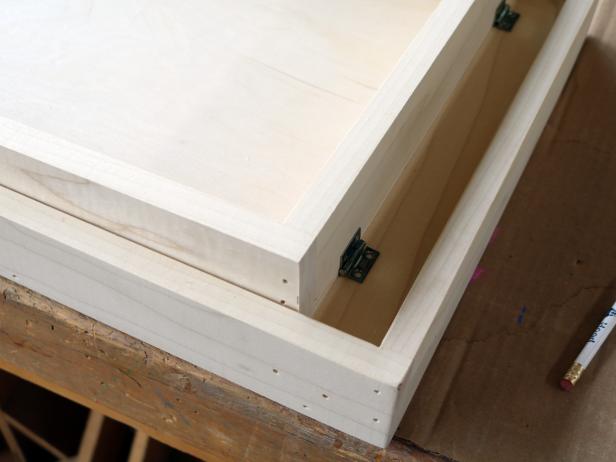
Step 2: Secure Inset Piece
The inset piece goes on the underside of the platform and will hold the hinges that connect the base to the platform. Nail the inset piece flat (the remaining 1x3 x 15-3/4-inch board) inside the bottom of the box and against one end using 1-1/4-inch nails (since it's only 1/2 inch thick) (Images 1 and 2). Use 2-inch nails through the 1x3 into the side pieces.

Jacquelyn_McGilvray

Jacquelyn_McGilvray
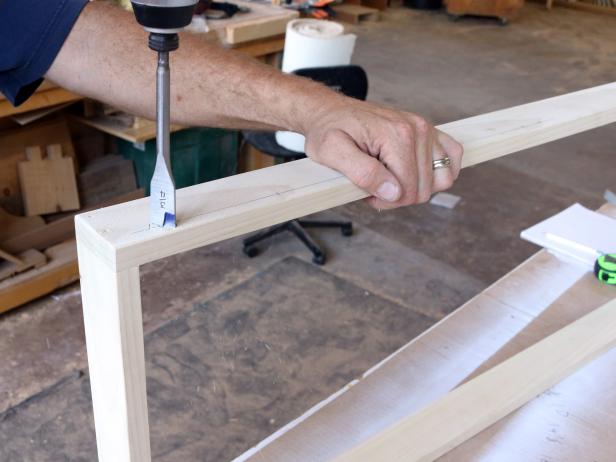
Step 3: Assemble Base
Nail the four base pieces together the same way as the platform but without the plywood on top. Let the long sides (37-inch pieces) run past the short sides (14-inch pieces) on each end. Sand all pieces with a sander.

Jacquelyn_McGilvray
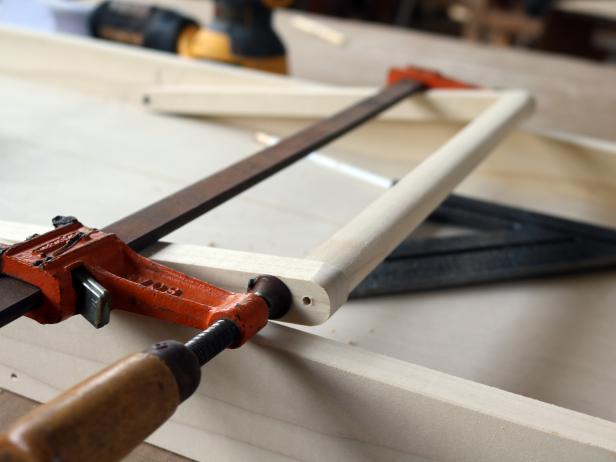
Step 4: Make Legs
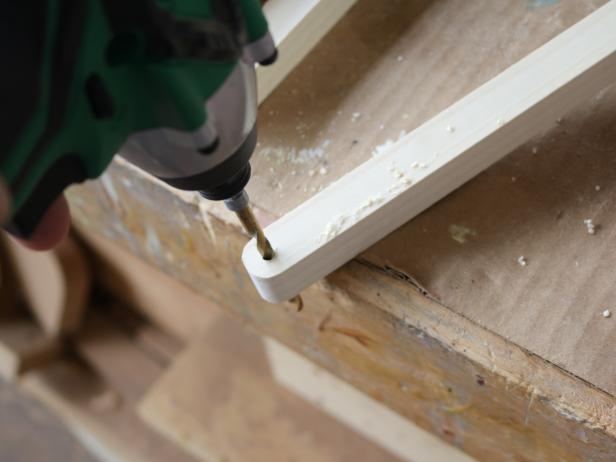
Rip the 15 1/2-inch in two so you have two 3/4 x 3/4 x 15 1/2-inch pieces. Set the dowel rod onto the end of the leg, lining it up with the edge. Trace a half-circle (the curve of the dowel) onto the leg. Repeat with the other three ends of the two legs. Use a sander to round over the ends to the curved mark. Drill a 3/16-inch hole in the center of each of the four radiused ends (Images 1 and 2).

Jacquelyn_McGilvray
Jacquelyn_McGilvray
Step 5: Attach Legs
Turn the platform upside down and place the tape measure inside the box butting up against the side without the inset piece; make a mark at 22 1/2 inches in from the edge without the flat 1x3 inset piece. Place a thin piece of cardboard or folded paper underneath the leg to give a little clearance. Screw the legs in at these points, but just loosely for now. You will need them loose for step 9. Also, do not attach the dowel at this point.

Jacquelyn_McGilvray
Step 6: Mark Placement of Notches in Base
On the base frame, measure down 1 inch from the top and use a straight edge or level to draw a line 2 feet long at that mark (Image 1). With the tape measure hooked on the end, measure along the line and make marks at 2 inches, 6 inches, 10 inches and 14 inches. Repeat on the opposite side.
Jacquelyn_McGilvray
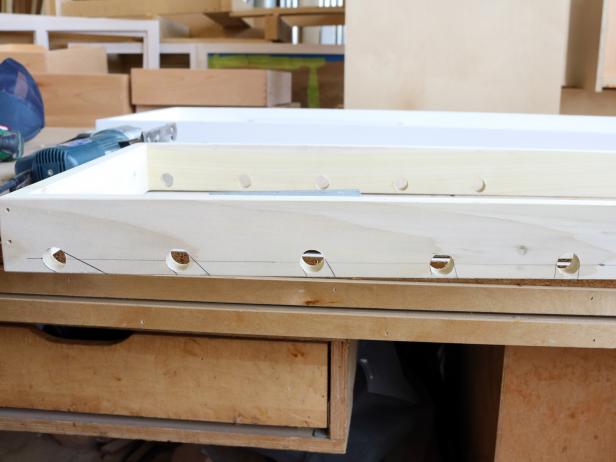
Step 7: Cut Holes for Notches
Drill a hole using a 3/4-inch paddle bit in the first mark (Image 1). Stop when the point of the bit comes through the other side but don’t drill all the way through. Put a piece of tape on the bit to mark the depth of that cut so the other holes will be consistent (Image 2). Continue with the rest of the holes, only drilling until the point of the bit pokes through the other side (Image 3). When all four holes are done, flip the base over and finish drilling out the holes from the other side (Images 4 and 5). This method prevents the wood from blowing out and splitting.
Jacquelyn_McGilvray
Jacquelyn_McGilvray

Jacquelyn_McGilvray

Jacquelyn_McGilvray

Jacquelyn_McGilvray
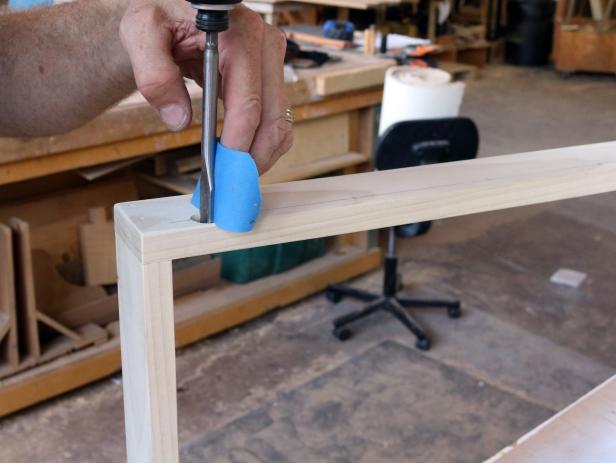
Step 8: Attach Base to Platform
Lay the platform upside down and place the base inside of it with the holes you just drilled facing down. Line the side without the holes up against the edge of the inset piece. Lay the hinges on top of the inset piece and up against the base; use a pencil to mark holes in the hinges. Pick up the base and screw the hinges into the inset piece. Then lay the base back in place and finish installing the other side of the hinges.
Jacquelyn_McGilvray
Step 9: Mark Angles on Notches
It's best to have a helper for this step. Turn the ramp right-side up, and have your helper hold up the platform with the base remaining flat on the work table. Swing the legs outside of the platform box and line them up with the bottom of each of the holes. (This is why you didn't tighten the legs all the way.) Mark the leg position against each hole (each one will be at a different angle) (Images 1 and 2). This will give you the line to cut with the jigsaw. The last notch can be a straight cut, so you can mark this with a speed square (Images 3 and 4).

Jacquelyn_McGilvray

Jacquelyn_McGilvray

Jacquelyn_McGilvray
Jacquelyn_McGilvray
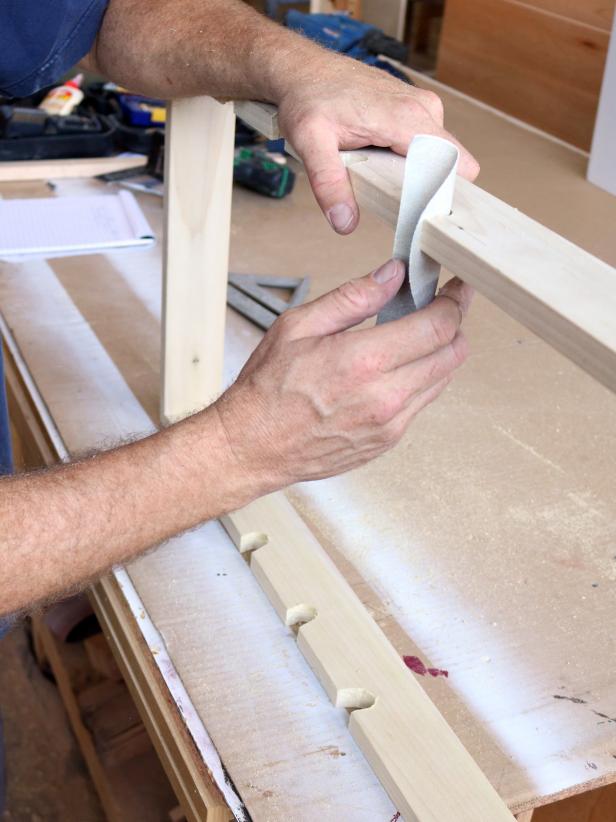
Step 10: Cut Notches
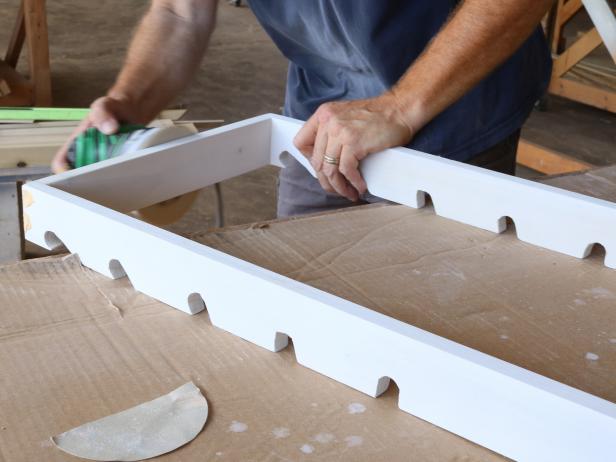
Use a jigsaw to cut outside your lines into the bottom of the drilled holes (Image 1). It’s better to be too large than not large enough. When all the notches are cut, sand the jigsaw marks smooth with coarse-grit sandpaper (Image 2), and then use a sander on the whole base piece to get it ready for painting (Image 3).

Jacquelyn_McGilvray
Jacquelyn_McGilvray

Jacquelyn_McGilvray
Step 11: Add Dowel to Legs
Screw the dowel in between the two legs. If it helps, use a clamp to hold up the legs while you insert the dowel. You can tighten the legs on the platform or remove it for painting.
Jacquelyn_McGilvray
Step 12: Stain or Paint
We chose to prime and paint our dog ramp but it could be stained as well. We removed the hinges to make it easier to paint, but it’s not necessary. If painting instead of staining, apply a coat of primer and allow it to dry. Fill nail holes with putty, then sand smooth once it's dry. Then apply a coat of paint, and allow it to fully dry. If staining, fill the nail holes with putty that matches the stain color after the stain has dried.
Jacquelyn_McGilvray
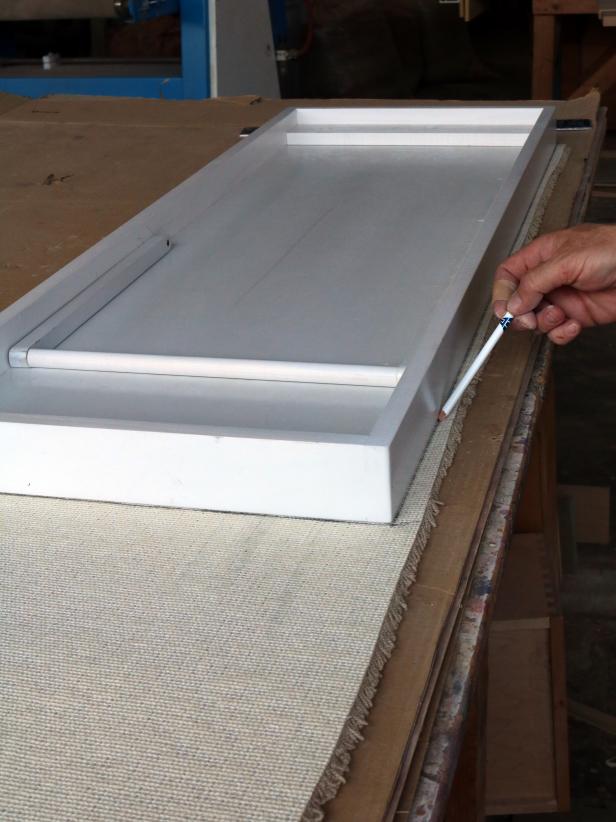
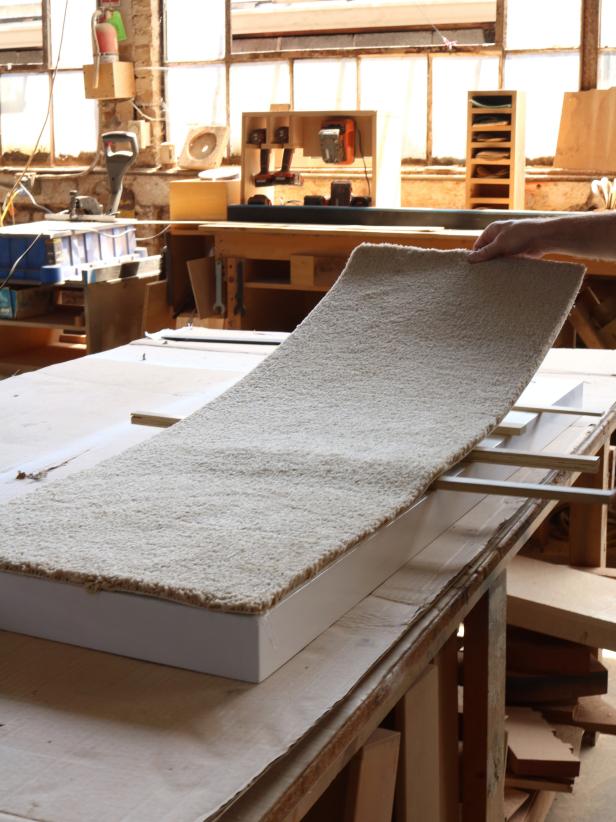
Step 13: Add Carpet
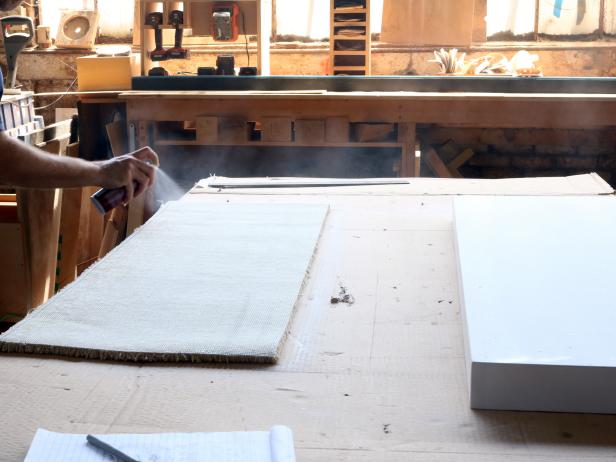
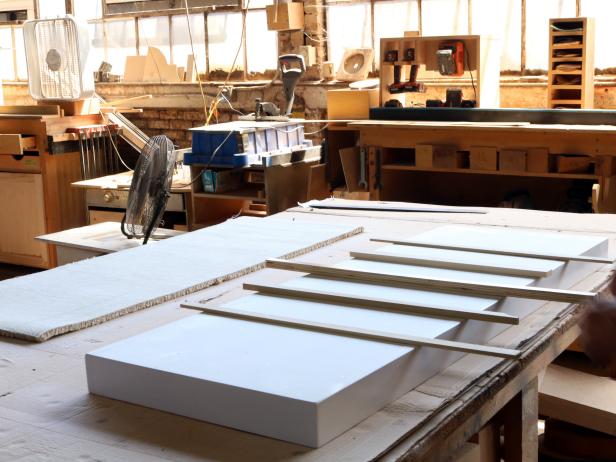
If you took the platform off the base for painting, you can add the carpet while it's still separated, but it’s okay to add the carpet if the ramp is fully assembled. Lay the carpet face down, and then lay the platform face down on top of the carpet. Trace a line around the platform to get the correct size (Image 1). Take the platform off the carpet, and use a utility knife to cut the carpet (Image 2). Apply spray adhesive on the bottom of the carpet and on the top of the platform (Image 3). Let the adhesive set for a few minutes, then lay some scrap sticks perpendicular so you can place the carpet a section at a time (Image 4). Lay the carpet onto the platform, and press down to hold it in place (Image 5). Reassemble the ramp, and test it to make sure everything works.
Jacquelyn_McGilvray

Jacquelyn_McGilvray
Jacquelyn_McGilvray
Jacquelyn_McGilvray
Jacquelyn_McGilvray
Step 14: Add a Handle
To make your ramp more portable, attach a handle to the side of the platform.


