


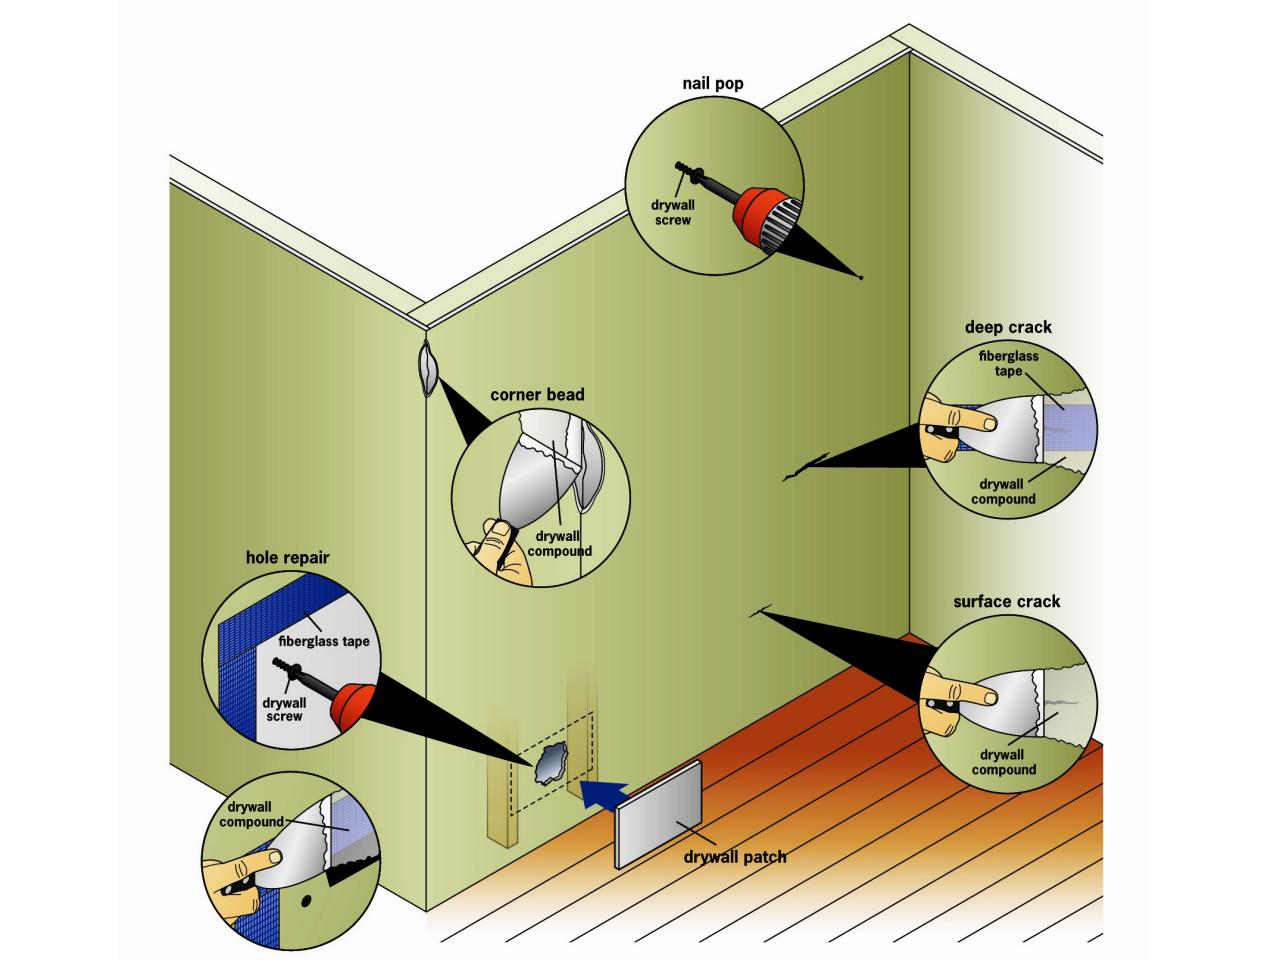
How to Repair Cracks and Holes in Drywall
Drywall damage can range from small cracks to large holes, but most repairs are easy and inexpensive to fix. We have six different ways to make the repair depending on the size, type and place of the damage.
There are many ways in which drywall can be damaged — surface cracks, deep cracks, nail pops, dents on corners, small and large holes — find the fix that works best for your situation.

Tools and Materials
- drywall saw
- reciprocating saw
- electronic stud finder
- hacksaw
- pry bar
- tape measure
- metal snips
- drill/driver
- carpenter's square
- razor knife
- drywall corner bead
- string
- fiberglass drywall tape
- drywall
- wood cleats
- drywall screws and/or nails
- joint compound
Surface Crack Repair


Unlike plaster, drywall has a seamless paper covering that rarely cracks or splits. When a crack appears, it is usually on a seam where two drywall sheets meet, and it is easily fixed.
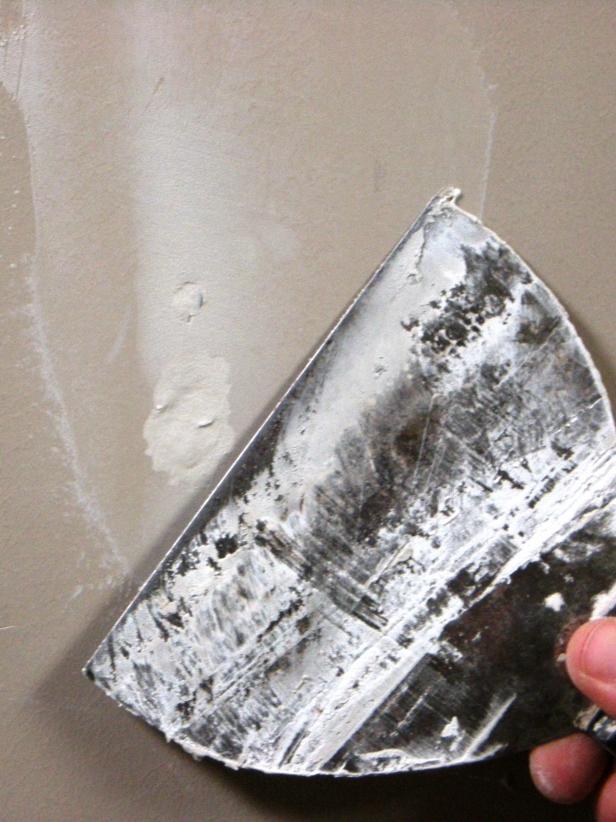
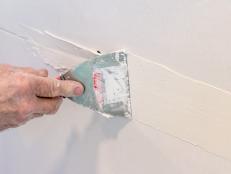
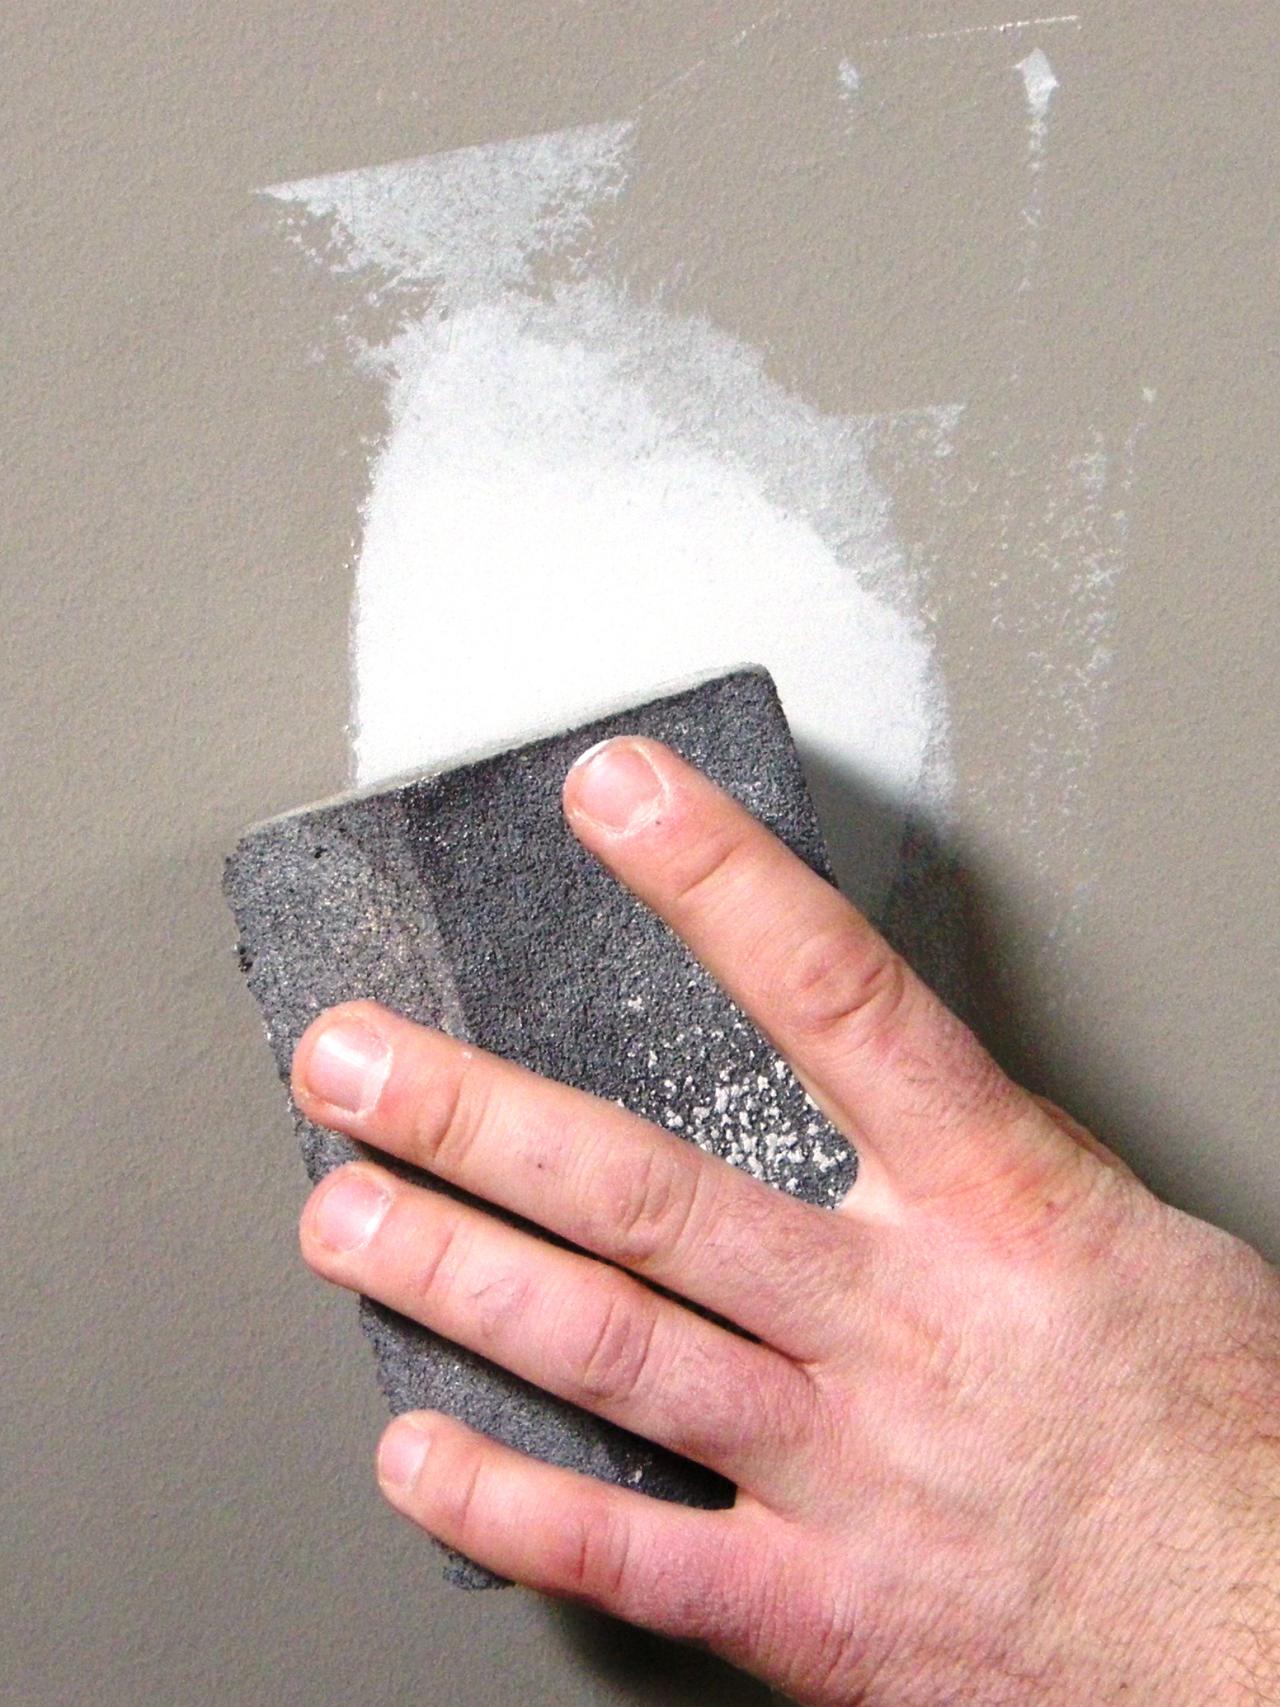
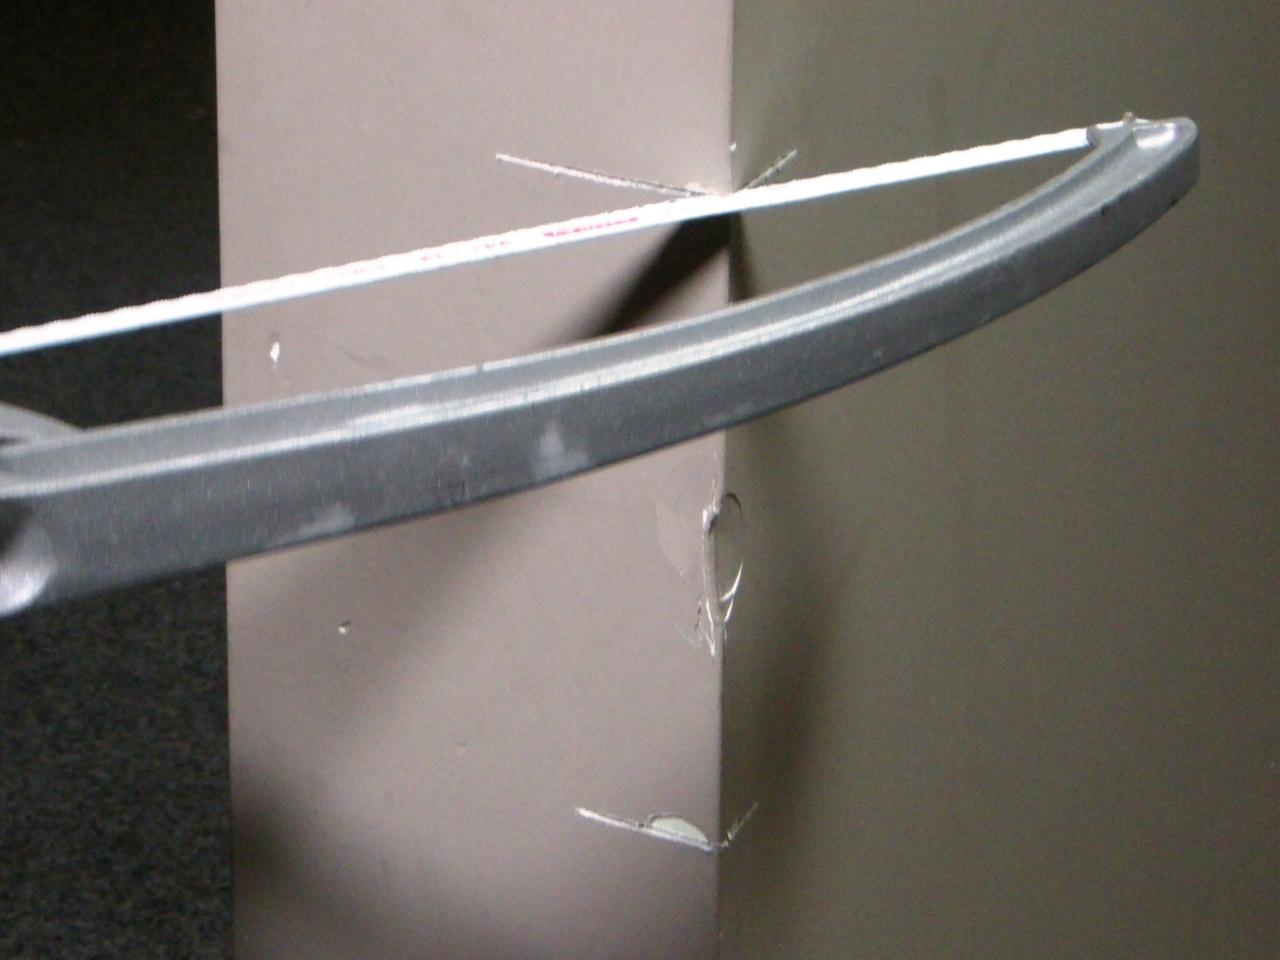
If the crack is on a vertical or horizontal seam, carefully widen the crack with the corner of a paint scraper, utility knife or chisel to determine if the crack extends completely through the paper that is covering the seam (Image 1); and if the tape has pulled loose from the wall surface. If the tape is intact and well-adhered, the crack was probably caused by the old drywall compound drying and shrinking. Simply fill the crack with new compound. When applying the compound, hold the knife at a 70-degree angle and swipe across the crack. Make sure the knife is clean by scraping both sides of it over the edge of the pan. Allow the joint compound to dry completely then lightly sand the area (Image 2). Wipe away the dust then paint over it.
Deep Crack Repair


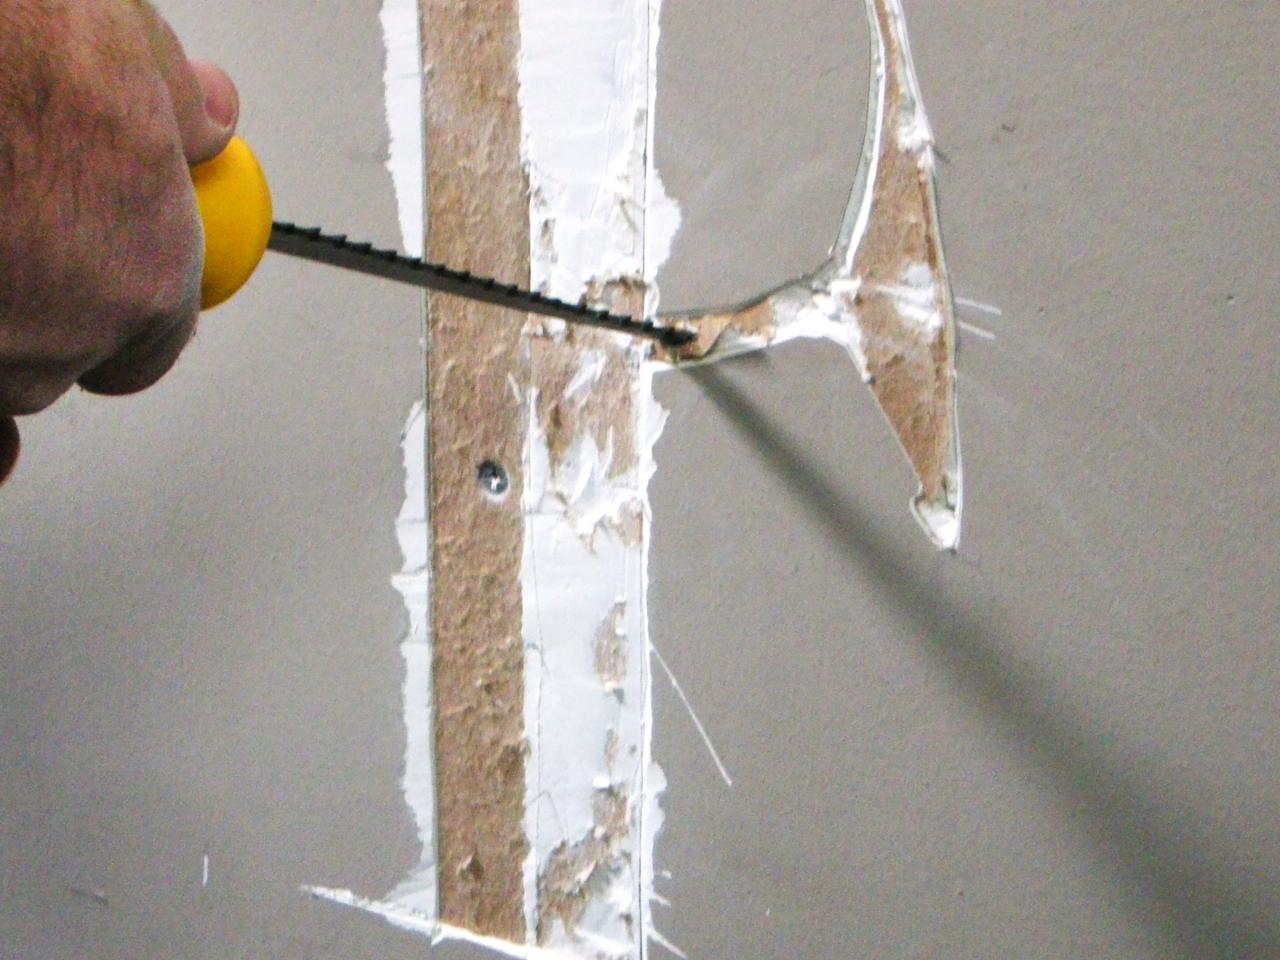
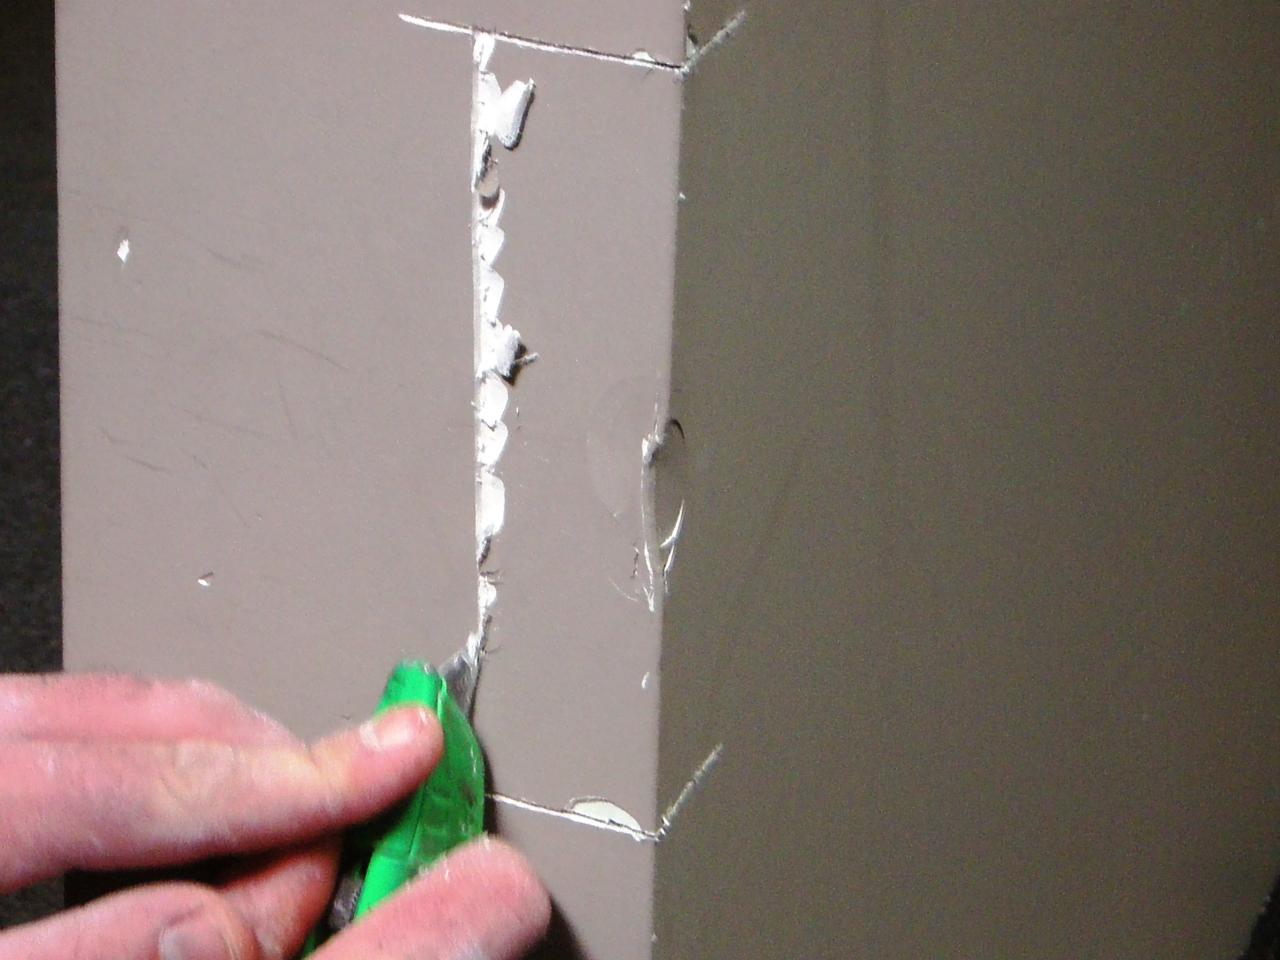
If the crack extends through the seam’s paper tape or if the tape has pulled loose from the wall, use a razor knife to cut the tape about 6" to 12" from both ends of the damage (Images 1 and 2). Remove the tape but be careful not to tear away the drywall’s paper covering. Scrape away any loose compound and use a razor knife or drywall saw to expand the crack through the wall surface into the stud cavity (Image 3). Avoid removing solid, well-adhered compound beyond the crack itself.
Fill the crack with new drywall compound and apply a thin coat of compound to the wall surface where the old tape was removed. While the compound is still wet, place a strip of fiberglass tape over the seam bridging the gap between the ends of the existing tape (Image 4). Use a putty knife to gently flatten wrinkles and to bed the tape into the compound.
After the compound dries, add a second thin coat of compound over the taped area. Cover the tape and taper or “feather” the edges of the new compound onto the surrounding wall surface (Image 5). Drywall compound needs to be applied in multiple thin layers because thicker layers are too difficult to smooth out and will eventually cause cracking.
When the second coat is thoroughly dry, sand lightly to smooth out any bumps. Next, use a wide (8" to 12") joint-compound taping knife to completely cover the patch with a third and final coat. Try to blend this coat as seamlessly as possible onto the wall surface. After it dries, sand lightly, wipe away dust and repaint the entire area.
Nail Pop Repair


A common drywall problem, especially in newer homes, is “nail pops,” or nail heads that pull away from the wood studs and protrude through the drywall tape or paint. This is usually caused by warped wood that was inadequately dry when installed. Although the drywall is rarely in danger of falling off the wall, the bumps are visible and unsightly.
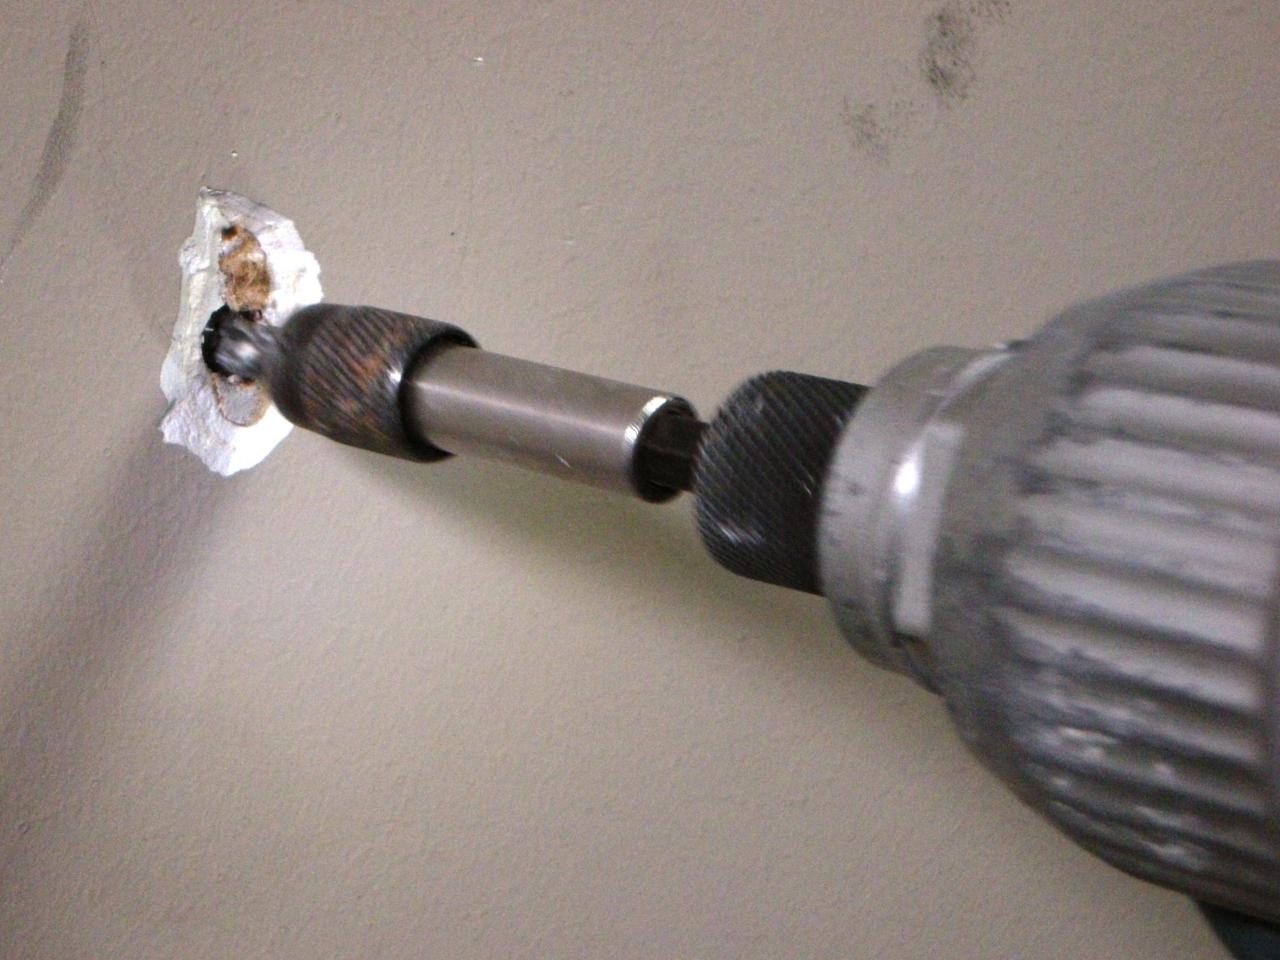
Use a utility knife to scrape away the drywall until the screw is exposed.
Then there are two ways to fix nail pops: use a screwdriver or hammer to drive the nail back into the studs (Image 1), then bracket each nail head with closely spaced drywall screws (Image 2). Or remove the nail and drive a screw in its place, along with a second screw nearby, to re-secure the drywall to the stud.
When using drywall screws, be sure to recess the heads slightly, creating a dimple in the drywall surface that can be covered with joint compound, but be careful not to tear through the paper surface. Where several screws are placed in a row, spot-patch each with compound and cover them with a strip of fiberglass tape as described in the steps above (Image 3).
Corner Bead Repair


Outer drywall corners are reinforced with metal or plastic edging, called corner bead. Although this bead is damage-resistant, a sharp knock can cause the drywall compound that covers it to crack or chip off, and a strong enough shock can dent or bend the corner bead. Usually, the damage is confined to a short section that can be cut away and replaced.
If the damage is limited to the drywall compound, simply remove all loose material and apply new compound. It is not necessary to tape over the compound.
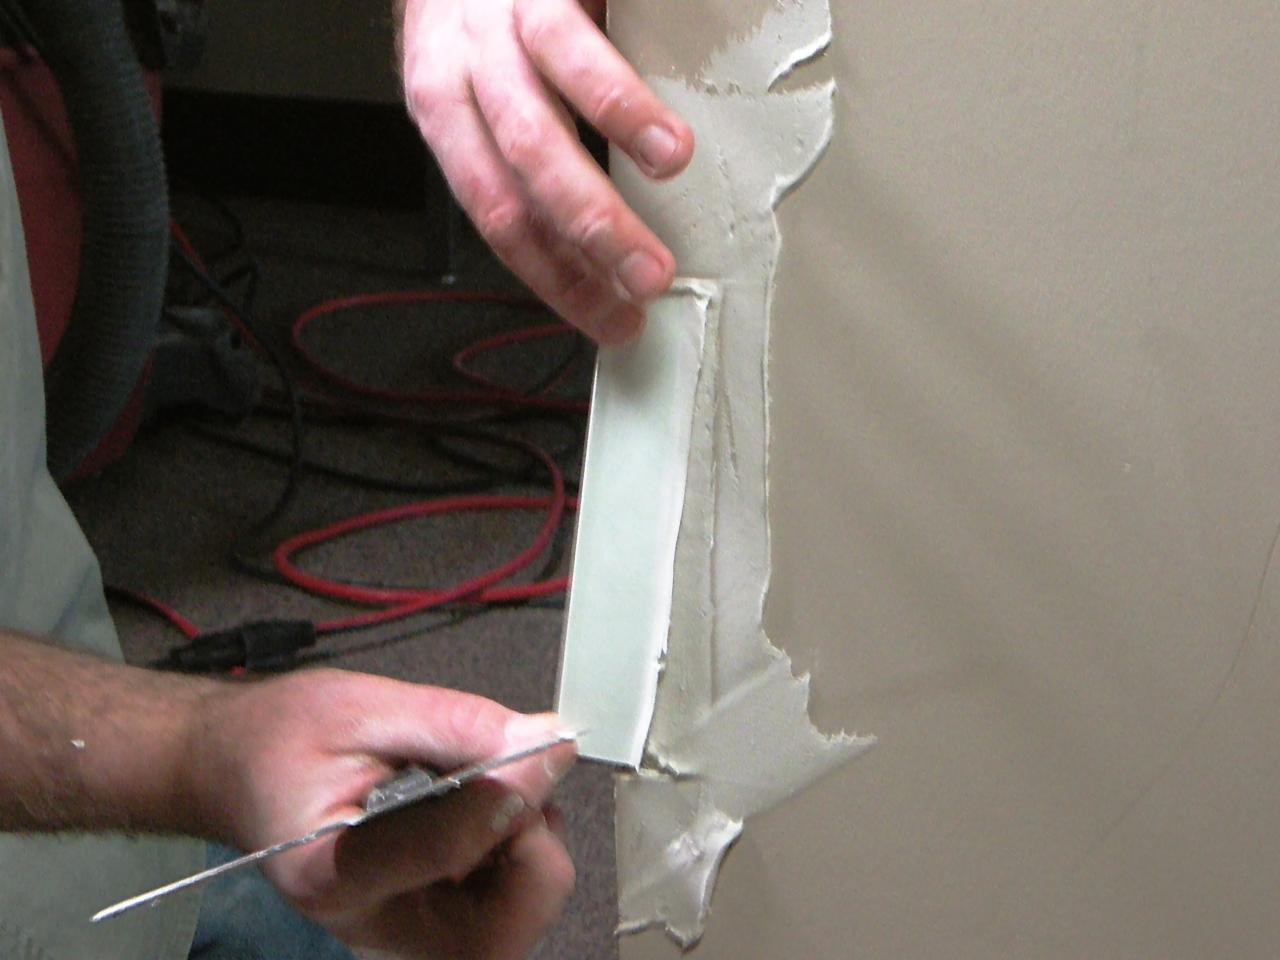
If the bead is dented, use a metal-cutting hacksaw to cut through the bead above and below the damaged area (Image 1). Then use a utility knife to cut vertically around the corner bead (Image 2). Corner bead is usually attached with drywall nails, so use a pry bar or claw hammer to remove the fasteners. Place a taping knife or thin plywood behind the tool to prevent additional damage to the wall — be especially careful not to lever against unsupported drywall or the tool will punch a hole that will require a more extensive repair.
Use metal snips to cut a section of new corner bead to fit the repair area (Image 3). Apply a coat of joint compound to the corner, set the bead in place then apply another layer of joint compound over it. Let dry completely then add another layer or two of compound depending on what is needed (Image 4).
Small Hole Repair


For holes no large than 6", a variety of drywall patch kits are available. The kits typically have a reinforced center panel surrounded by self-sticking tape. Simply adhere the patch to the wall and cover with drywall compound.
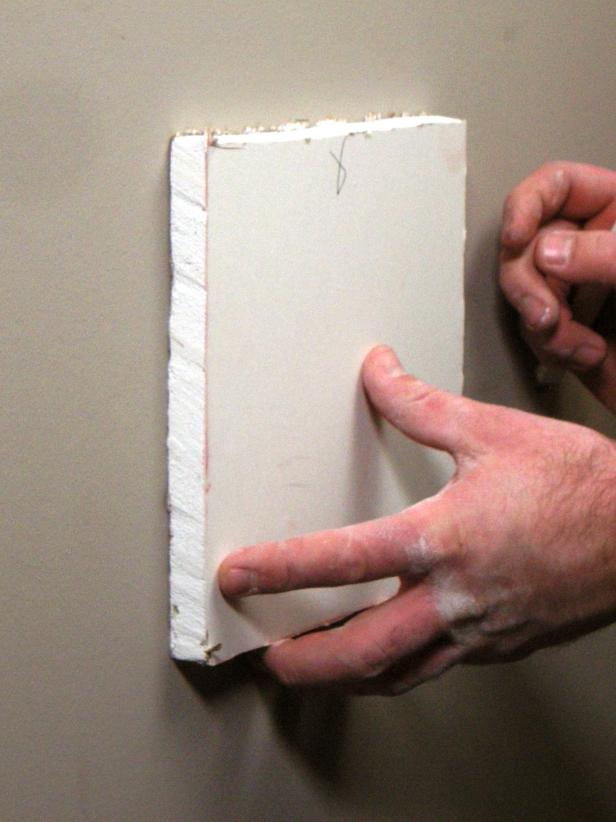
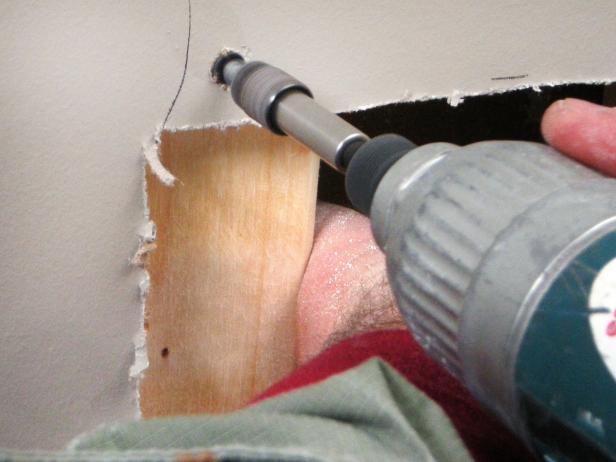
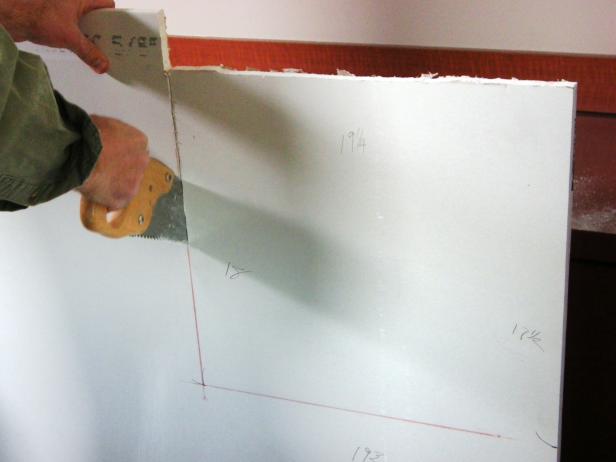
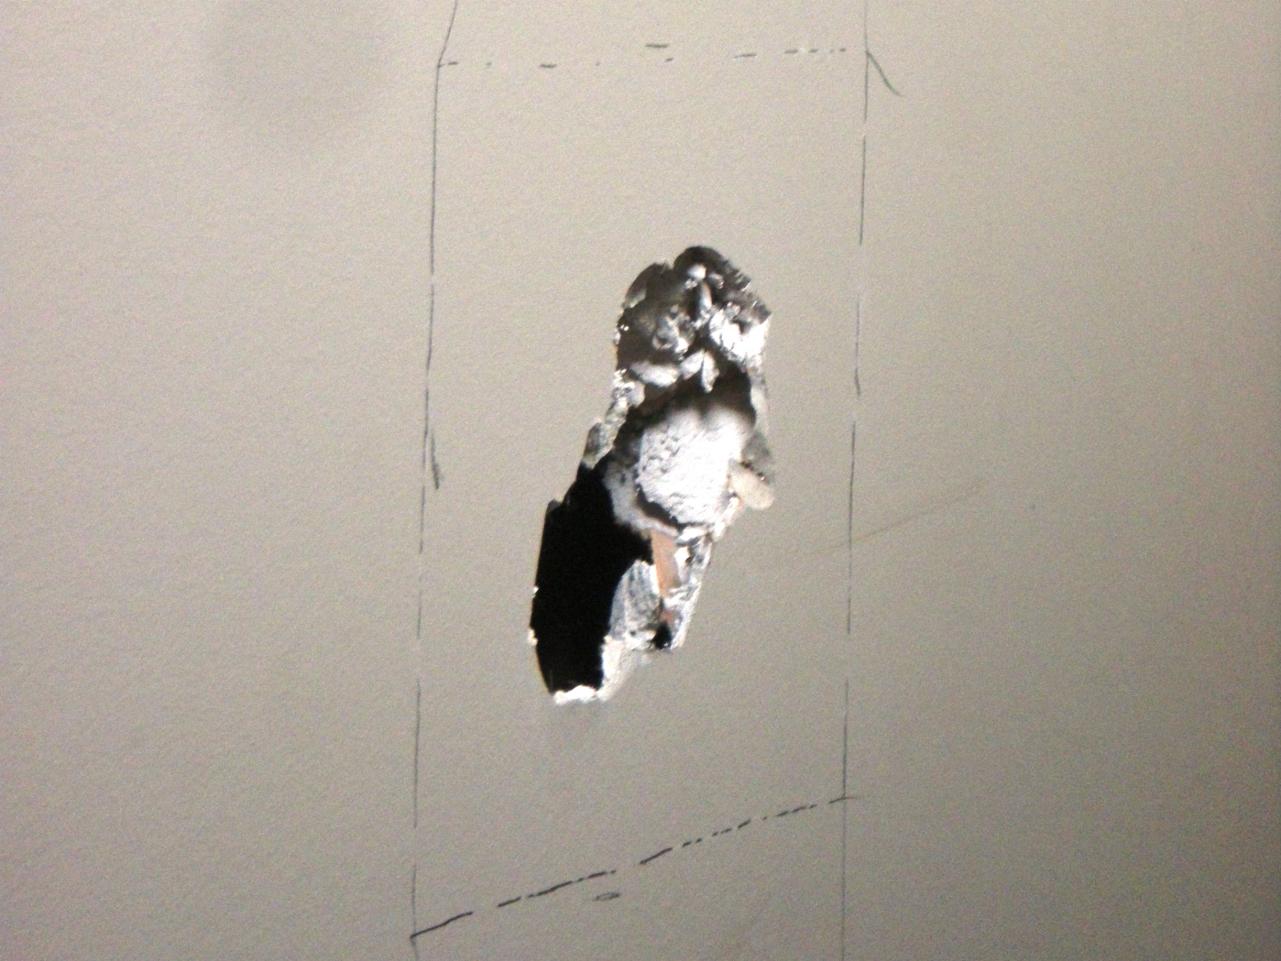
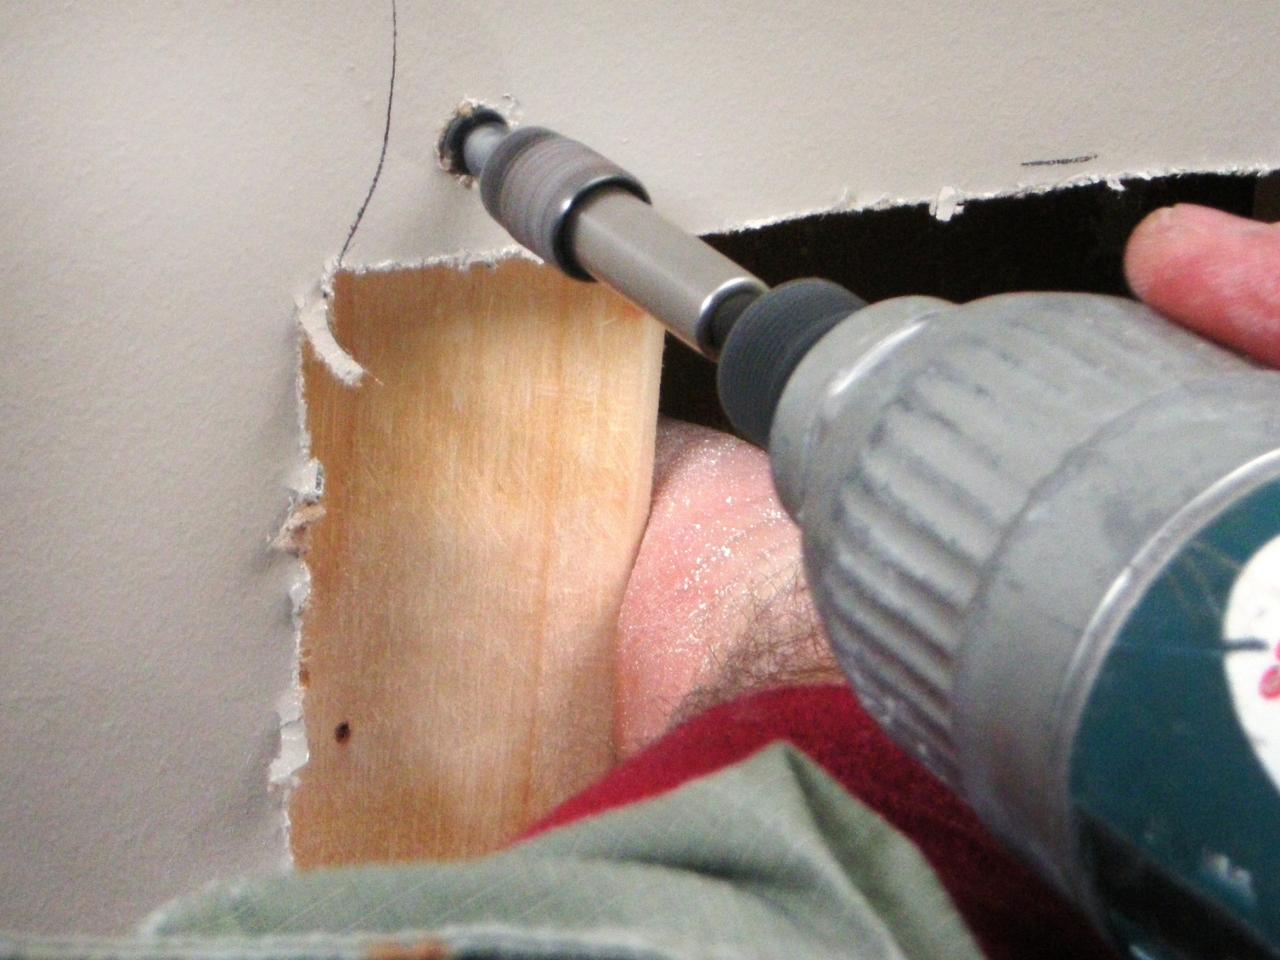
You can create your own patch to repair larger holes in drywall. For holes that don’t extend to studs on either side, you will need to reinforce the hole. Measure the hole then cut a scrap piece of drywall that is slightly larger than the hole’s diameter. Place drywall piece over the damaged area (Image 1) and trace around it with a pencil (Image 2). Use a drywall or reciprocating saw to cut out the area within the traced lines (Image 3). Cut two pieces of 2x4 slightly larger than the hole. Position the 2x4s vertically inside the hole on each side of the hole. (It is not necessary to reinforce the horizontal edges of the replacement drywall.) Secure the 2x4s to the drywall with drywall screws (Image 4). Set the new drywall into the hole and secure to the 2x4s with screws.
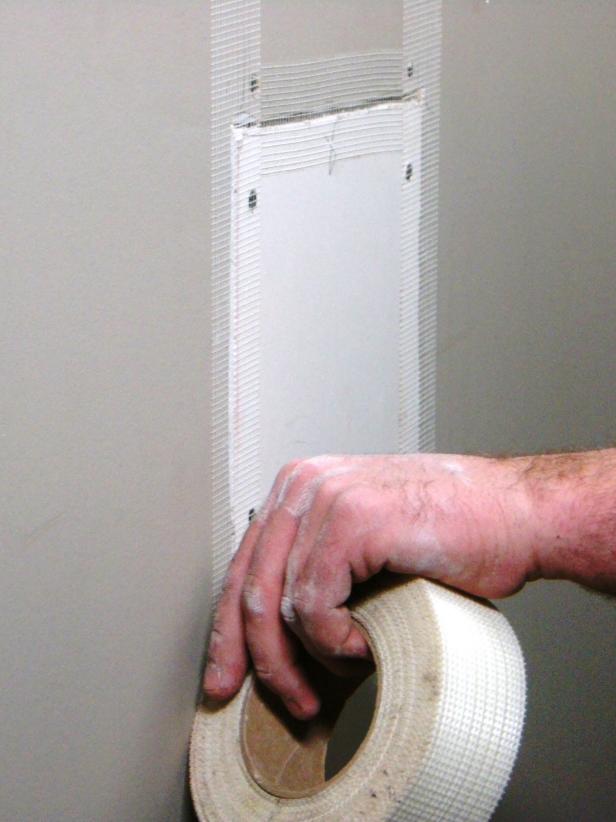
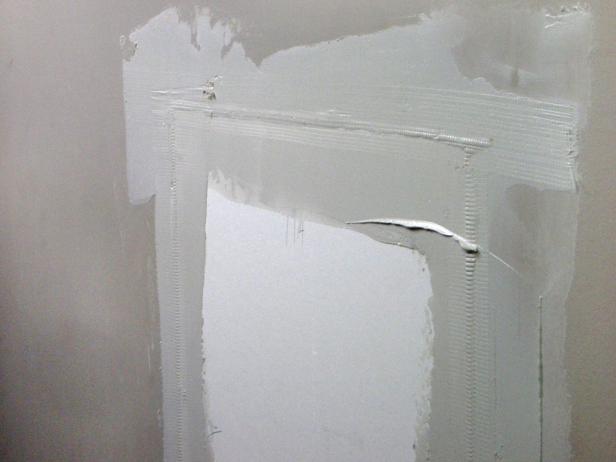
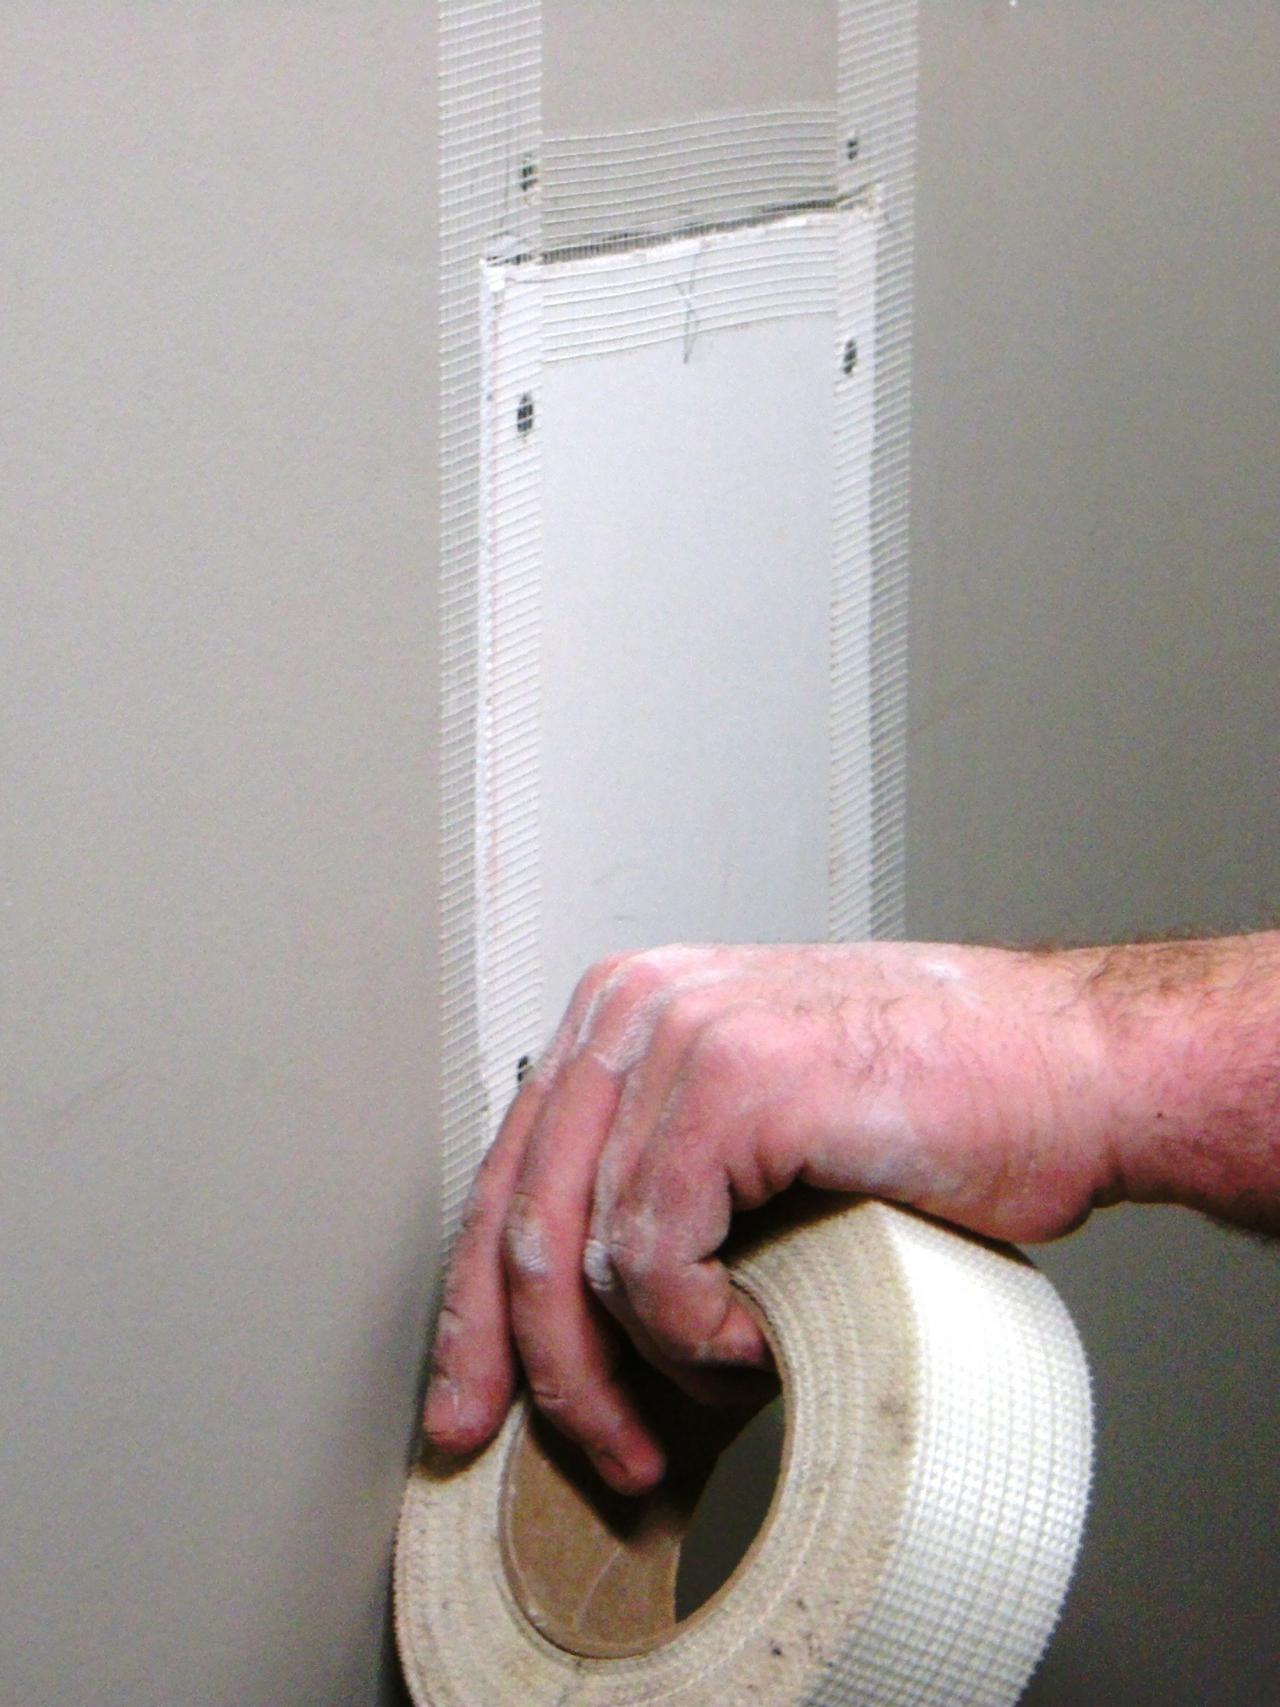
Trim the rough edges of drywall around the patch. Lay strips of fiberglass tape over the patched area to reinforce it (Image 5), extending the tape a few inches beyond the patch. Do not overlap the tape. Embed the tape and cover the entire area with a thin coat of drywall compound, and complete the repair as described in the steps above.
Large Section Repairs


Drywall damage that extends across one or more wall studs requires more extensive reinforcement and repair. Before you cut into the wall, make sure there is nothing in the way such as electrical or plumbing.
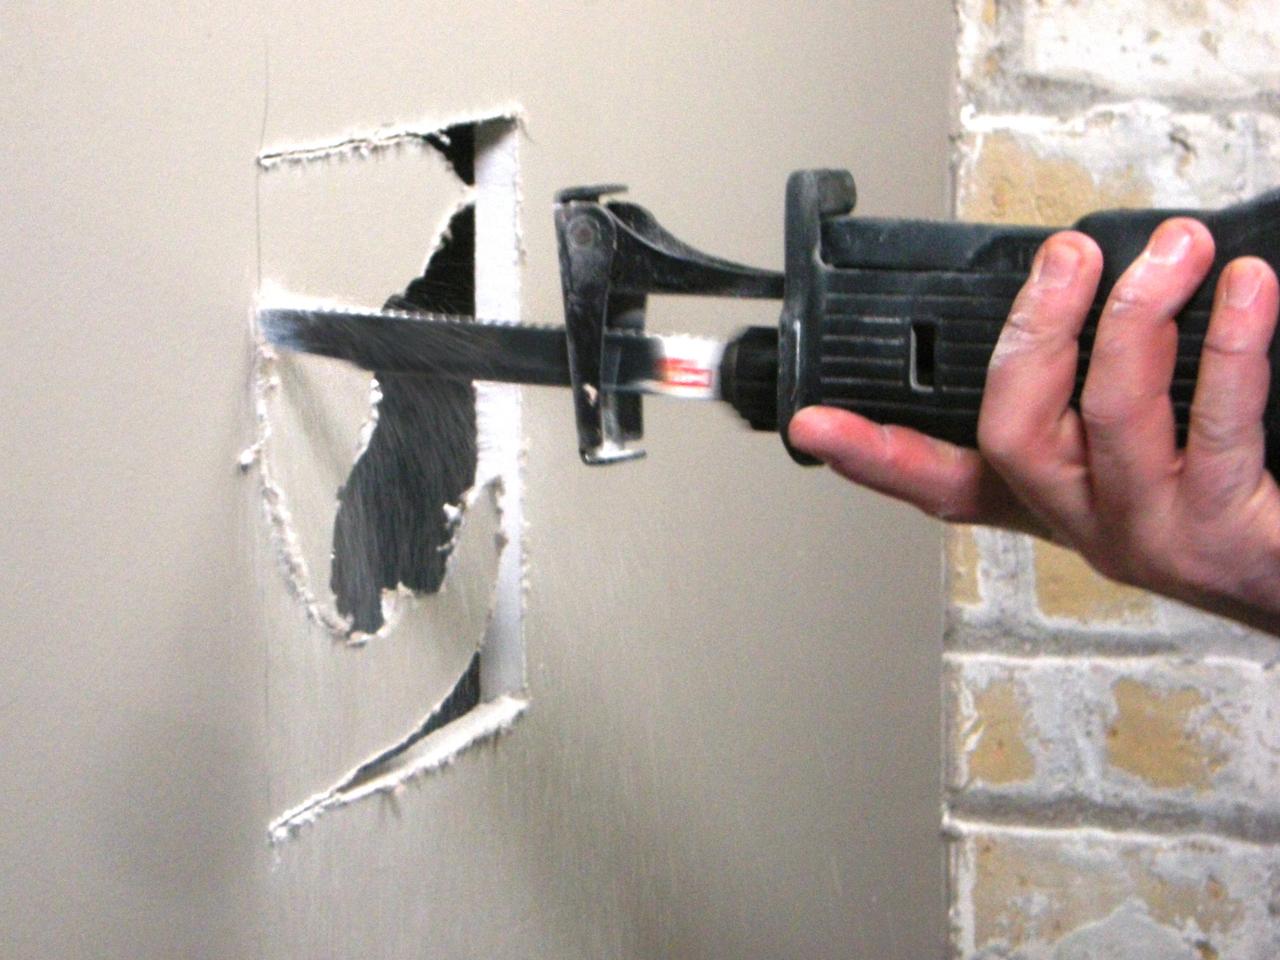
Use an electronic stud finder to mark the studs behind the damaged drywall, then use a drywall saw or reciprocating saw to cut away the drywall. Be careful not to cut into or through the studs. Remove as much drywall as needed until you reach studs beyond both sides of the damaged area. Discard the drywall and remove all exposed drywall nails or screws.
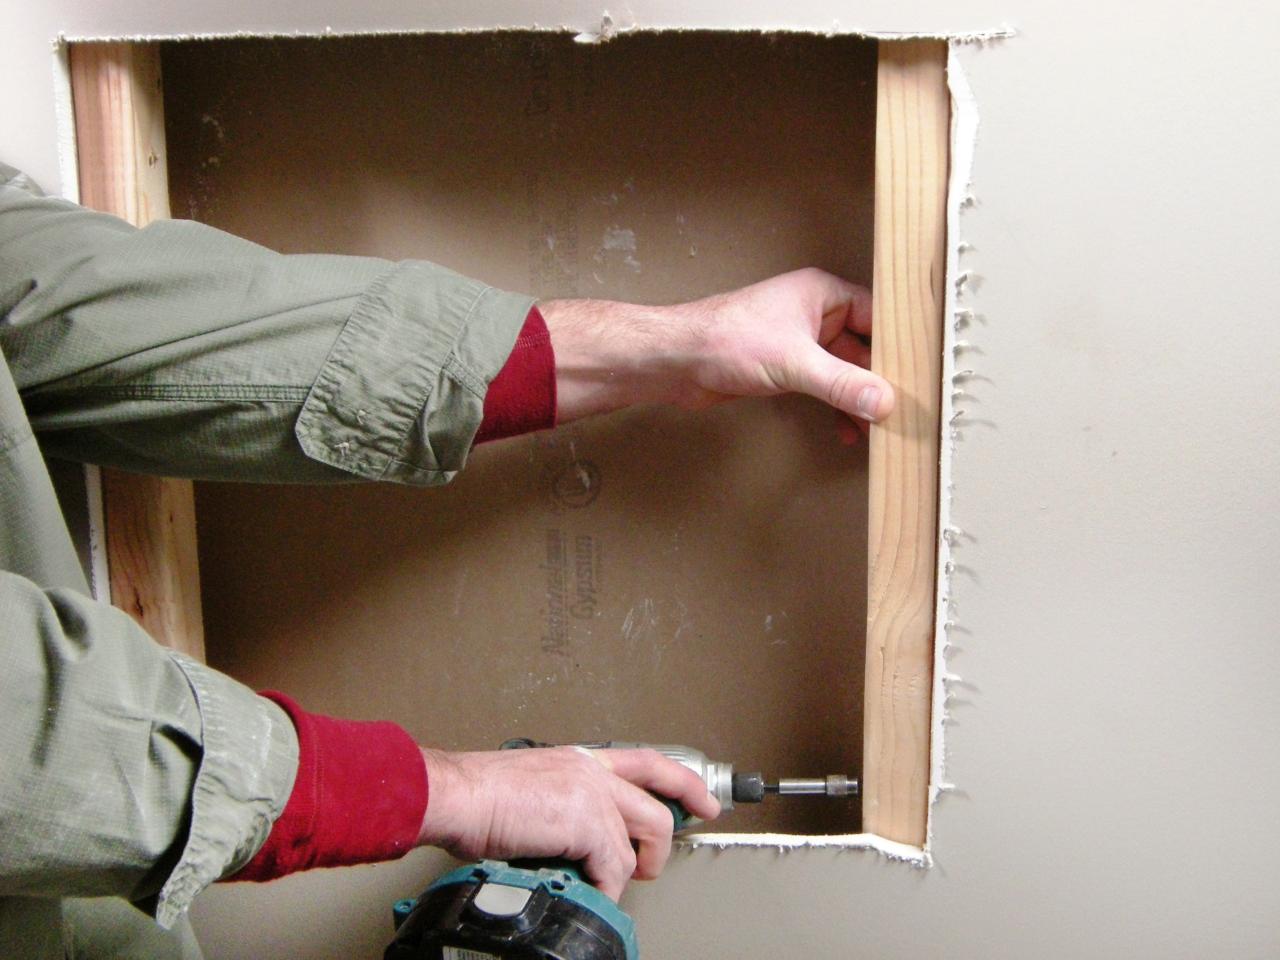
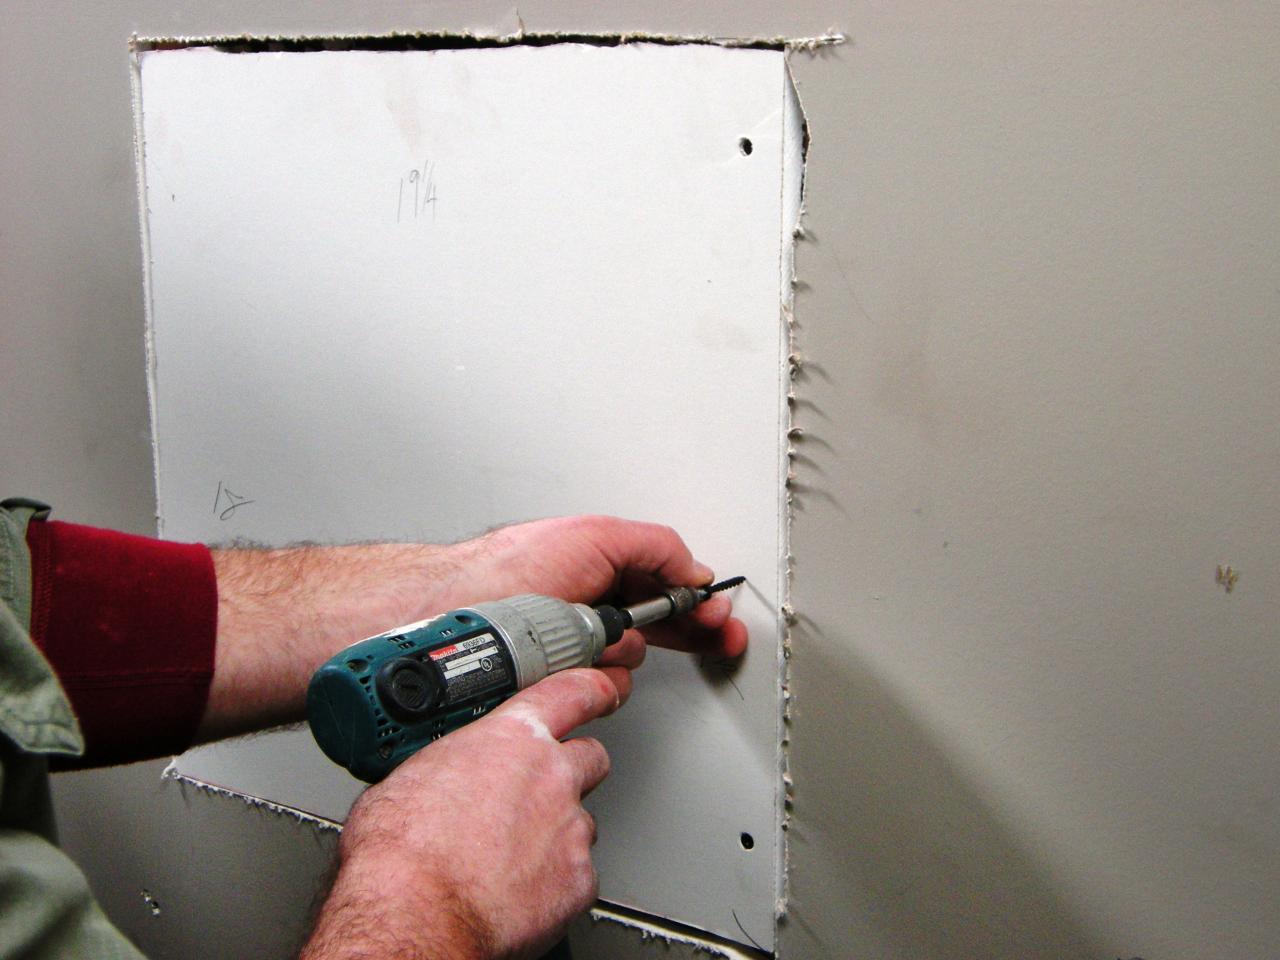
Install wood cleats against the studs on both sides of the opening to support the new drywall’s vertical edges (Image 1). Use scrap wood such as 1x2 furring for smaller repairs. If you are replacing a large sheet of drywall, reinforce the opening with 2x3 lumber. Cut the cleats a few inches longer than the opening. Position the cleats flush with the face of the existing studs and install them with drywall screws or nails. It is not necessary to reinforce the horizontal edges of the replacement drywall.
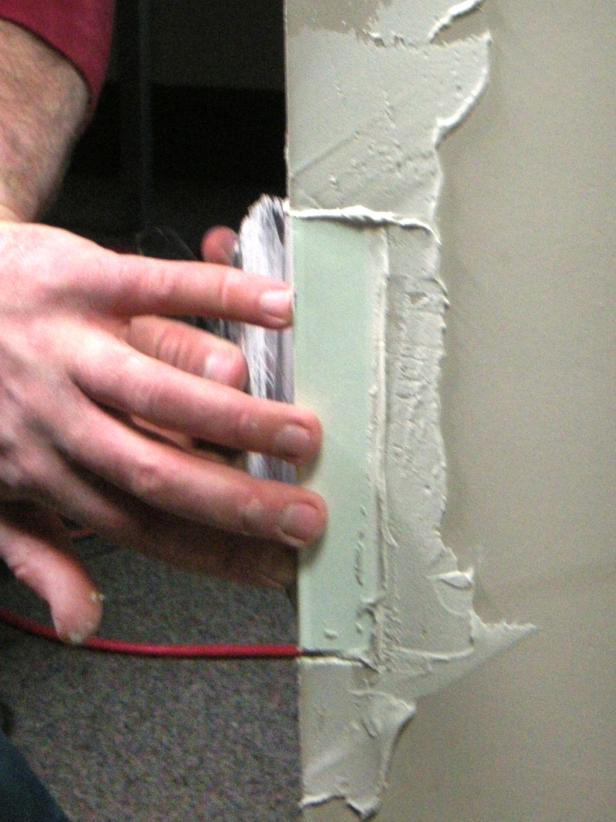
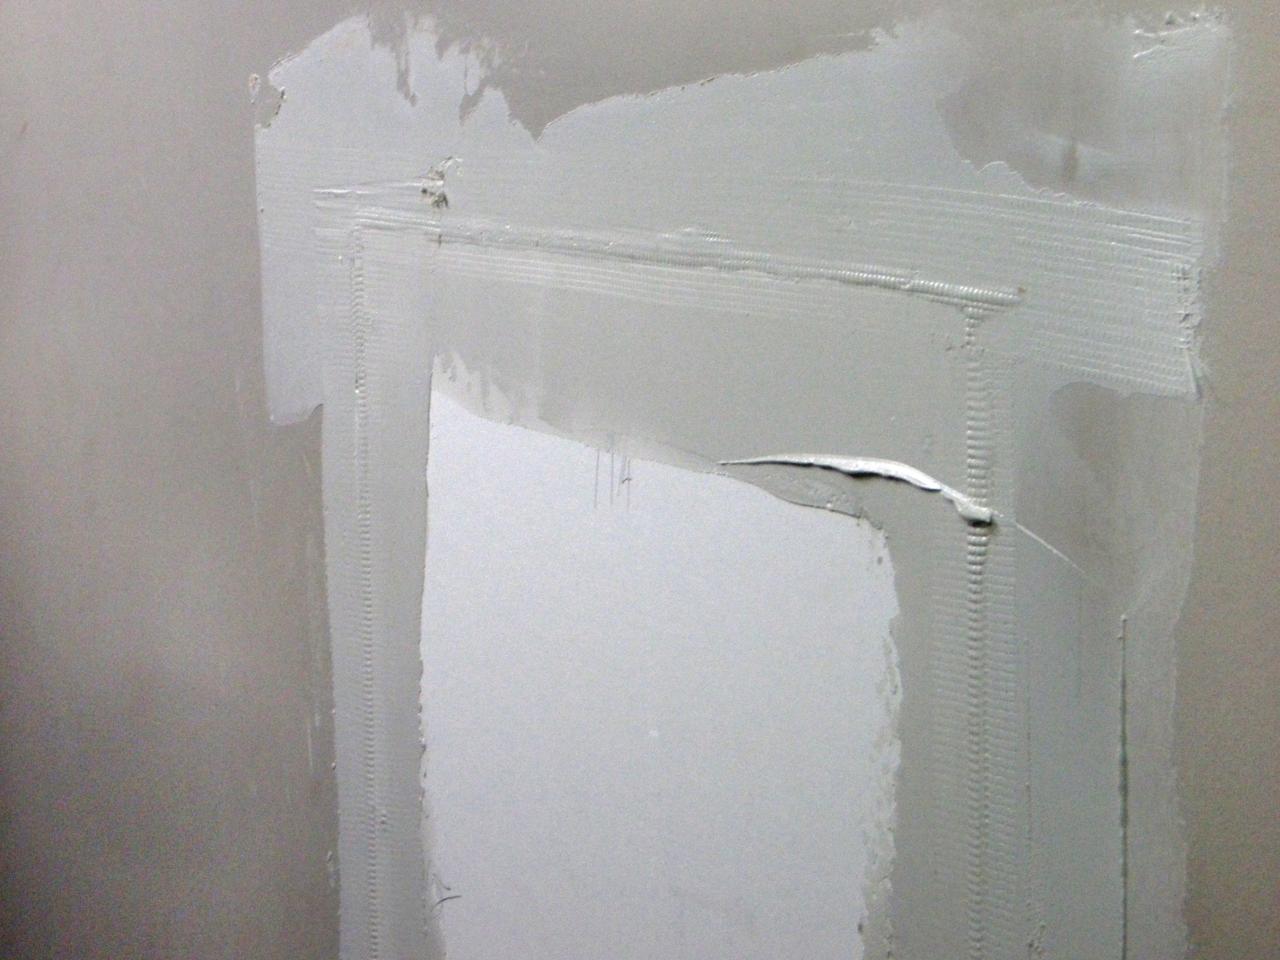
Measure, cut and install new drywall to fit the repair area (Image 2). Be sure to use drywall that matches the original wall thickness. Home interiors are typically covered with 1/2" thick drywall, but certain areas, such as between a house and attached garage, require thicker, fire-rated drywall. Use drywall screws to attach the drywall to the cleats (Image 3) and to any studs between them, as in new construction. Tape over the joints and apply joint compound as described in the steps above (Image 4).


