


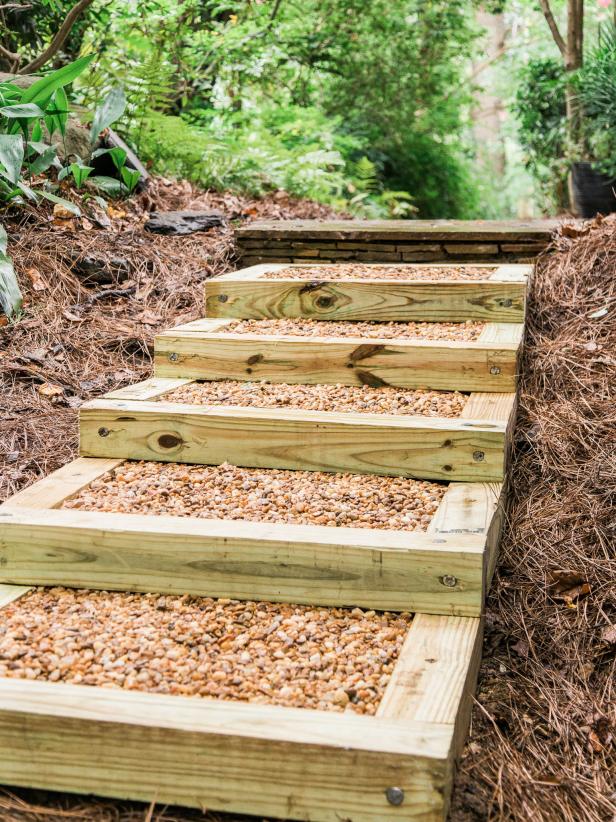
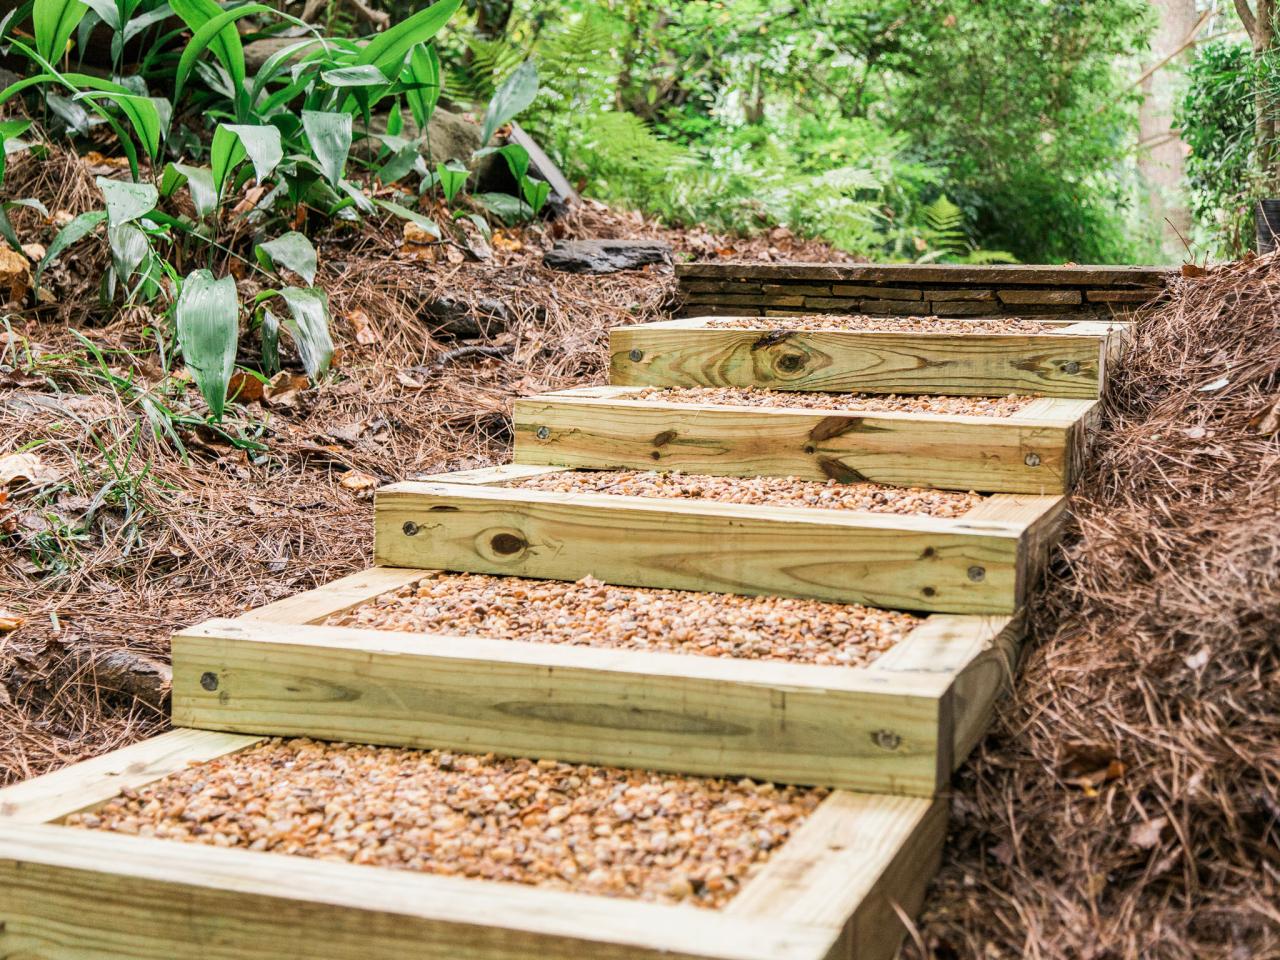
How to Build an Outdoor Wood and Gravel Staircase
Use pea gravel and wood posts to build steps in your yard.
Tame a slope in your yard or add interest to a garden pathway with this wood and gravel staircase. It is not complicated to build but does take a little elbow grease. We recommend using pressure-treated wood for this project; we left ours natural, but you could easily paint or stain the timbers before assembly.

Tomas Espinoza
Tools and Materials
- shovel
- sledgehammer
- tamper
- utility knife
- chop saw or circular saw
- drill and 1/2" and 3/8" bits
- hammer
- measuring tape
- level
- safety glasses and ear protection
- 4x4 x 8' pressure-treated wood posts (one per step)
- (2) 24" pieces of rebar per step
- (2) #3/8 x 8" galvanized steel spike nails per step
- (2) #3/8 x 6" galvanized steel spike nails per step
- pea gravel
- landscape fabric
Step 1: Excavate Area
Remove any large rocks or the current steps using a shovel and sledgehammer as needed. Make sure to wear eye protection.

Tomas Espinoza
Step 2: Grade Area
Flatten out the area where each step will be located using a shovel, and tamp down with a hand tamper to level it out. As you do this, keep in mind each step will be around 4 inches high or the width of your post at a minimum.

Tomas Espinoza
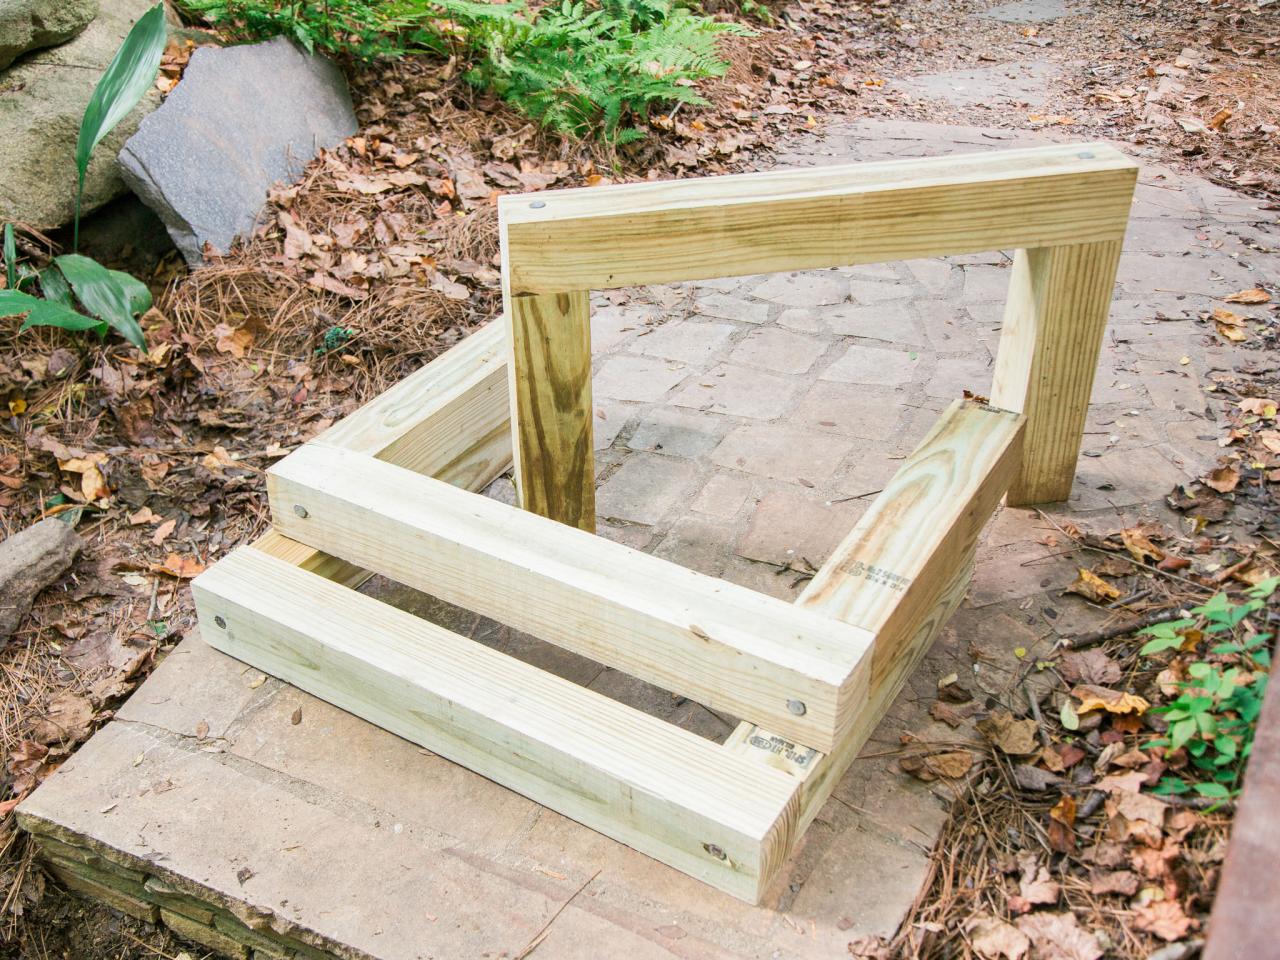
Step 3: Cut Posts
Measure, mark and cut each post into three pieces: one at 30 inches for the front of the step and two at 19 inches for the sides.

Tomas Espinoza
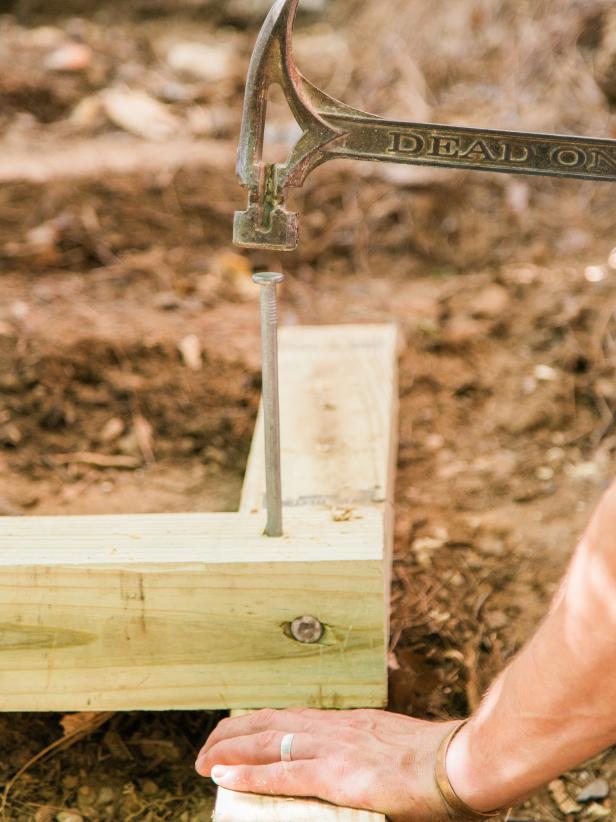
Step 4: Assemble Posts
Use a 3/8-inch drill bit to drill pilot holes to insert the spikes that will connect the sides to the front. You do not need to drill all the way into the side pieces, just through the front piece. Use a hammer to insert the 6-inch spikes into the pilot holes to attach three post pieces together, creating the step's frame. Repeat the process as needed to build more steps.

Tomas Espinoza
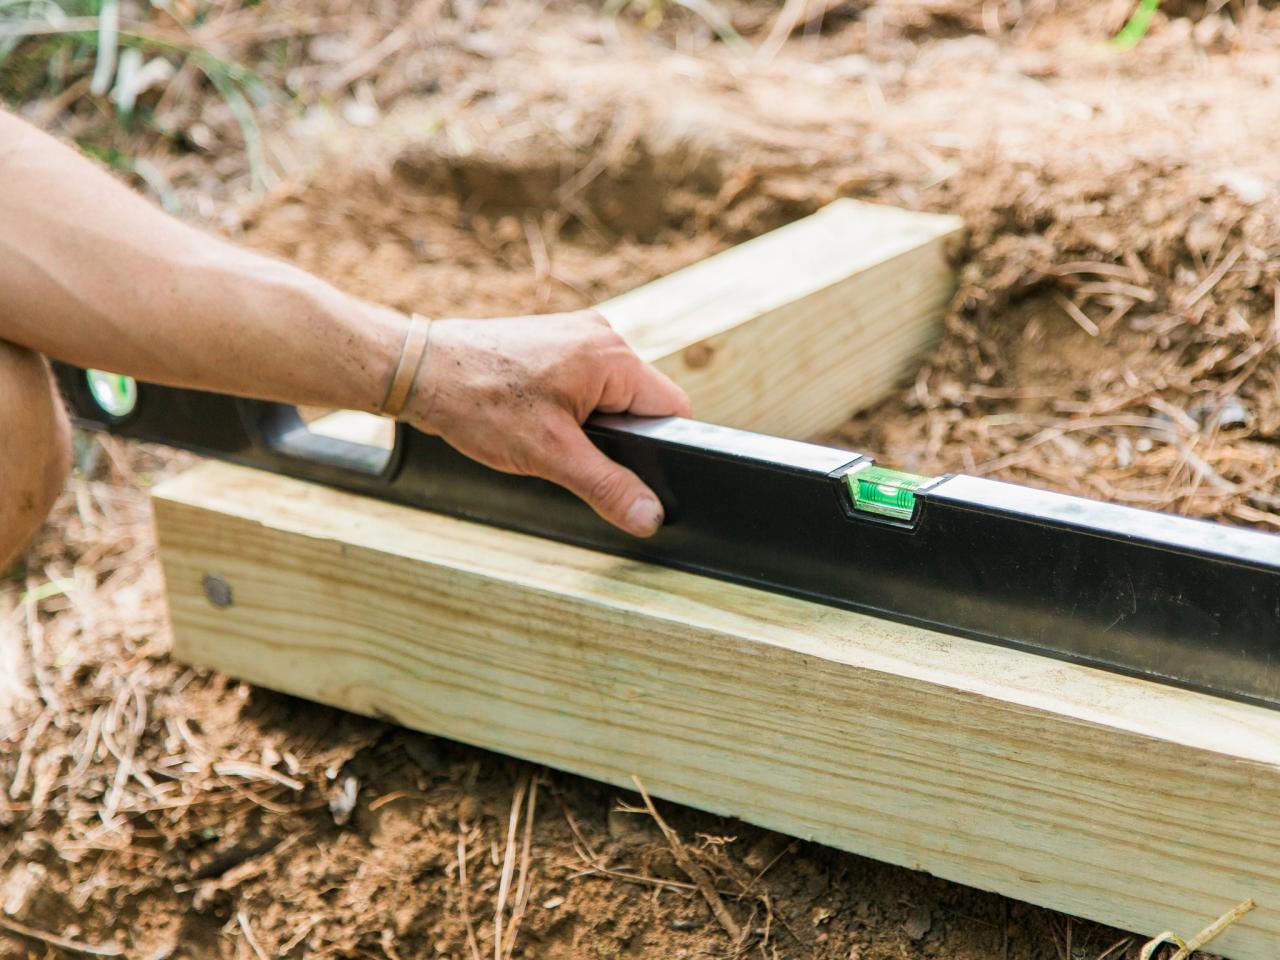
Step 5: Position Bottom Step
Starting with the bottom step, place it in the desired position and level it with dirt or stones. Use a level to check that it is even.

Tomas Espinoza
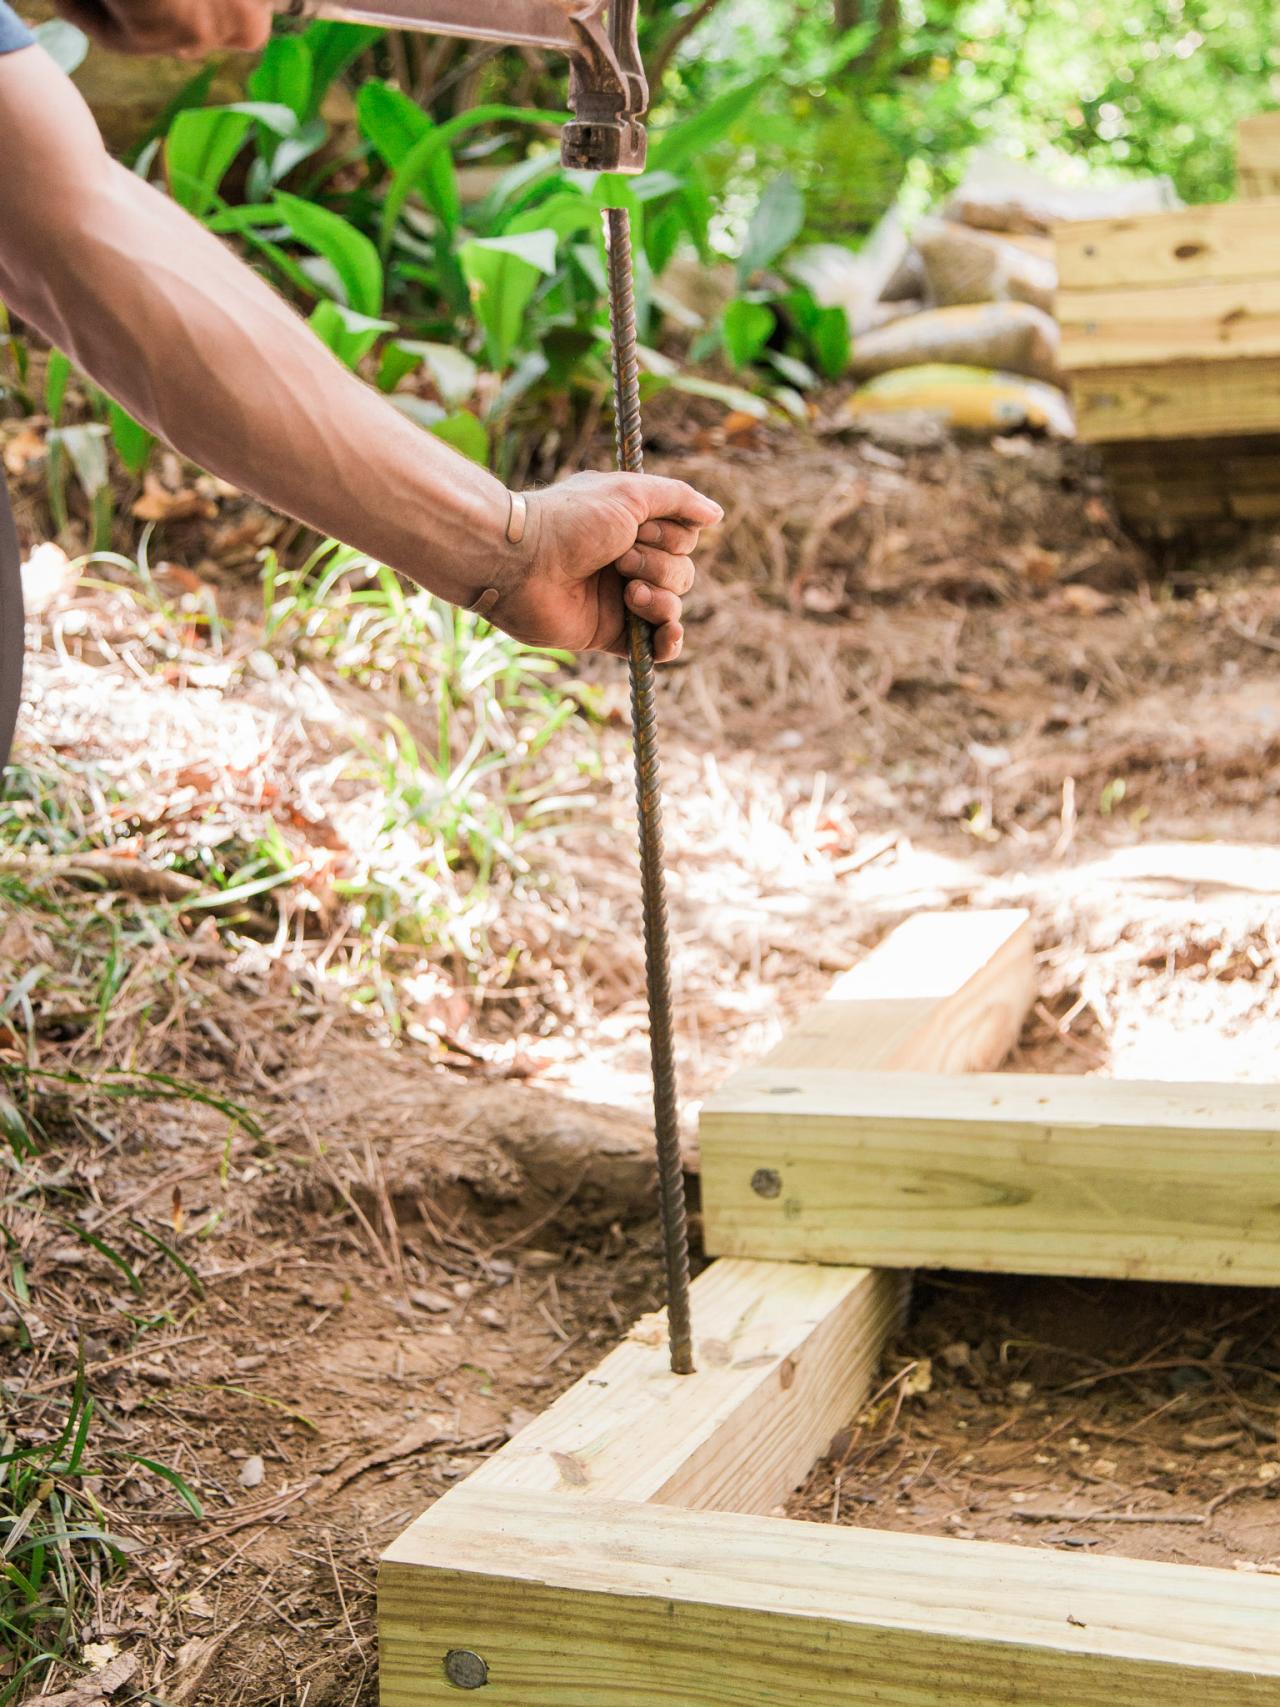
Step 6: Secure Frame Placement
Pre-drill 1/2-inch holes centered on each side of the step, then hammer in a 24- inch rebar into those holes. The rebar will hold the steps in place and prevent them from moving.

Tomas Espinoza
Step 7: Secure Steps Together
Place and level the next step frame on the one below it. To secure the two steps together, use a 3/8-inch bit to pre-drill a pilot hole through both steps where they meet. Hammer in 8-inch spikes through the top of the step and into the one below it. Repeat this process until each step is installed and securely fastened to the step below it.
Tomas Espinoza
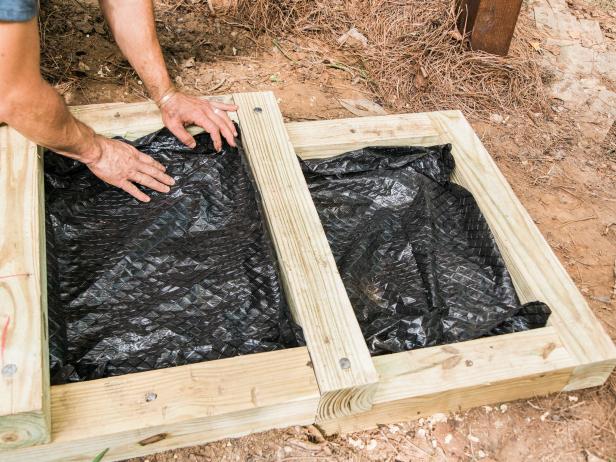
Step 8: Lay Weed Block
Cut landscape fabric or weed block material using scissors or a utility knife to fit within each frame and then lay in place.
Tomas Espinoza
Step 9: Fill With Gravel
Add pea gravel on top of the weed block material and level out by hand.

Tomas Espinoza
Tomas Espinoza

How to Build a Retaining Wall
Retaining walls are a great way to bring definition to your property and turn unusable space into useful space in the landscape. Find out how to build a retaining wall with this step-by-step.


