


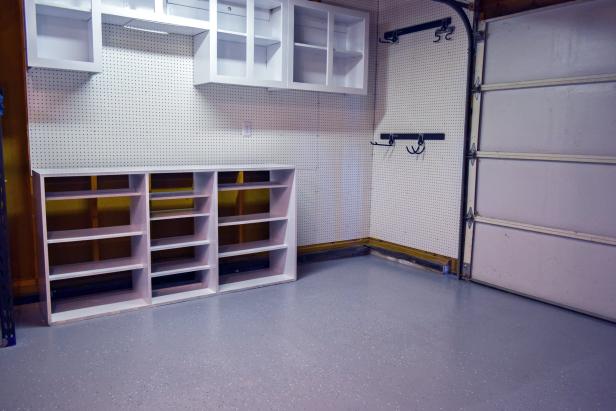
How to Paint a Garage Floor With Epoxy
Using epoxy paint with terrazzo flakes on your garage floor will help prevent stains and deterioration, and the polished finish will give you a new-car-showroom look.

Dylan Eastman
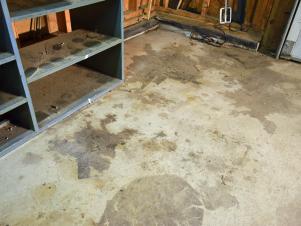
Most garage slabs only receive a minimum of sealer when initially poured. So years of storage and spills really take their toll. Plus the natural porosity and chalkiness of concrete make it almost impossible to keep really clean. Epoxy coating the floor is not only an easy weekend DIY but it is also a great way to help keep your work zone inviting and clean for years to come.

Dylan Eastman
Tools and Materials
- two-part high-gloss epoxy kit (1 gallon/250 square feet)
- paint roller and extension
- 1/2"-nap roller cover
- nylon paintbrush
- stiff-bristled push broom
- clay cat litter
- safety goggles
- carbon-filter paint odor mask
- plastic spackle knife
- squeegee
- floor scraper
- 5 gallon bucket
- concrete floor patch
- degreaser
- painter's tape
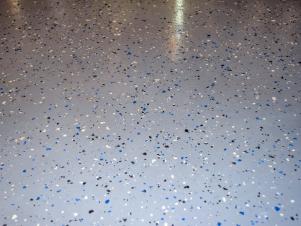
Before + After
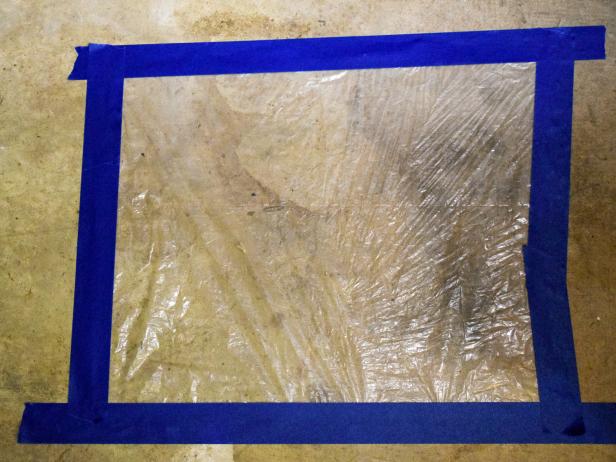
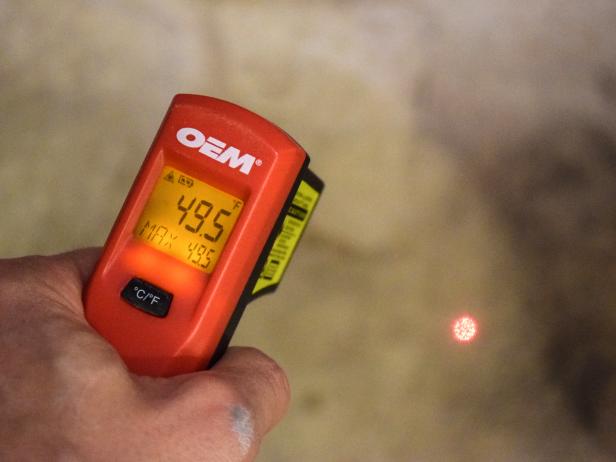
Step 1: Check for Moisture
Check for existing moisture issues. If your slab was originally poured with no underlying vapor barrier or you have high-ground water, it’s possible for water vapor pressure to actually lift coatings off the surface. Tape a 2' x 2' piece of clear plastic over the slab and leave for 24 hours. If you see the concrete darken or water droplets form, consult an epoxy supplier for solutions including surface applied vapor barriers.
Dylan Eastman
Step 2: Check Weather Forecast
Before you begin make sure the air temperature is 60 degrees and rising and that your slab is at a minimum of 50 degrees. It will be near impossible for the epoxy to set if you try to do this in the winter.
Dylan Eastman
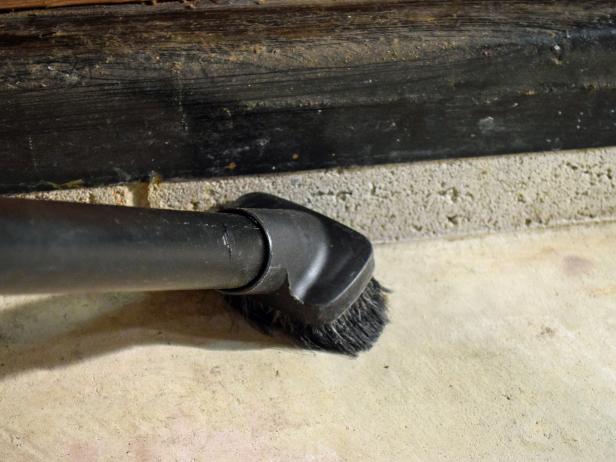
Step 3: Sweep It Thoroughly
Use a broom to clean the slab. Be sure to get up against walls and around garage door tracks.

Dylan Eastman
Step 4: Scrape + Degrease
Scrape up any hard dirt or grease. For stubborn areas, apply full concentration degreaser and then continuously scrape the surface.
Alternate between the degreaser and dry clay cat litter to pull embedded oils out of the concrete.

Dylan Eastman

Dylan Eastman
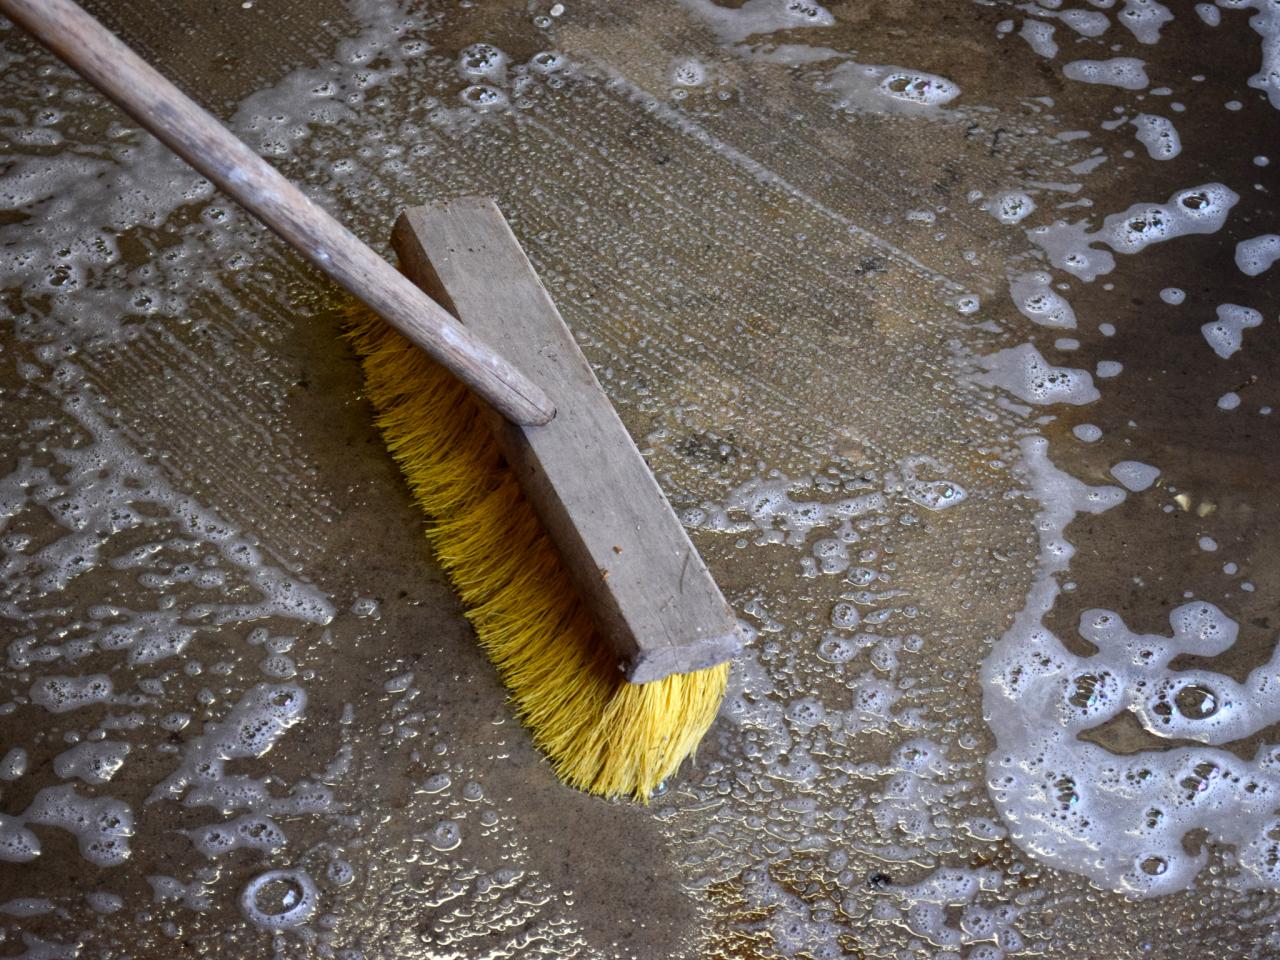
Step 5: Wash + Squeegee
Once the heavy stains are up, quickly wash the entire floor with a diluted degreaser.
Quickly remove the standing liquid with a foam squeegee. The goal is to not over-wet the floor so it will also dry quickly.

Dylan Eastman
Step 6: Apply Etch Pretreatment
Mix the citric acid concrete etch with warm water per the instructions. Then apply, scrub, and squeegee off the floor in the same manner as the degreaser. The citric acid will help open the top pores of the concrete so the epoxy adheres well.

Dylan Eastman
Step 7: Let It Dry
Use fans as necessary to completely dry the floor overnight. Allow longer dry times in cooler temperatures.

Dylan Eastman
Step 8: Test For Existing Sealer
Check to see if there is still top sealer on the floor. Drip water onto the slab. If the water beads up, there is an existing sealer that may interfere with the adhesion of the epoxy. Depending on how much sealer is left, you may have to repeat the etching process.

Dylan Eastman
Step 9: Patch Cracks
Take time to fill concrete cracks and voids or these imperfections will show through the epoxy.
Mix (1) part A to (2) parts B on a clean piece of cardboard and then fill cracks and voids using a plastic spackle knife.
Allow the filler to harden for eight hours and then feather down any edges with a coarse sanding block.

Dylan Eastman

Dylan Eastman
Step 10: One Last Cleaning
Give the space one more good cleaning before applying the epoxy. Be sure to get close to edges and walls for bits of block and concrete that will get into the finish.
To make cutting in easier, apply painter’s tape along any block and wall plates (basically anything you don't want the epoxy on).
Dylan Eastman

Dylan Eastman
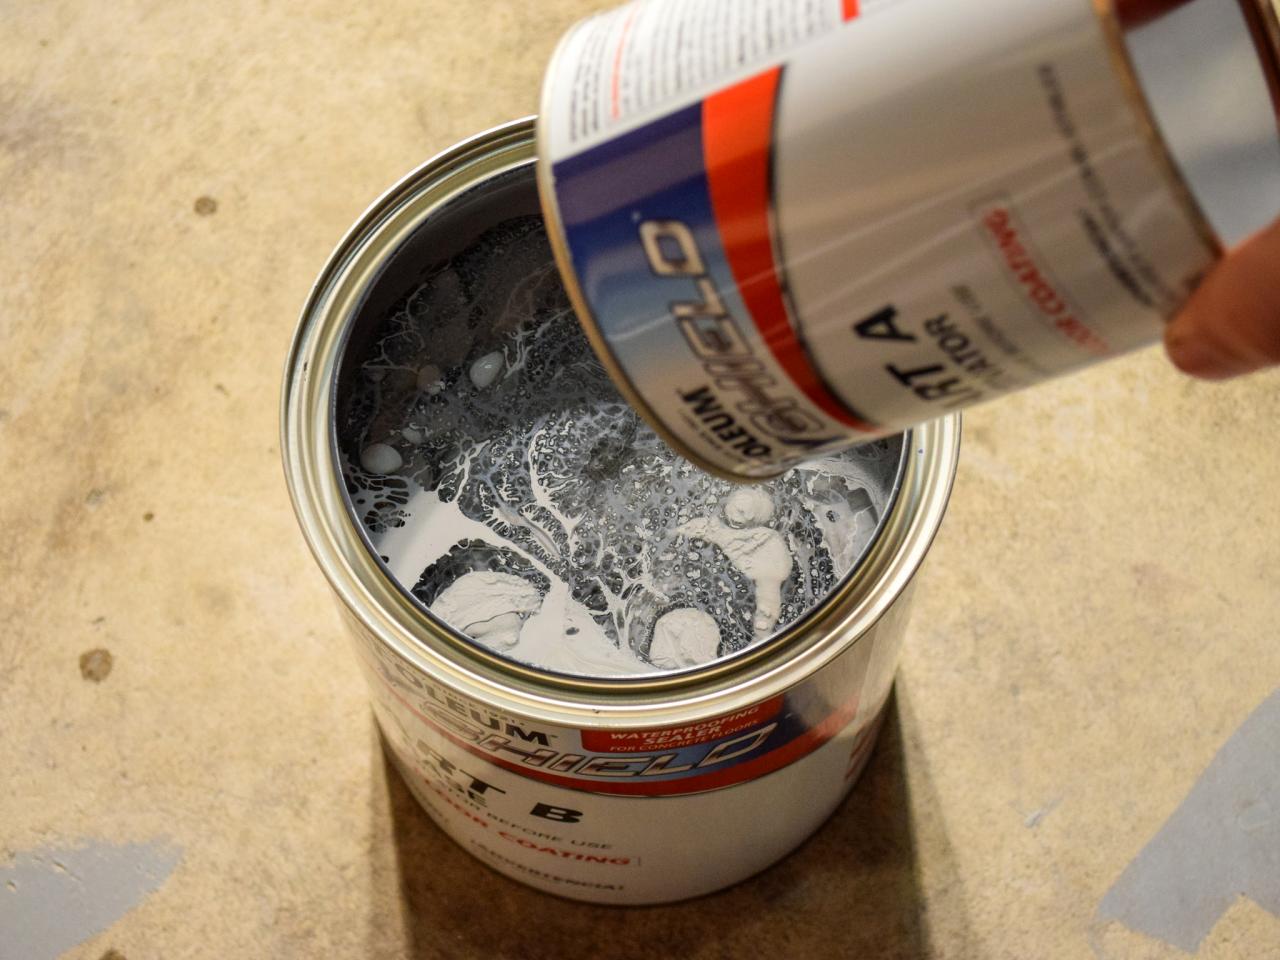
Step 11: Mix Part A With Part B
Your epoxy kit should come with a large and small can. The large can of Part B may feel light but it is only partially full so that you can pour Part A into it. Epoxy is available in various colors but the two most popular are gray and tan.
Pour Part A into Part B. Then mix thoroughly until the liquid is homogenous.

Dylan Eastman

Dylan Eastman
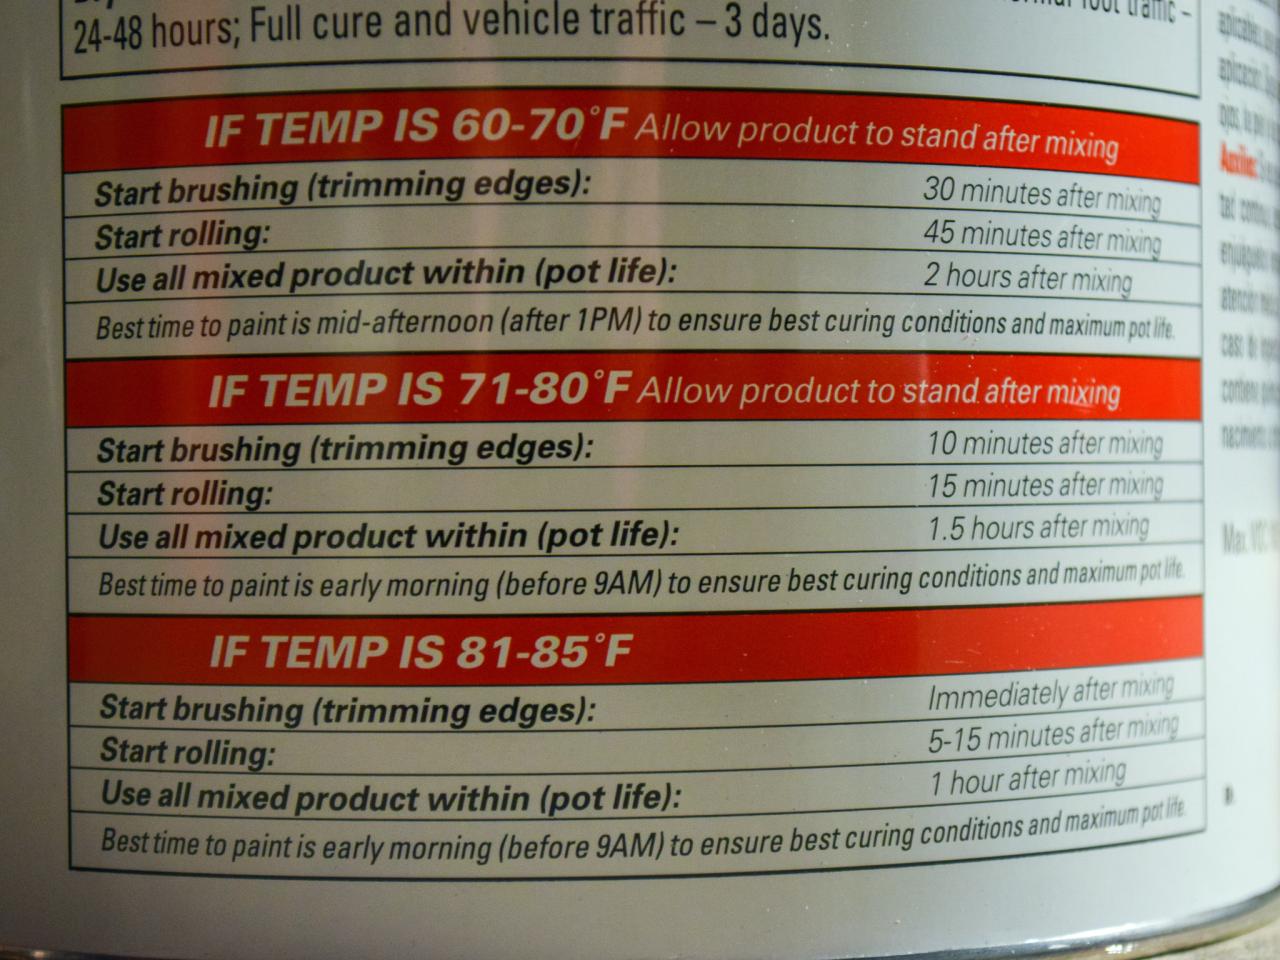
Step 12: Wait for the Reaction Time
Dependent upon temperature, allow the epoxy to react for the recommended time on the container. Do not cheat on this step otherwise you will have a non-hardening sticky mess.

Dylan Eastman
Step 13: Cut In
Pour the mixed epoxy into a roller tray and use a cheap brush to cut in along edges. Don't get too far ahead of rolling because you’ll want to keep the epoxy wet until the flakes are applied.

Dylan Eastman
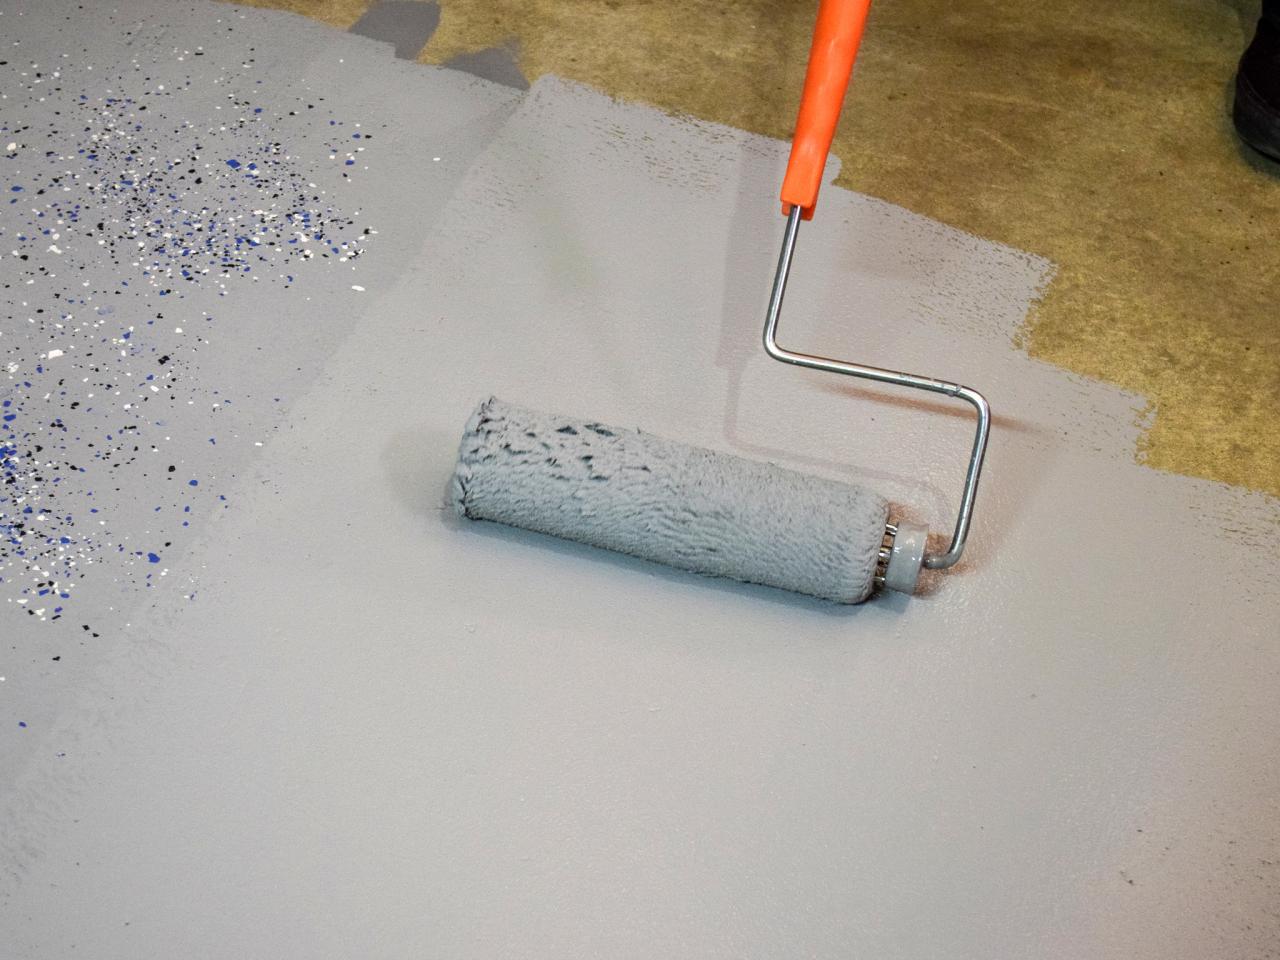
Step 14: Roll in Sections
Start rolling the epoxy out in 4' x 4' sections. Keeping the wet edge, lightly broadcast the surface flakes into the wet epoxy. Also, be sure to plan your exit strategy as the floor will need to dry for 24 hours before light traffic. You don't want to paint yourself into a literal corner!

Dylan Eastman
Step 15: Apply Generously
In general, roll out the epoxy heavier than you think is needed and conserve the flakes. The epoxy gets absorbed into the concrete pores and will lose its gloss if it is not applied heavy enough.

Dylan Eastman
Step 16: Sprinkle on Flakes
Try to spread the flakes as high and thin as possible for a light random pattern. The flakes not only add an attractive surface pattern but they also add some slip resistance to the floor.

Dylan Eastman
Step 17: Let Cure
Finishing an existing garage floor with a new epoxy coating is a great way to refresh your DIY workspace while also making the floor much easier to keep clean in the long run. Be sure to allow the proper times for light foot and vehicle traffic (1 and 3 days respectively).

Dylan Eastman
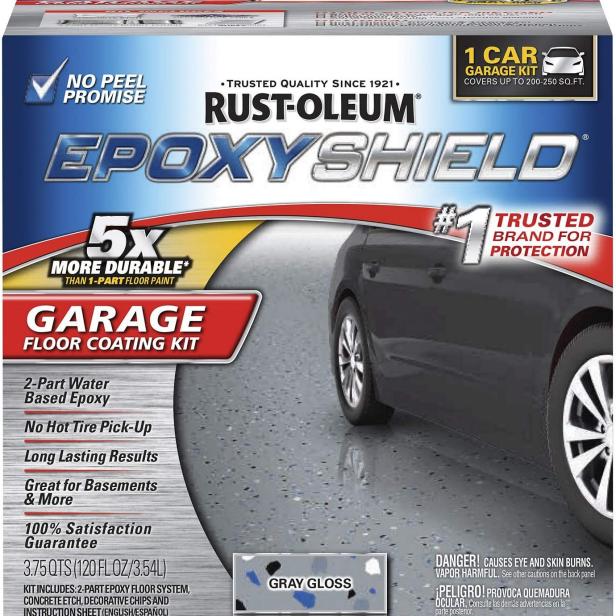
Durable, two-part epoxy formula works on interior concrete surfaces, such as garage floors, workshops, basements and more.


