


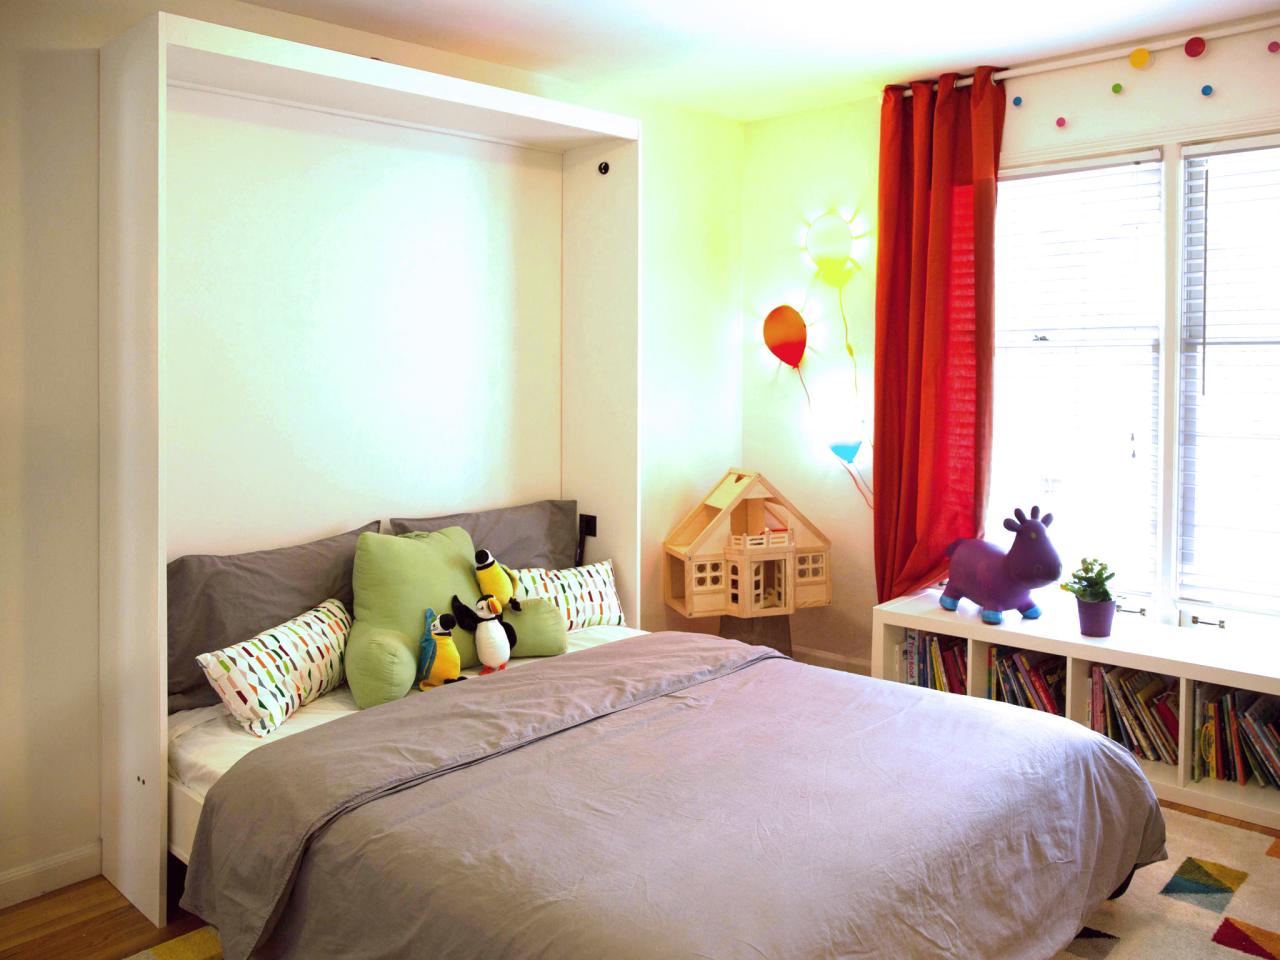
How to Build a Murphy Bed
Get step-by-step instructions on how to construct a hideaway bed for a studio apartment or guest bedroom.

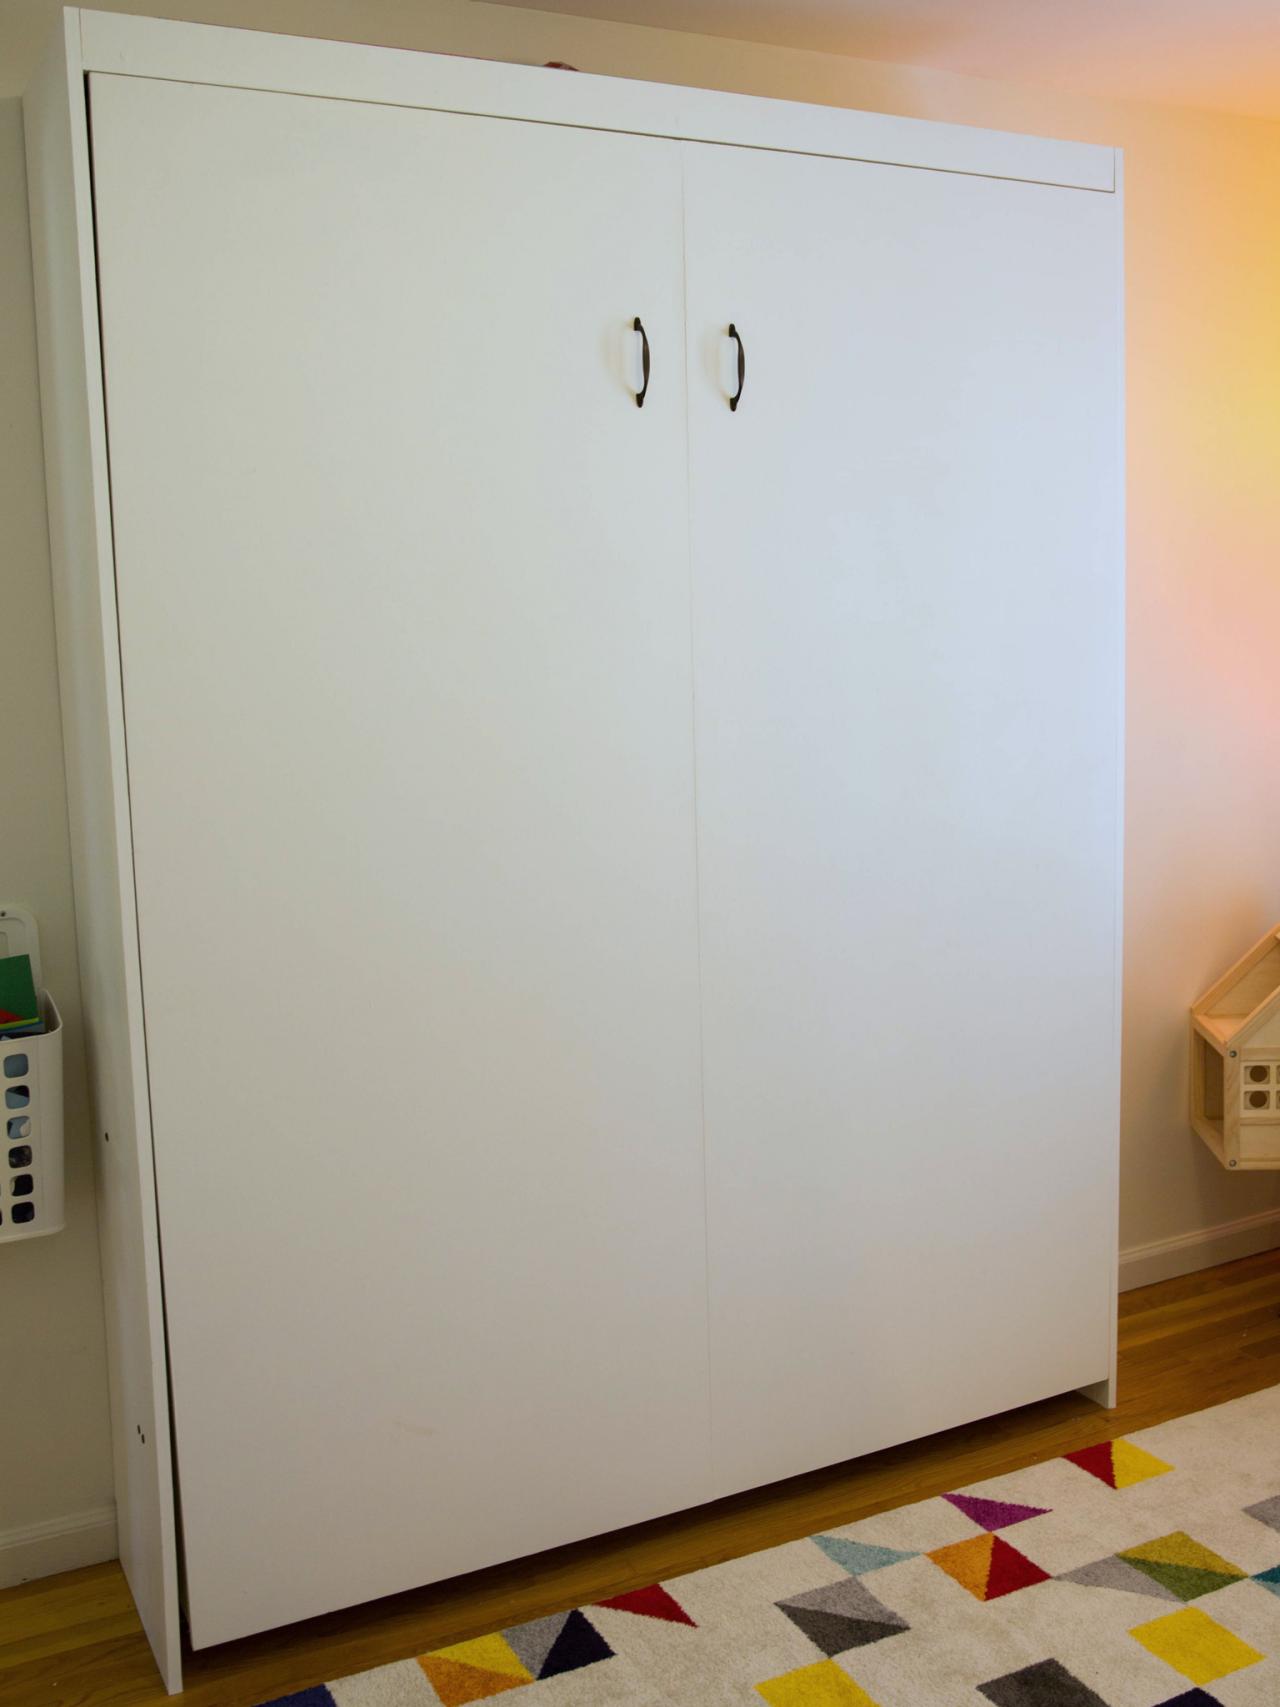
To build our queen-sized Murphy bed we constructed the bed frame and then the wall cabinet. We then used a hardware kit made especially for Murphy beds to assemble the pieces together. When planning the placement of your Murphy bed, make sure you have at least two wall studs to mount the bed to, and make sure you have enough clearance to walk around the bed when it is open. When attaching the wall cabinet to the wall you may have to remove some baseboard or cut the cabinet to go around the baseboard.

Wade Works Creative
Tools and Materials
- Murphy bed kit
- tape measure
- hammer
- drill with 1/8" counter-sink bit, 1/4" bit and 1" Forstner bit
- 1-1/4", 1-1/2" and 2" screws
- table or circular saw
- jigsaw
- screwdriver
- clamps
- stud finder
- paint and paint supplies
- nailer and finish nails
- (4) 3/4" x 4' x 8' plywood sheet
- (2) 1/4" x 4' x 8' plywood sheet
- (12) 1x2 x 8' solid wood board
- wood glue
- veneer tape
- cabinet handles
We chose to finish our bed with just a clear coat of polyurethane so we could see the wood’s natural beauty. But this bed can be finished or painted any way you desire. The best time to paint or stain is prior to assembly.
Cut List
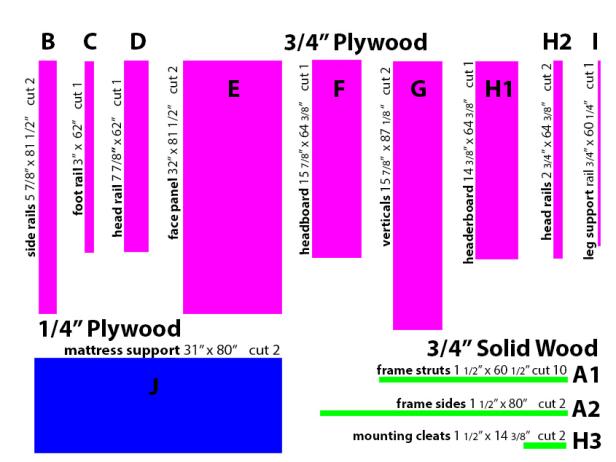
Cut List
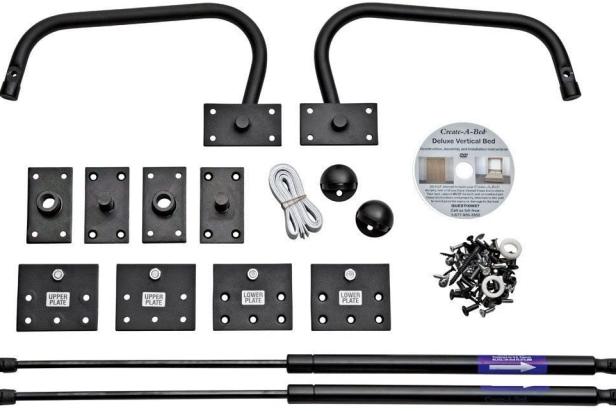
This Murphy bed kit includes all the necessary hardware needed to build a queen-sized fold-away bed.
Use the graphic above or the list below to see the measurements of each component needed to build the bed. Since these cuts are all straight and simple, you may be able to have the lumber cut for you where you buy it.
(A1) Frame Struts - (10) 3/4" x 1-1/2" x 60-1/2" solid wood board
(A2) Frame Sides - (2) 3/4" x 1-1/2" x 80" solid wood board
(B) Side Rails - (2) 3/4" x 5-7/8" x 81-1/2" plywood
(C) Foot Rail - (1) 3/4" x 3" x 62" plywood
(D) Head Rail - (1) 3/4" x 7-7/8" x 62" plywood
(E) Face Panel - (2) 3/4" x 32" x 81-1/2" plywood
(F) Headboard - (1) 3/4" x 15-7/8" x 64-3/8" plywood
(G) Verticals - (2) 3/4" x 15-7/8" x 87-1/8" plywood
(H1) Header Board - (1) 3/4" x 14-3/8" x 64-3/8" plywood
(H2) Header Rails - (2) 3/4" x 2-3/4" x 64-3/8" plywood
(H3) Mounting Cleats - (2) 3/4" x 1-1/2" x 14-3/8" solid wood board
(I) Leg Support Rail - (1) 3/4" x 3/4" x 60-1/4" plywood
(J) Mattress Support - (2) 1/4" x 31" x 80" plywood
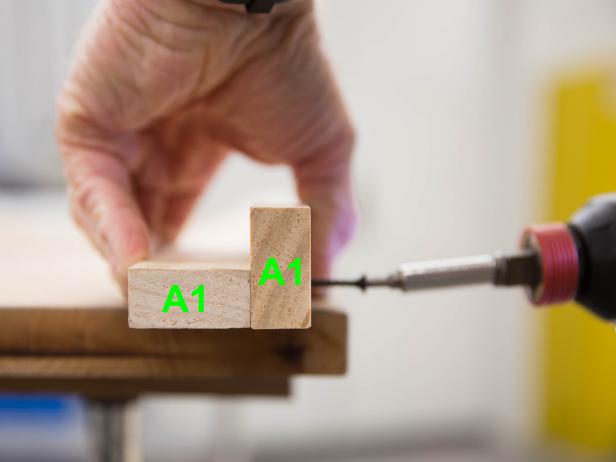
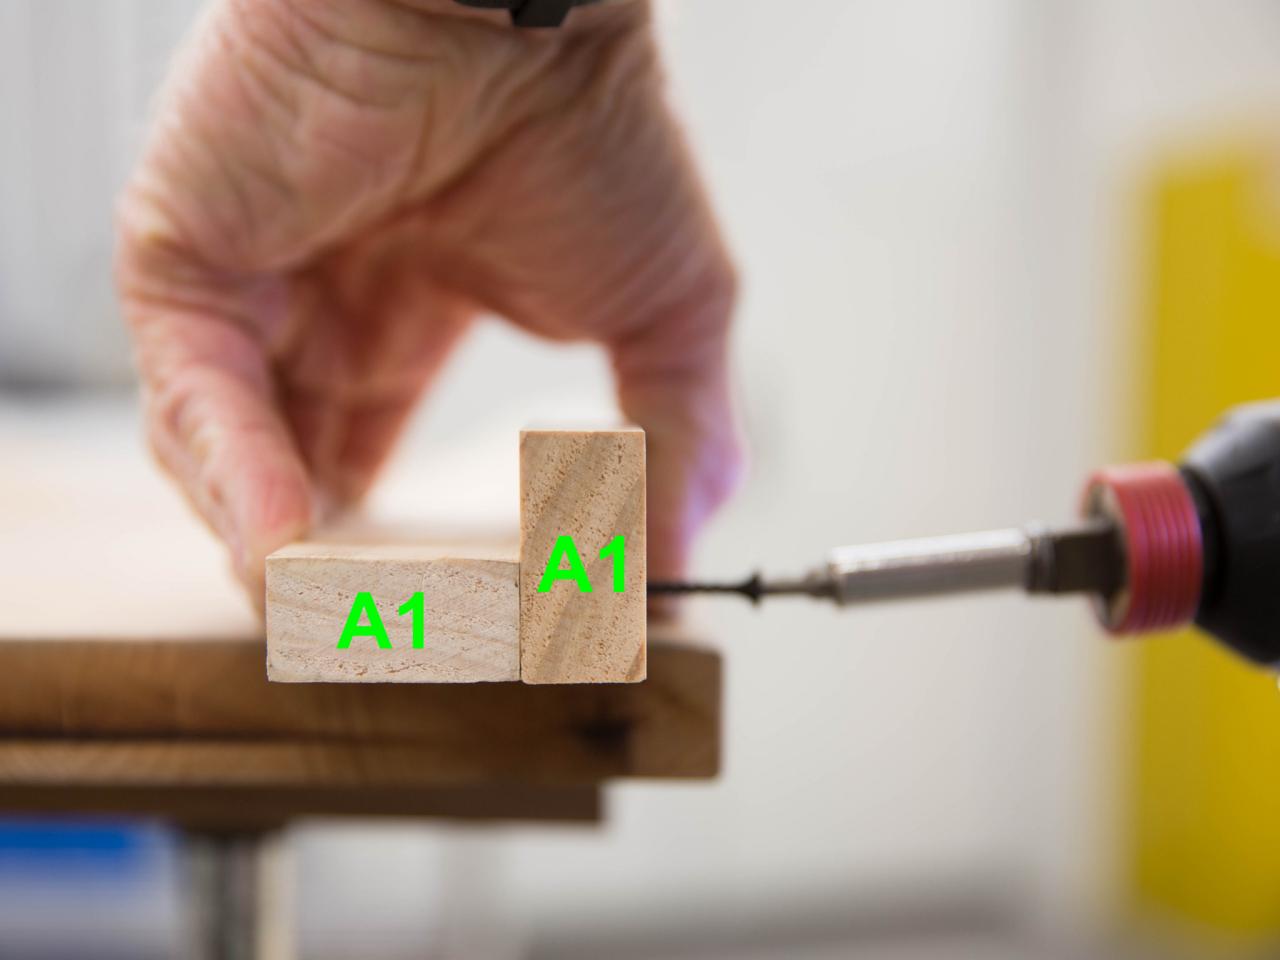
Step 1: Create Struts
Wade Works Creative
Step 1
Make sure there is ample room for the bed to extend before you begin building. Determine the size of the bed and orientation (pivoting on the long side or short side of the bed). Again, these instructions are for a queen-sized bed pivoting on the short side.
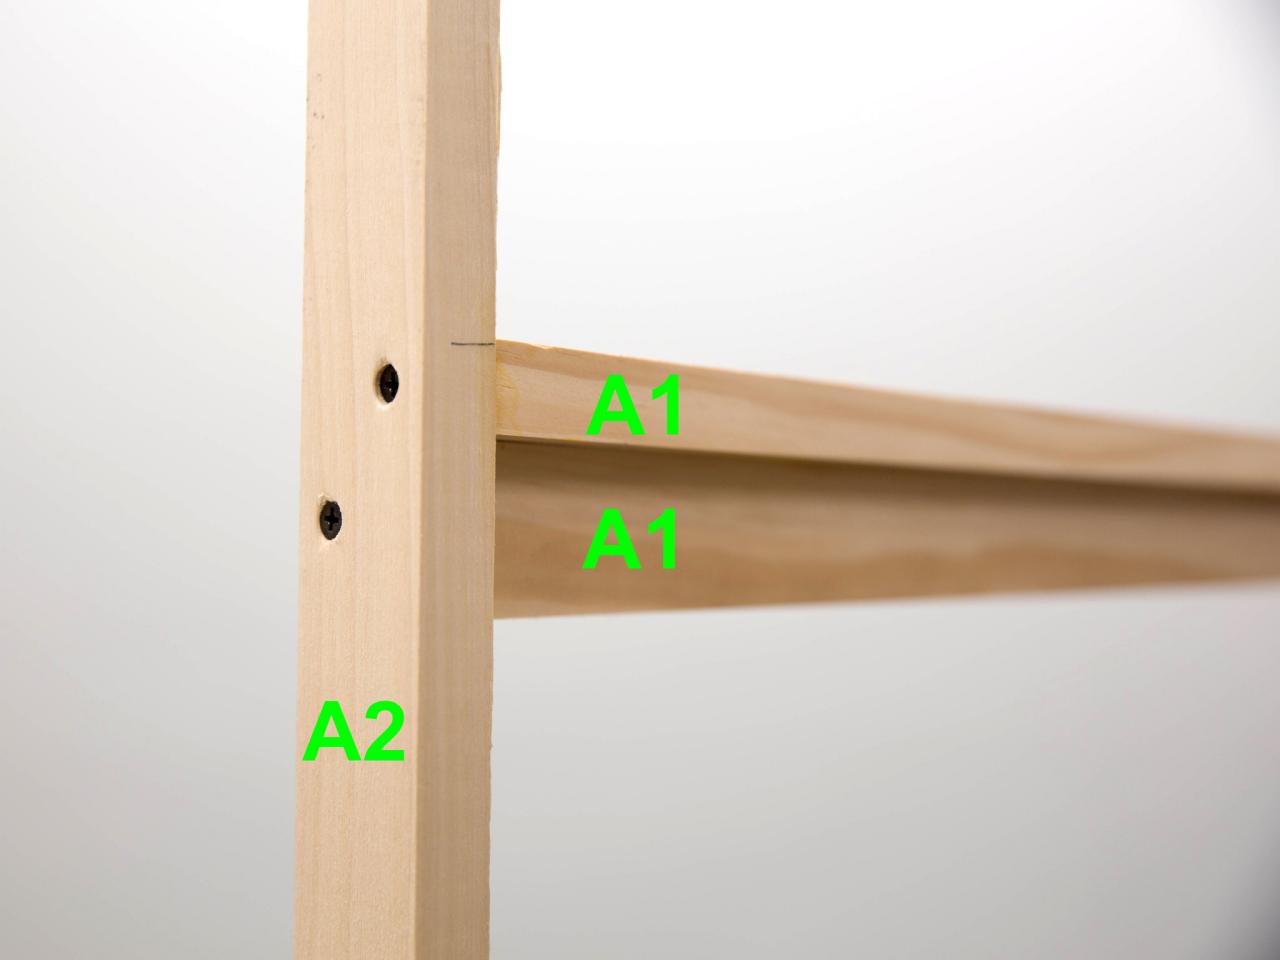
Lay out the 10 frame strut pieces (A1), and pair them to create five struts. For each strut, glue two strut pieces in an "L" shape using wood glue. Hold the pieces together, and drill pilot holes 8 inches apart along the length of the struts. Secure them with 1 1/2-inch screws.
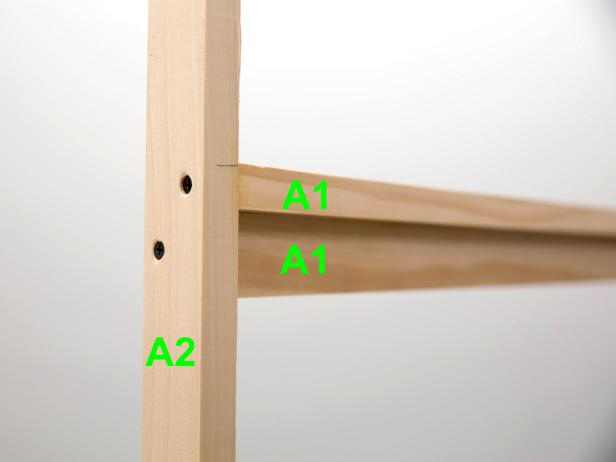
Step 2: Assemble Sub-Frame
Wade Works Creative
Step 2

Wade Works Creative
Step 2
Place the struts 20 feet apart, perpendicular to the frame sides (A2). Drill pilot holes, and attach with 2-inch screws.
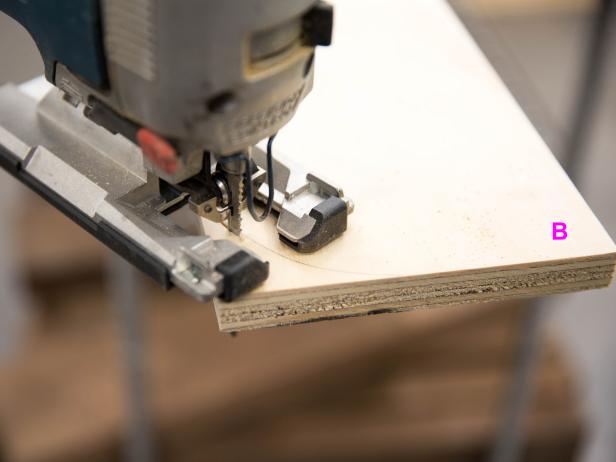
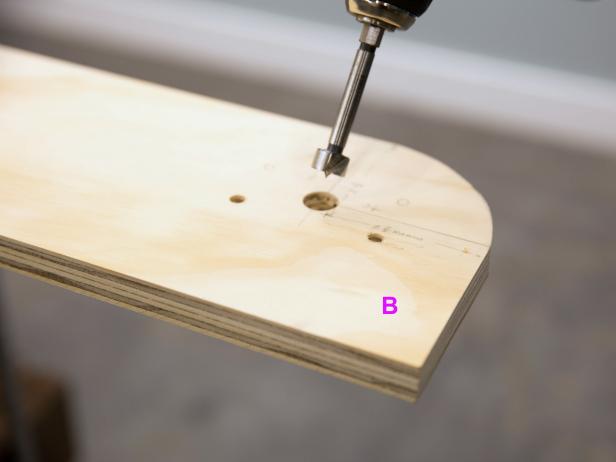
Step 3: Round Corners
Wade Works Creative
Step 3
Wade Works Creative
Step 3
Round one corner of each side rail (B) to a 2 7/8-inch radius using a jigsaw (Image 1). Pre-drill for the hardware, and follow the instructions included in your particular hardware (Image 2). The rounded corners should face up at the foot of the bed.
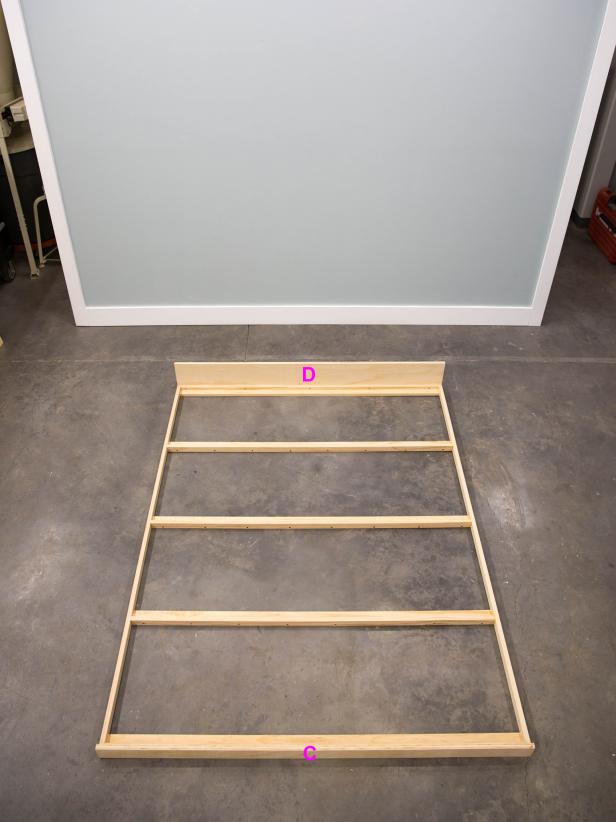
Step 4: Attach Head and Foot Rails

Wade Works Creative
Step 4
Wade Works Creative
Step 4
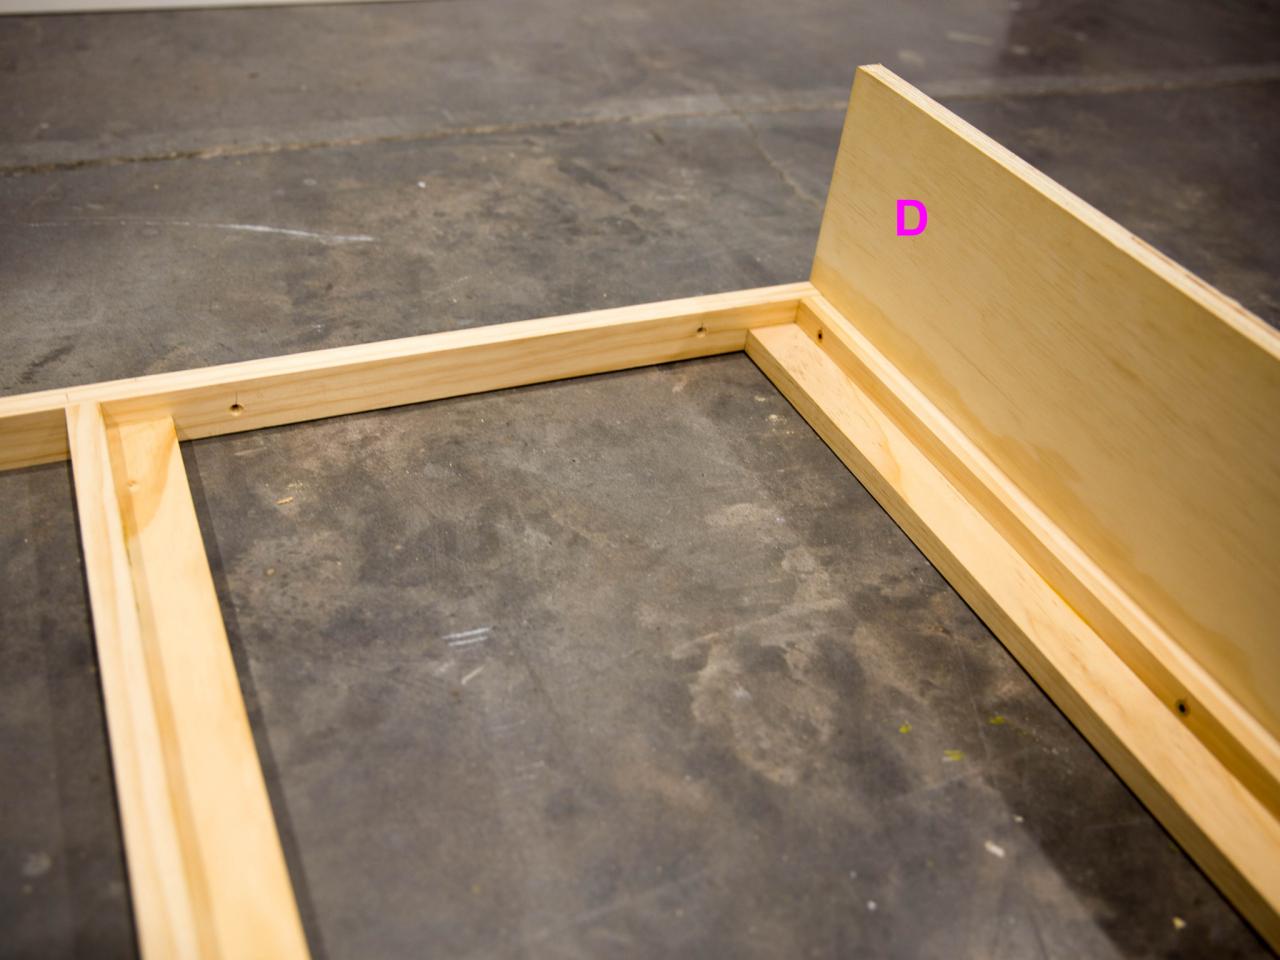
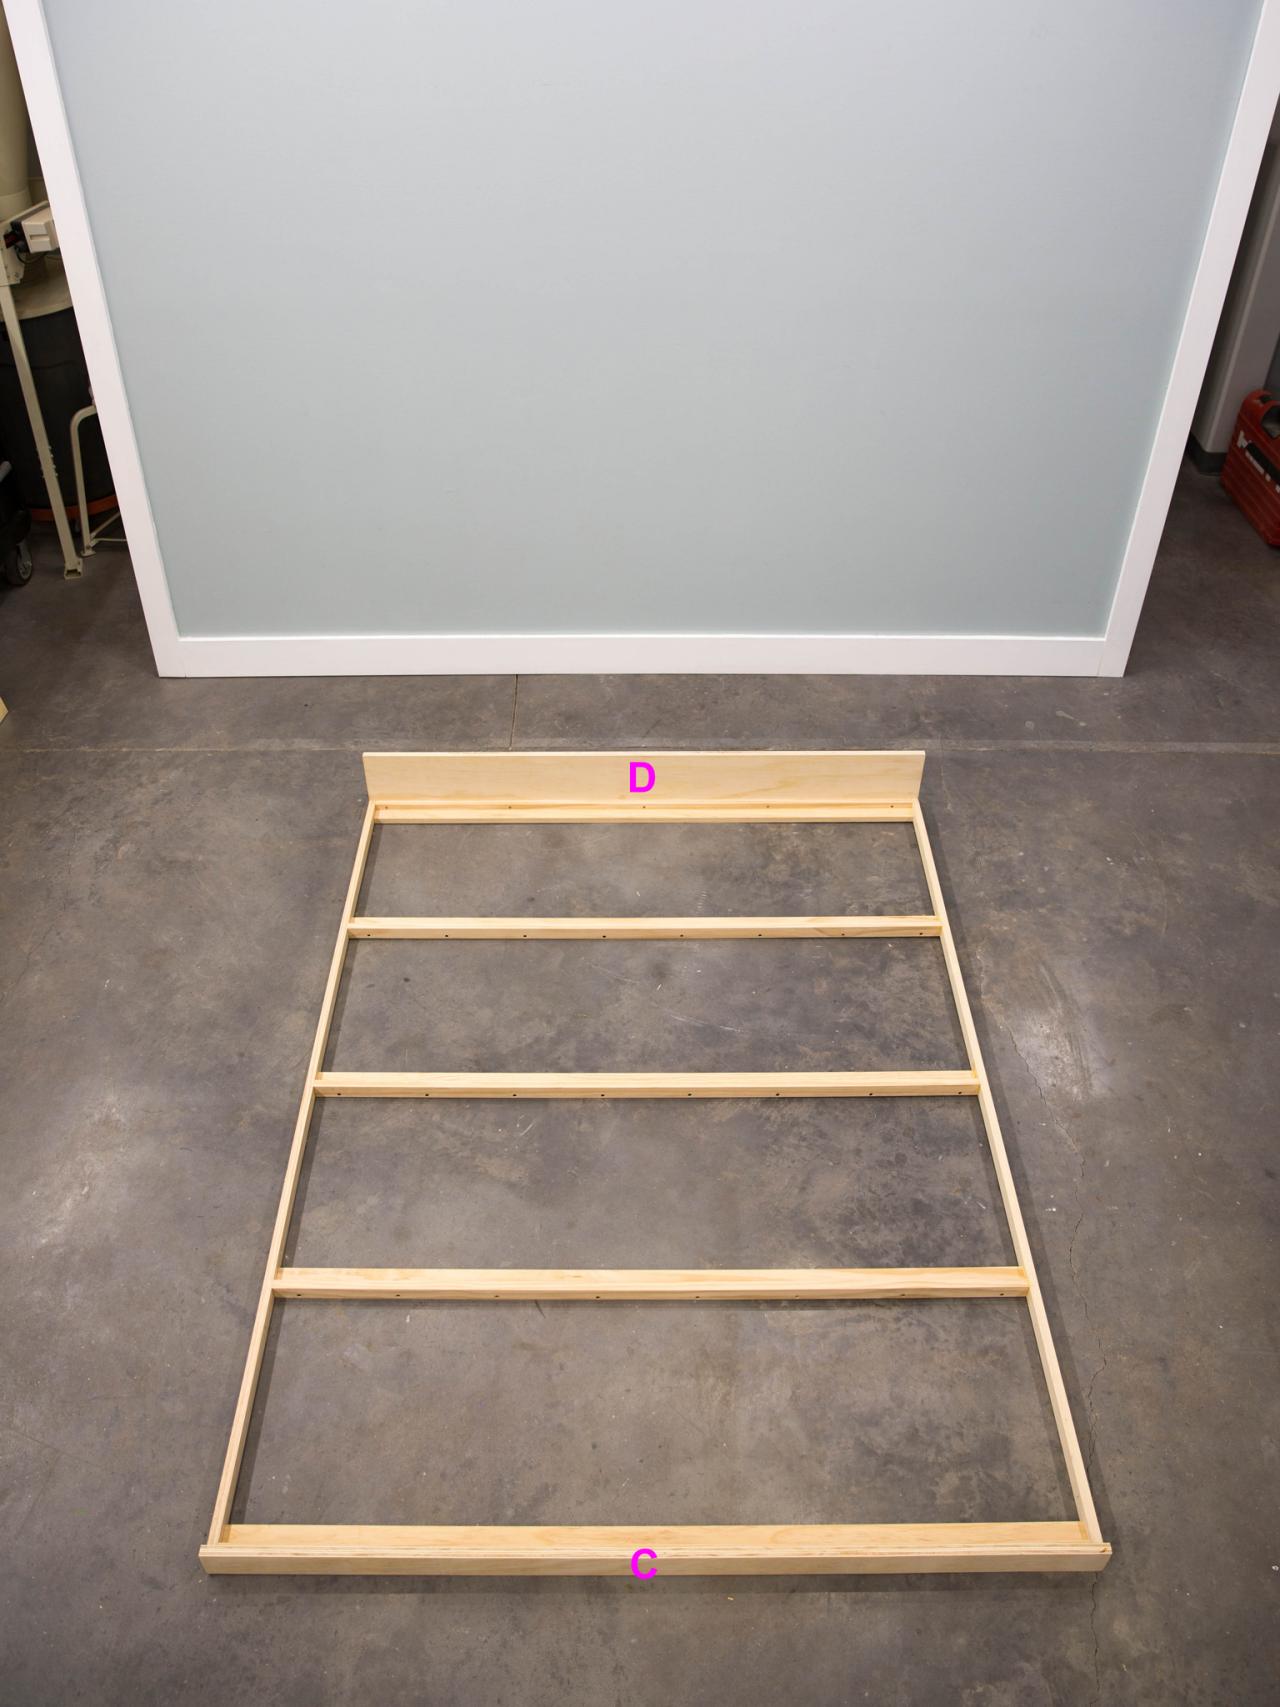
Drill five equally-spaced pilot holes from the inside of the sub-frame using a 1-1/4-inch bit, and attach the head (Image 2) and foot rails with 1-1/4-inch screws (Image 2).
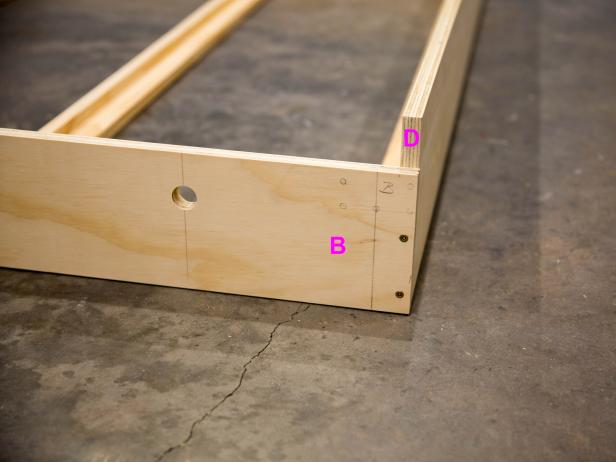
Step 5: Attach Side Rails
Wade Works Creative
Step 5

Wade Works Creative
Step 5
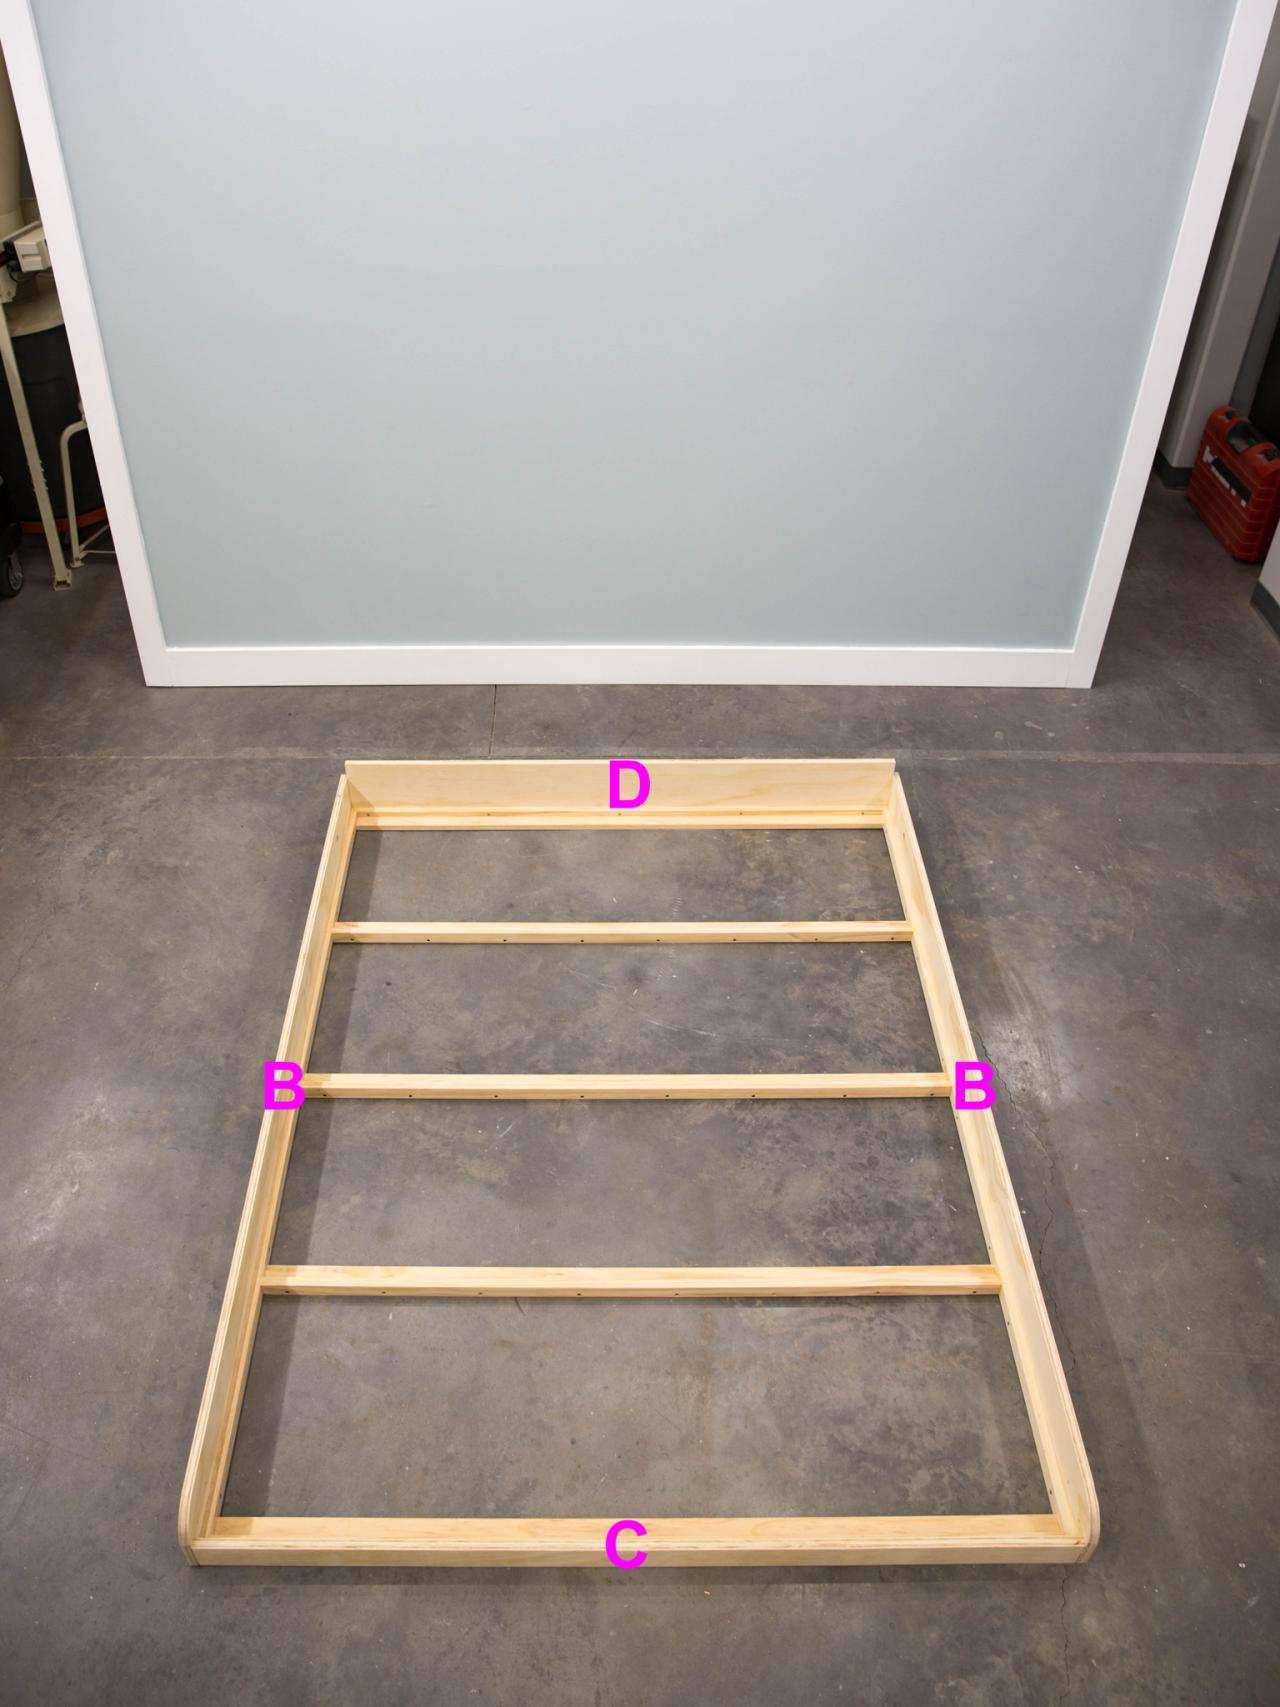
Place the side rails (B) next to the sub-frame, making sure the rounded ends (where the leg hardware will be attached) are at the foot and that the leg hardware is mounted on the outside. Drill pilot holes from the inside of the sub-frame on each side of each strut using a 1 1/4-inch bit. Attach the rails to the sub-frame with 1 1/4-inch screws. Next, drill pilot holes (two holes per corner) from the outside through the side rails into the head rail and foot rail. Attach with 2-inch screws (Images 1 and 2).
Step 6: Position Panels

Wade Works Creative
Step 6

Wade Works Creative
Step 6

Wade Works Creative
Step 6
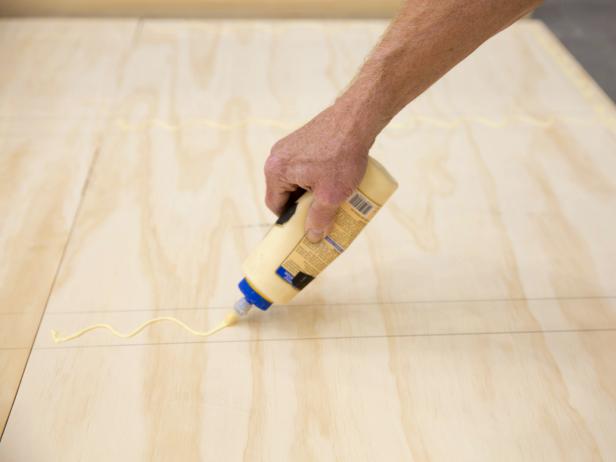
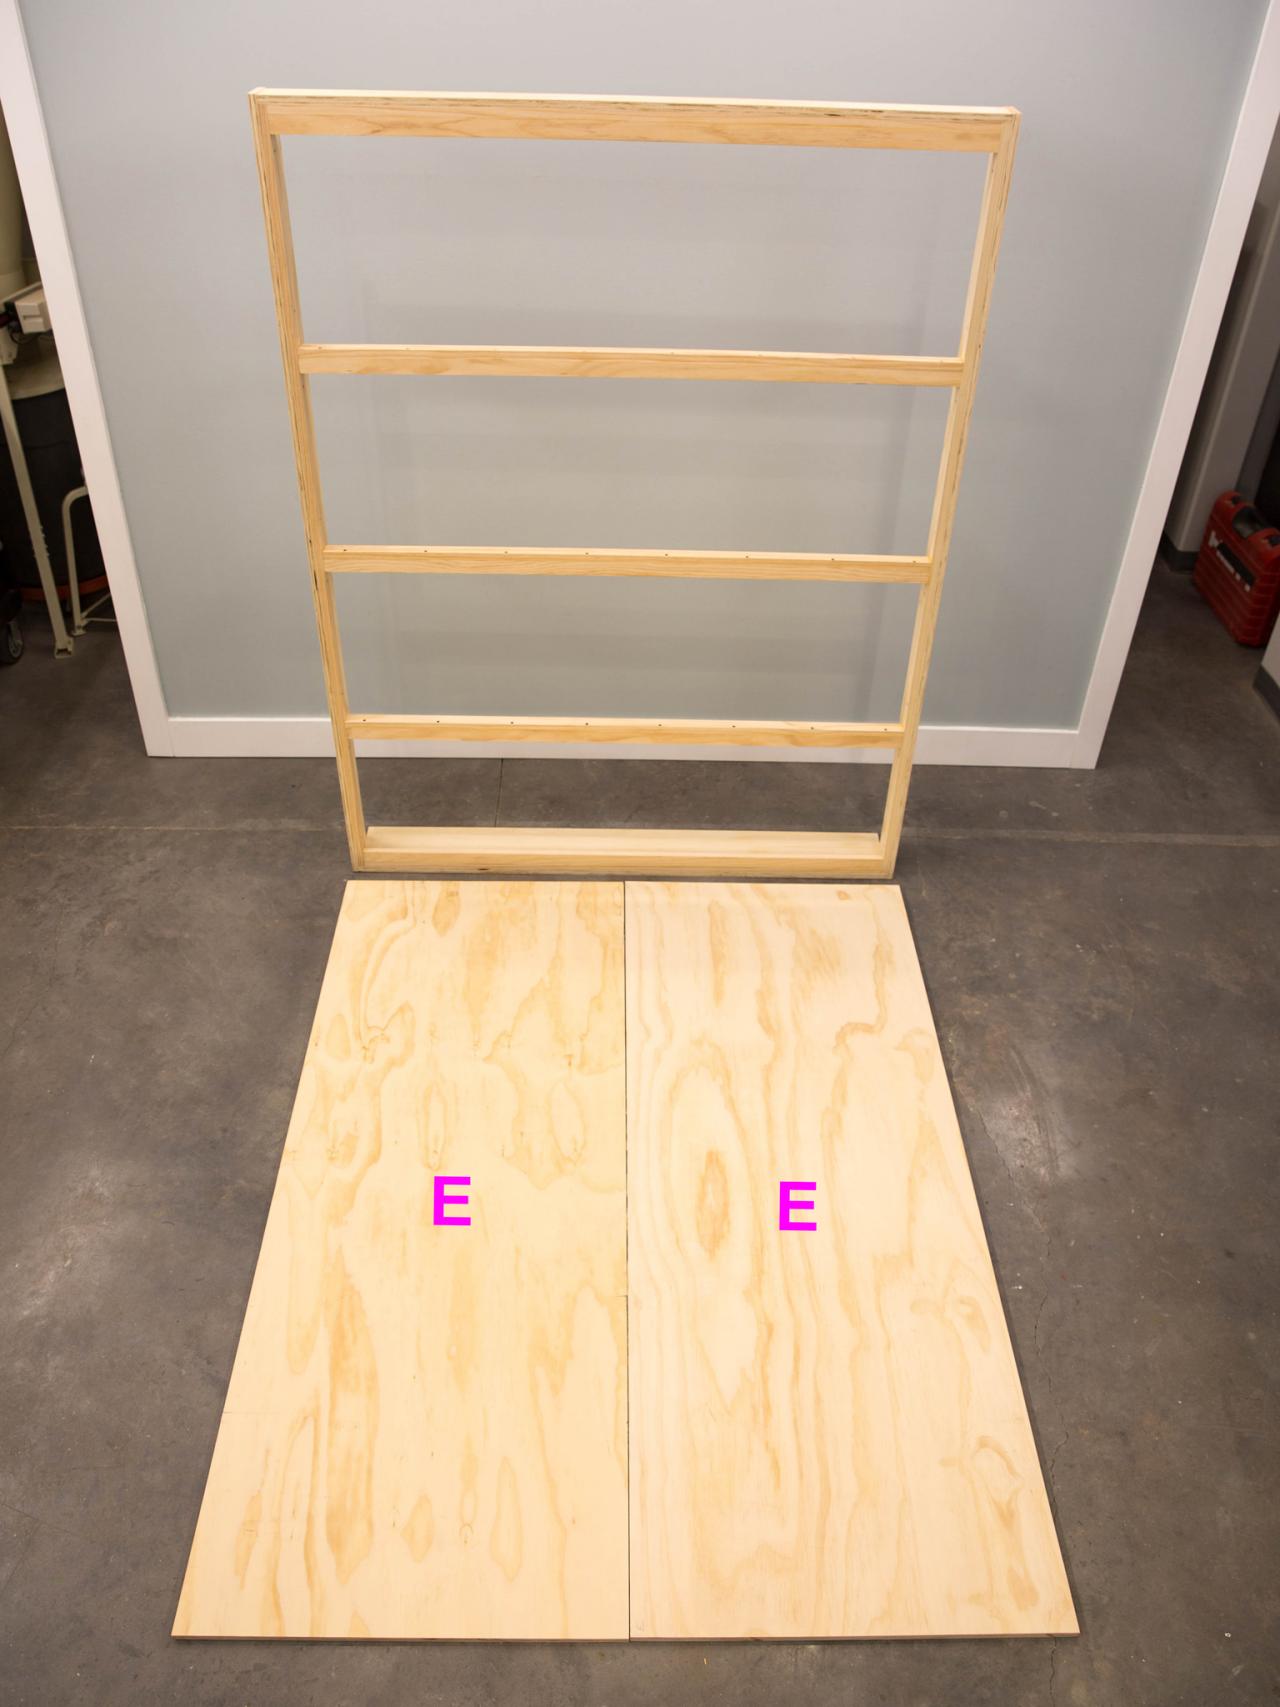
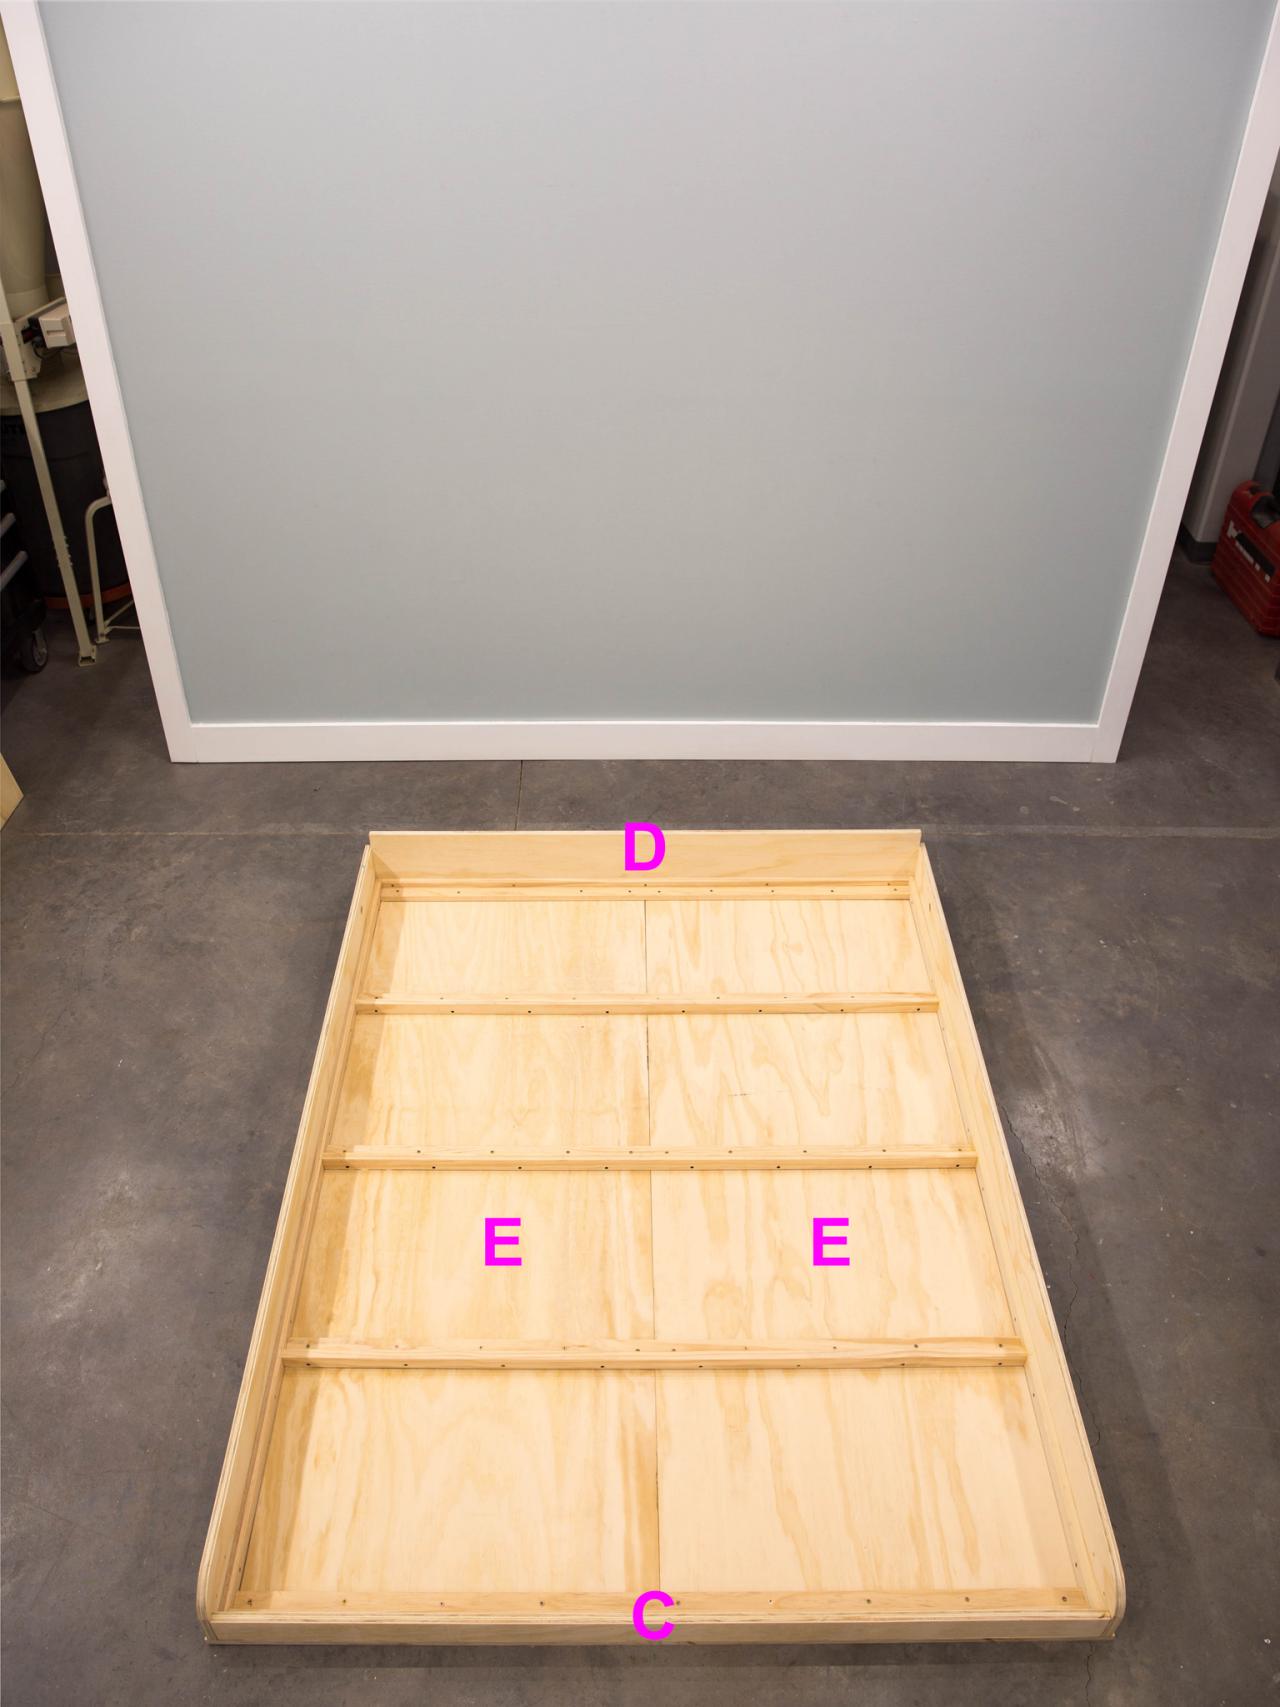
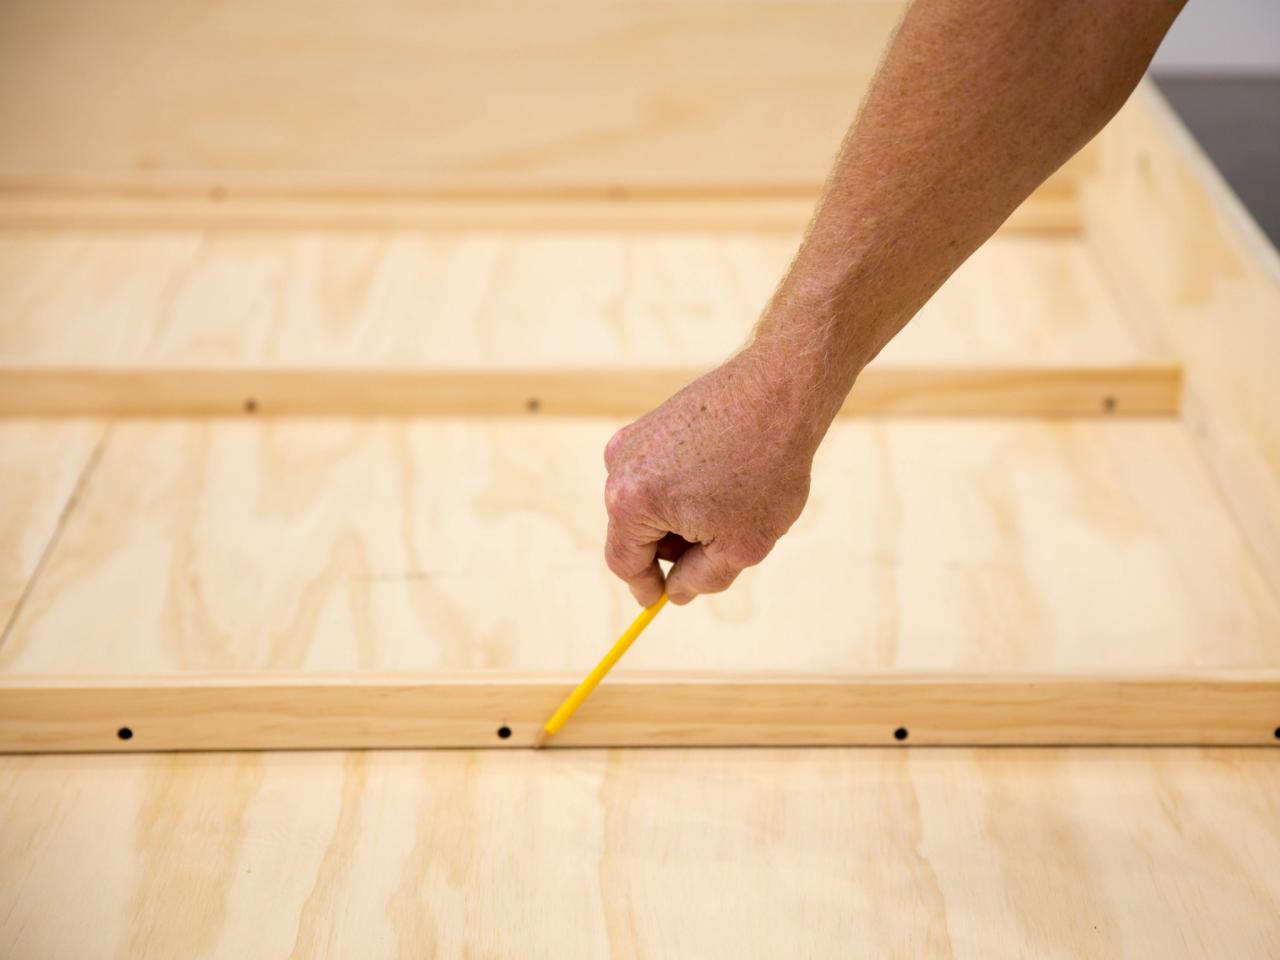
Lay both face panels (E) face down, with the long sides butted together (Image 1). Carefully align the bed frame assembly on top of face panels (Image 2). The panels should extend 1/4 inch beyond the side rails on each long side. The panels should be flush with the foot rail (C) but extend beyond the head rail (D). Once the sub-frame is in place, trace between the struts to guide glue application (Image 3). Next, trace the 1/4-inch panel reveal on the sides.
Step 7: Attach Panels
Wade Works Creative
Step 7

Wade Works Creative
Step 7
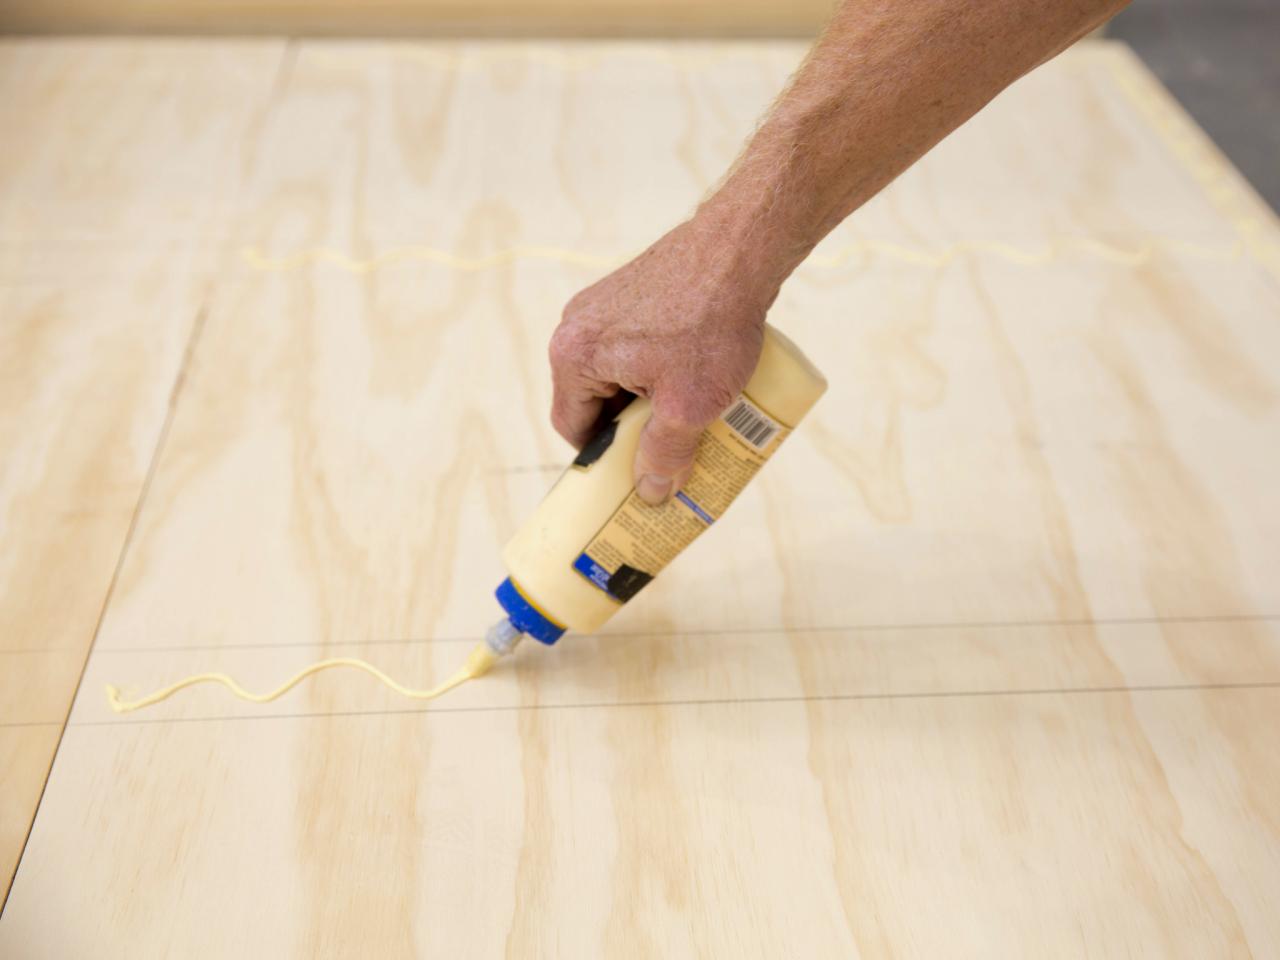
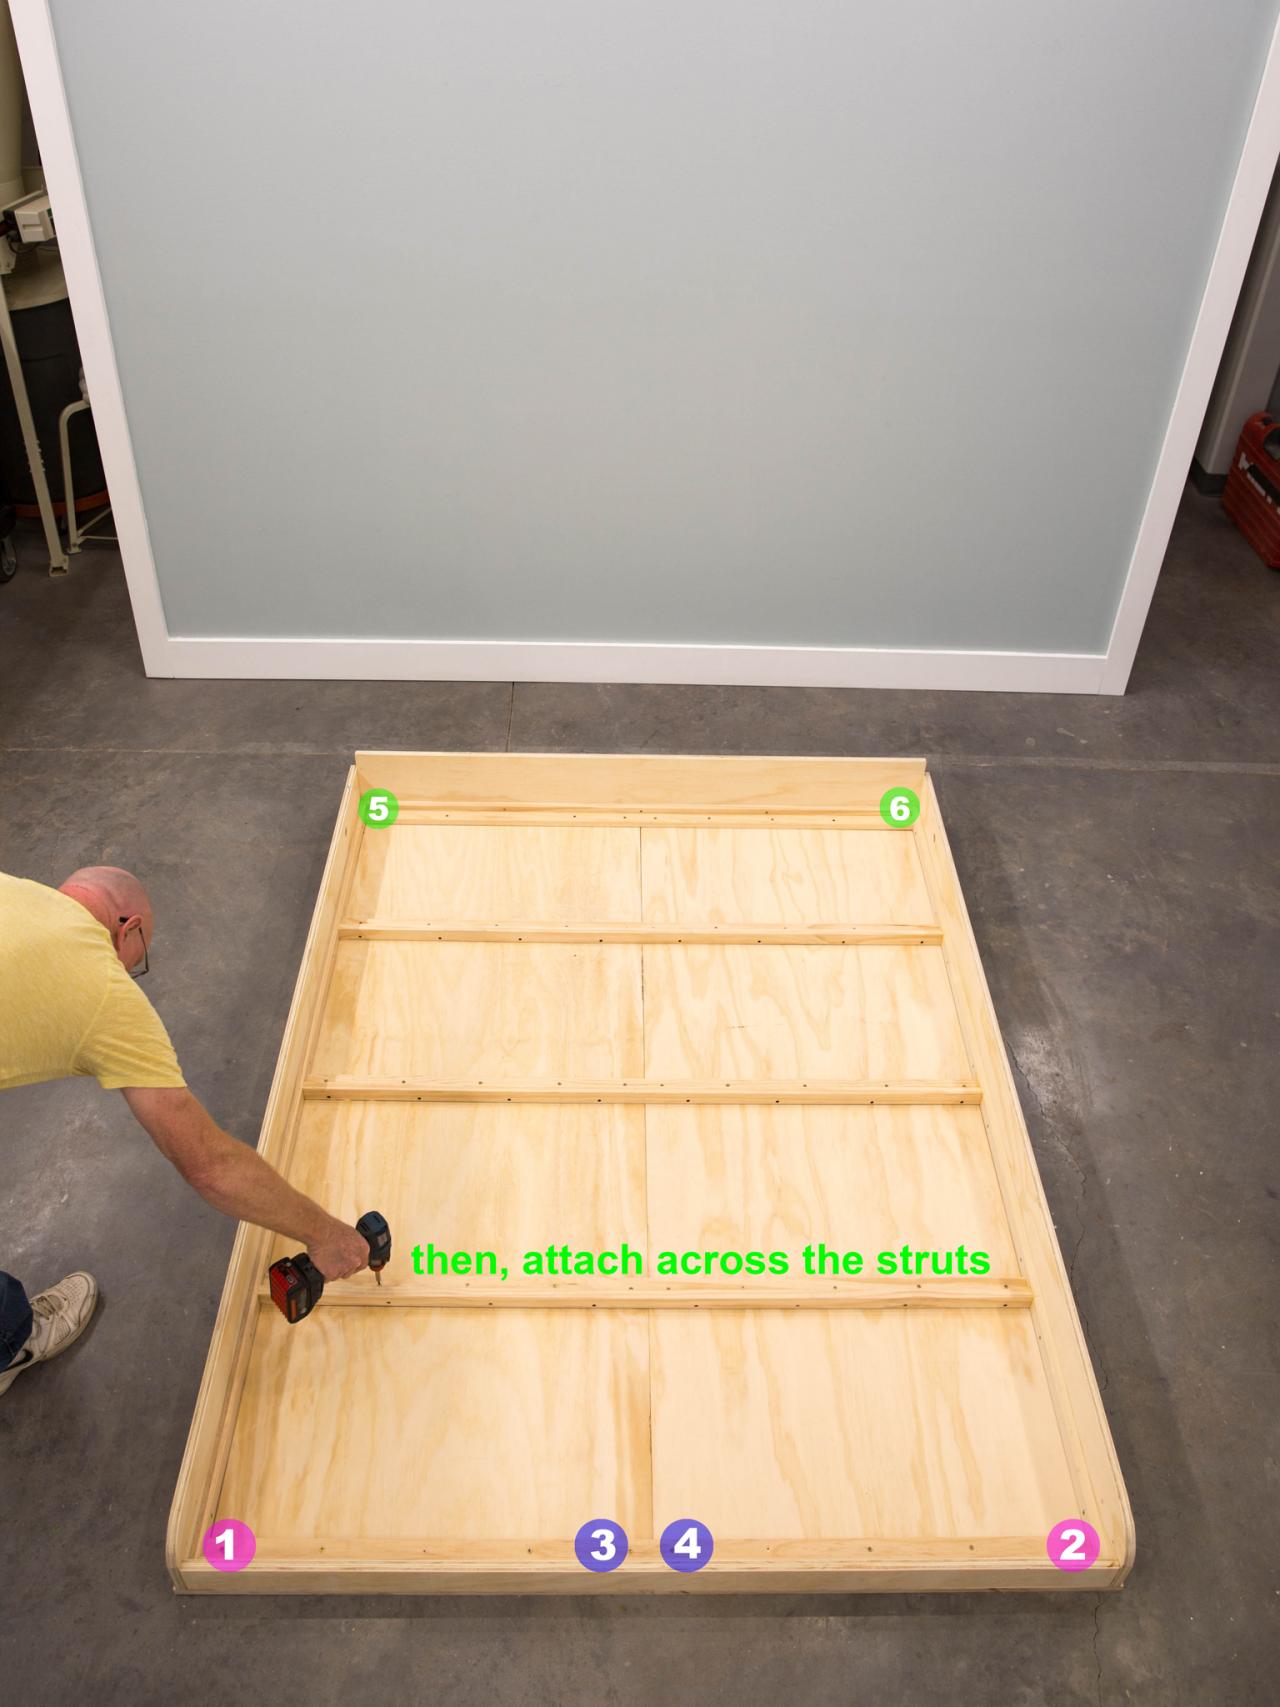
Secure struts by applying a bead of glue to the face panels (E), following the pencil guide made in the previous step (Image 1). Carefully reposition the sub-frame on the glue, and confirm it is flush with the panels at the foot and centered on the sides. The sequence that you apply the screws is important to keep the face panels and sub-frame aligned. First, secure the last strut on the foot with 1 1/4-inch screws on the corners. Next, insert two screws in the center of the foot rail strut. Then, screw the corners at the head of the bed. Once the corners are secure, screw remaining struts to the face panels at approximately 6-inch increments (Image 2).
Step 8: Assemble Header

Wade Works Creative
Step 8
Wade Works Creative
Step 8
Wade Works Creative
Step 8
Wade Works Creative
Step 8
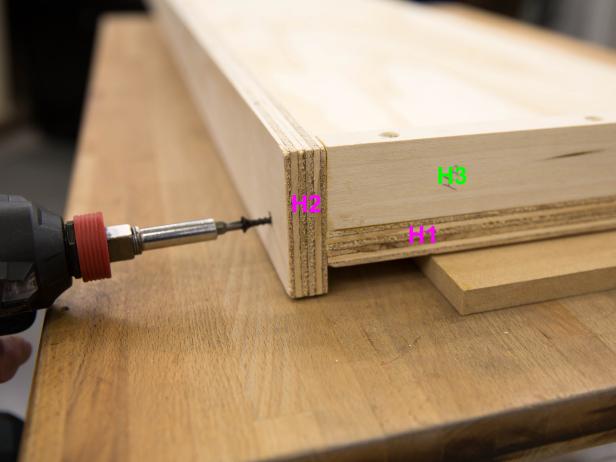
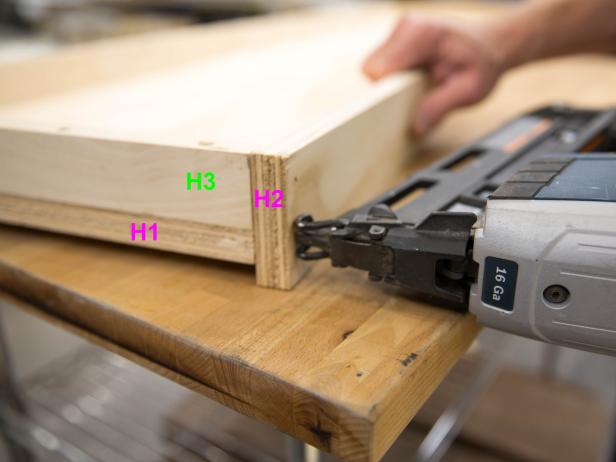
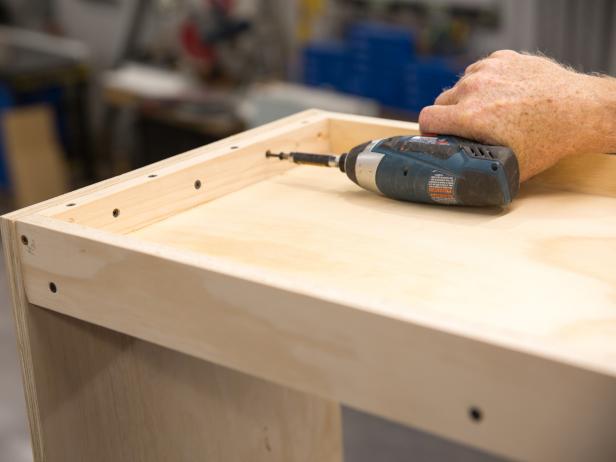
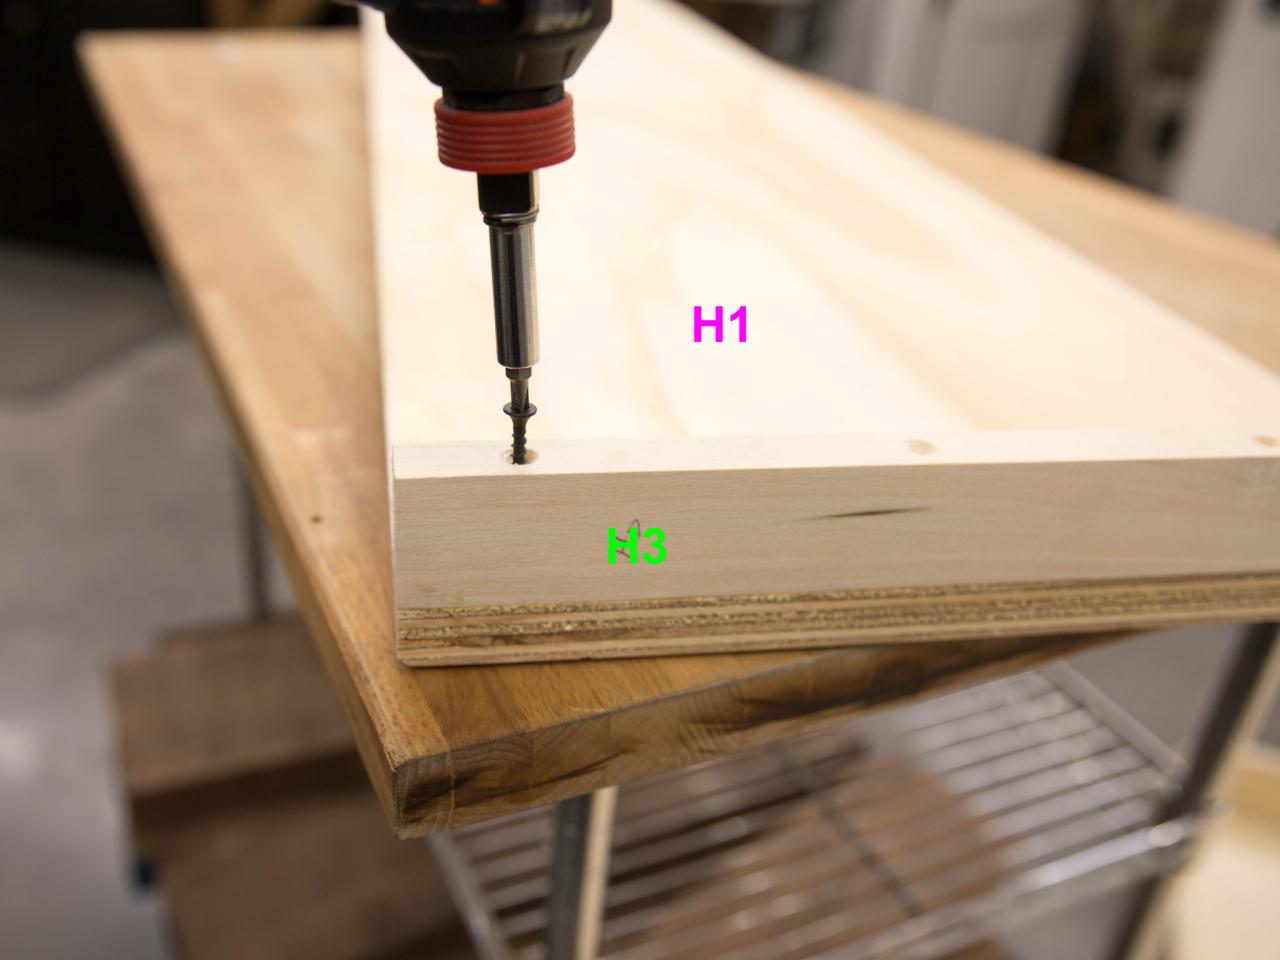
Attach the mounting cleats (H3) flush with the short ends of the header board (H1) by drilling pilot holes then attaching with 2-inch screws. Make sure the header has the best side face down (Image 1). Next, screw a header rail (H2) to the rear side of the header board (H1). Leave 1/2 inch of the header rail (H2) extending beneath the header board (Image 2). Align the remaining header rail (H2) with the front edge of the header board assembly, and leave the 1/2-inch extension underneath. Because the face will be visible, secure with glue and a nailer and finish nails instead of screws (Images 3 and 4).
Step 9: Assemble Cabinet
Wade Works Creative
Step 9

Step 9
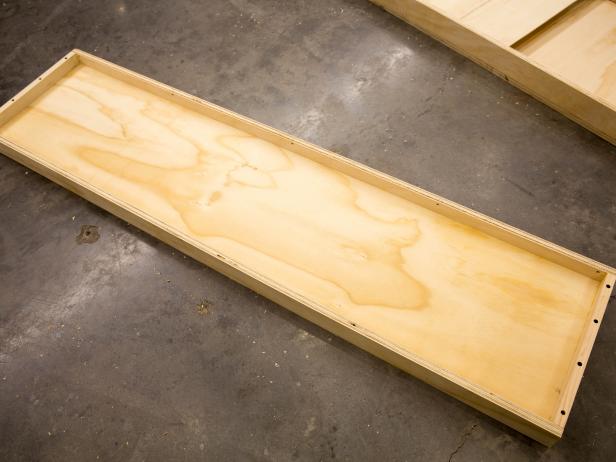
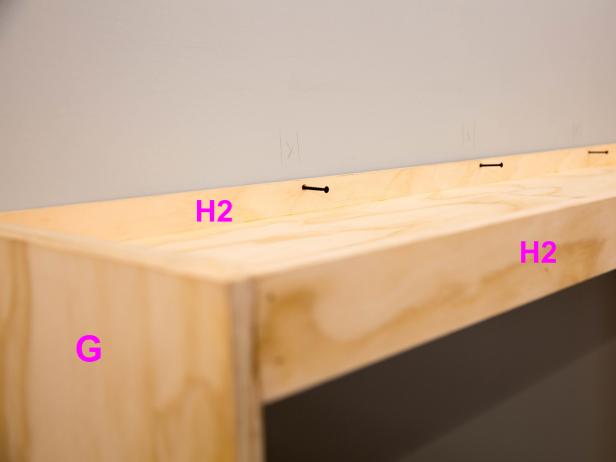
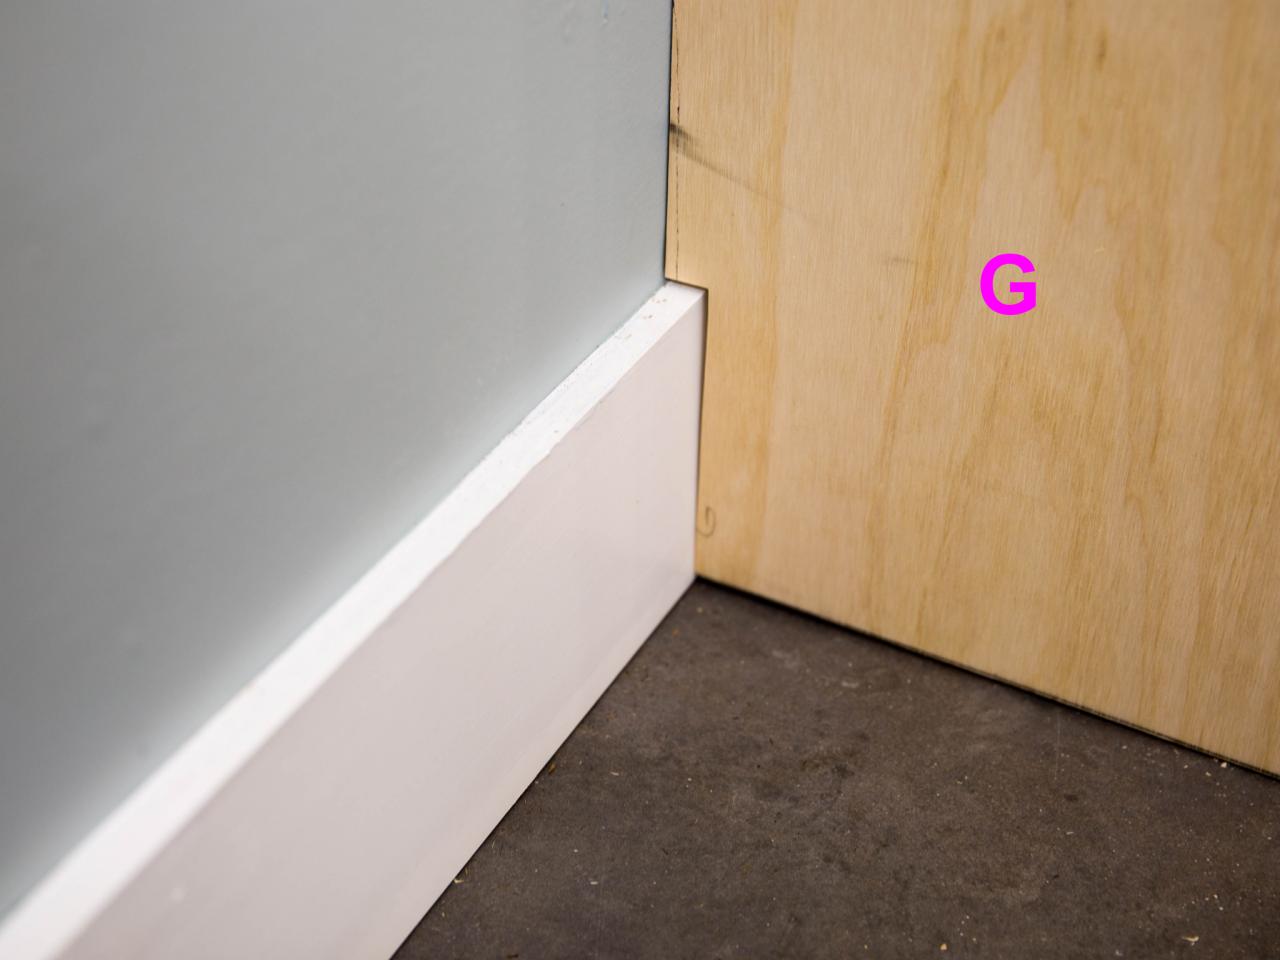
The verticals (G) make up the sides of the cabinet, and the header makes up the top. Attach the verticals to the short sides of the header with a drill and 2-inch screws (Image 1). If necessary, cut a notch with a jigsaw to allow clearance for base molding so the cabinet stays flush with the wall (Image 2).
Step 10: Attach Veneer
Wade Works Creative
Step 10
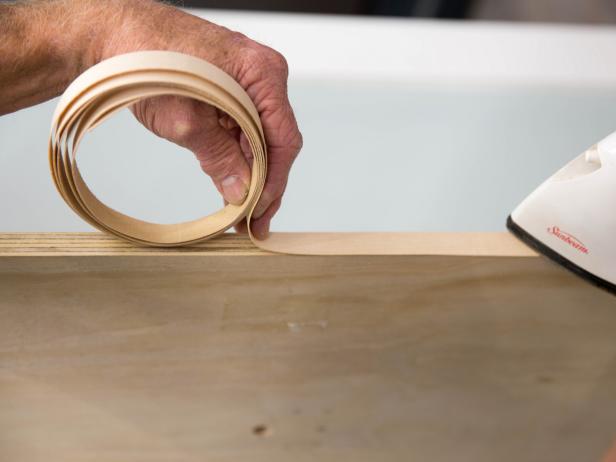
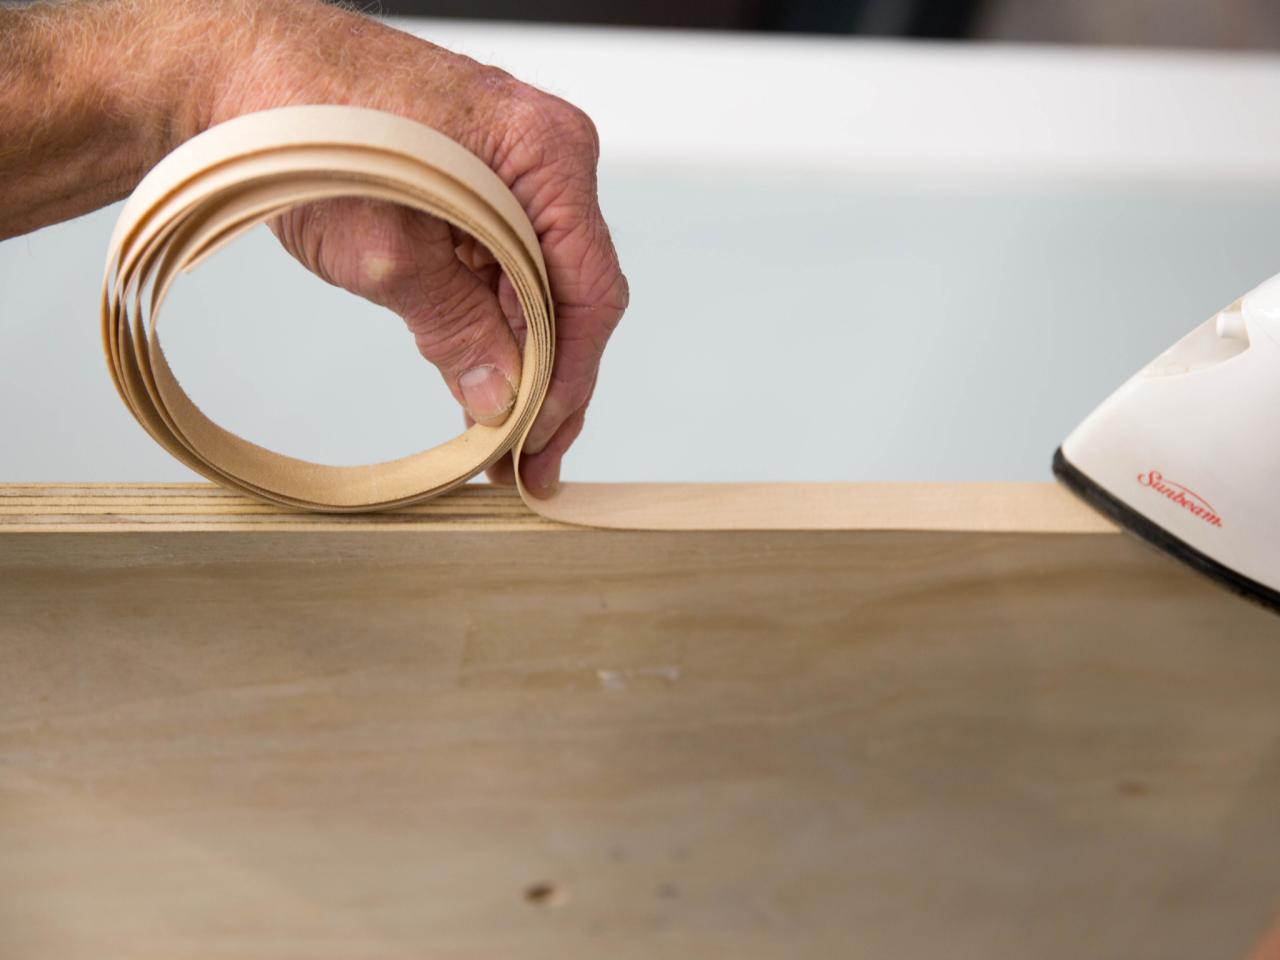
Use an iron to bond the veneer tape to all the plywood's visible edges for a finished look.
Step 11: Mount Cabinet to Wall
Wade Works Creative
Step 11
Find the studs in the wall, and screw through the back side of the header to attach the cabinet to the wall.
Step 12: Attach Hardware
Wade Works Creative
Step 12
Wade Works Creative
Step 12
Wade Works Creative
Step 12
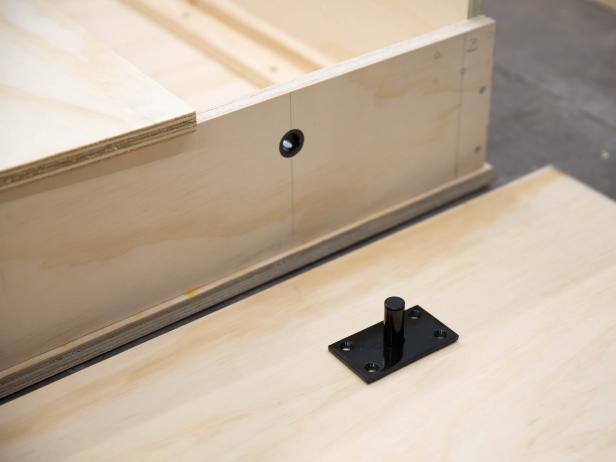
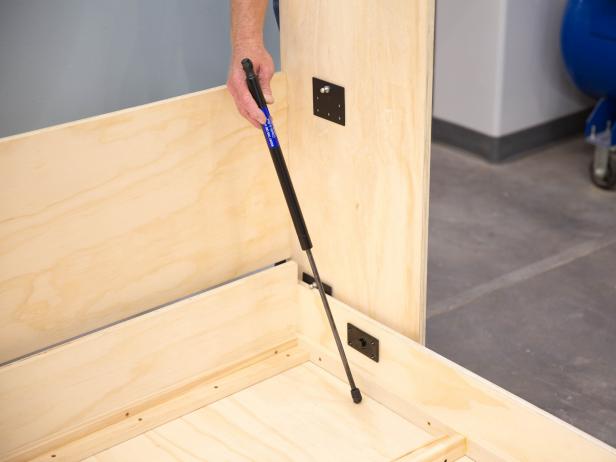
Follow the instructions provided with your hardware kit. Make sure all the mechanical parts fit and function (Images 1 and 2). Then, remove the hardware to make finishing the surfaces easier. Paint or stain in your desired finish, and reinstall hardware, including the leg support (I), according to kit instructions (Image 3).
Step 13: Attach Handles

Wade Works Creative
Step 13
Attach handles to the outside surface of the face panels at a comfortable height for you. Generally, 66 inches from the floor is a good height. We built a base version, but you can customize it with wooden trim, decorative hardware, chalk paint, etc. Make sure the decorative additions don't interfere with the lowering of the bed.
Step 14: Install Mattress Support Panels
Wade Works Creative
Step 14

Wade Works Creative
Step 14
Wade Works Creative
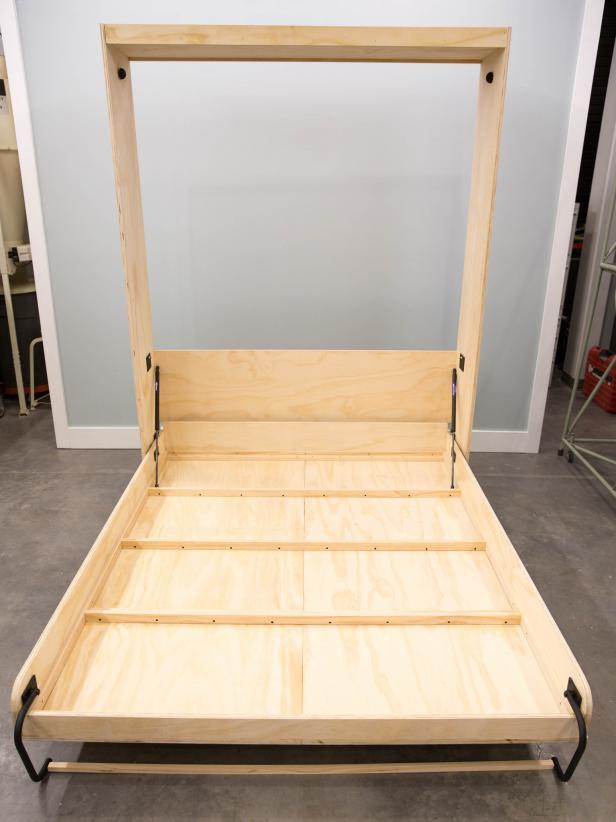
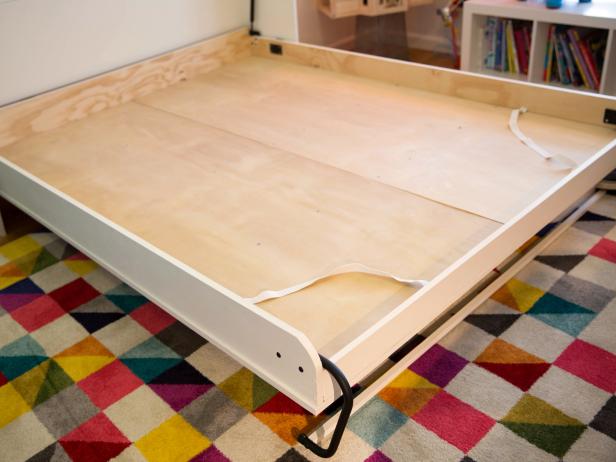
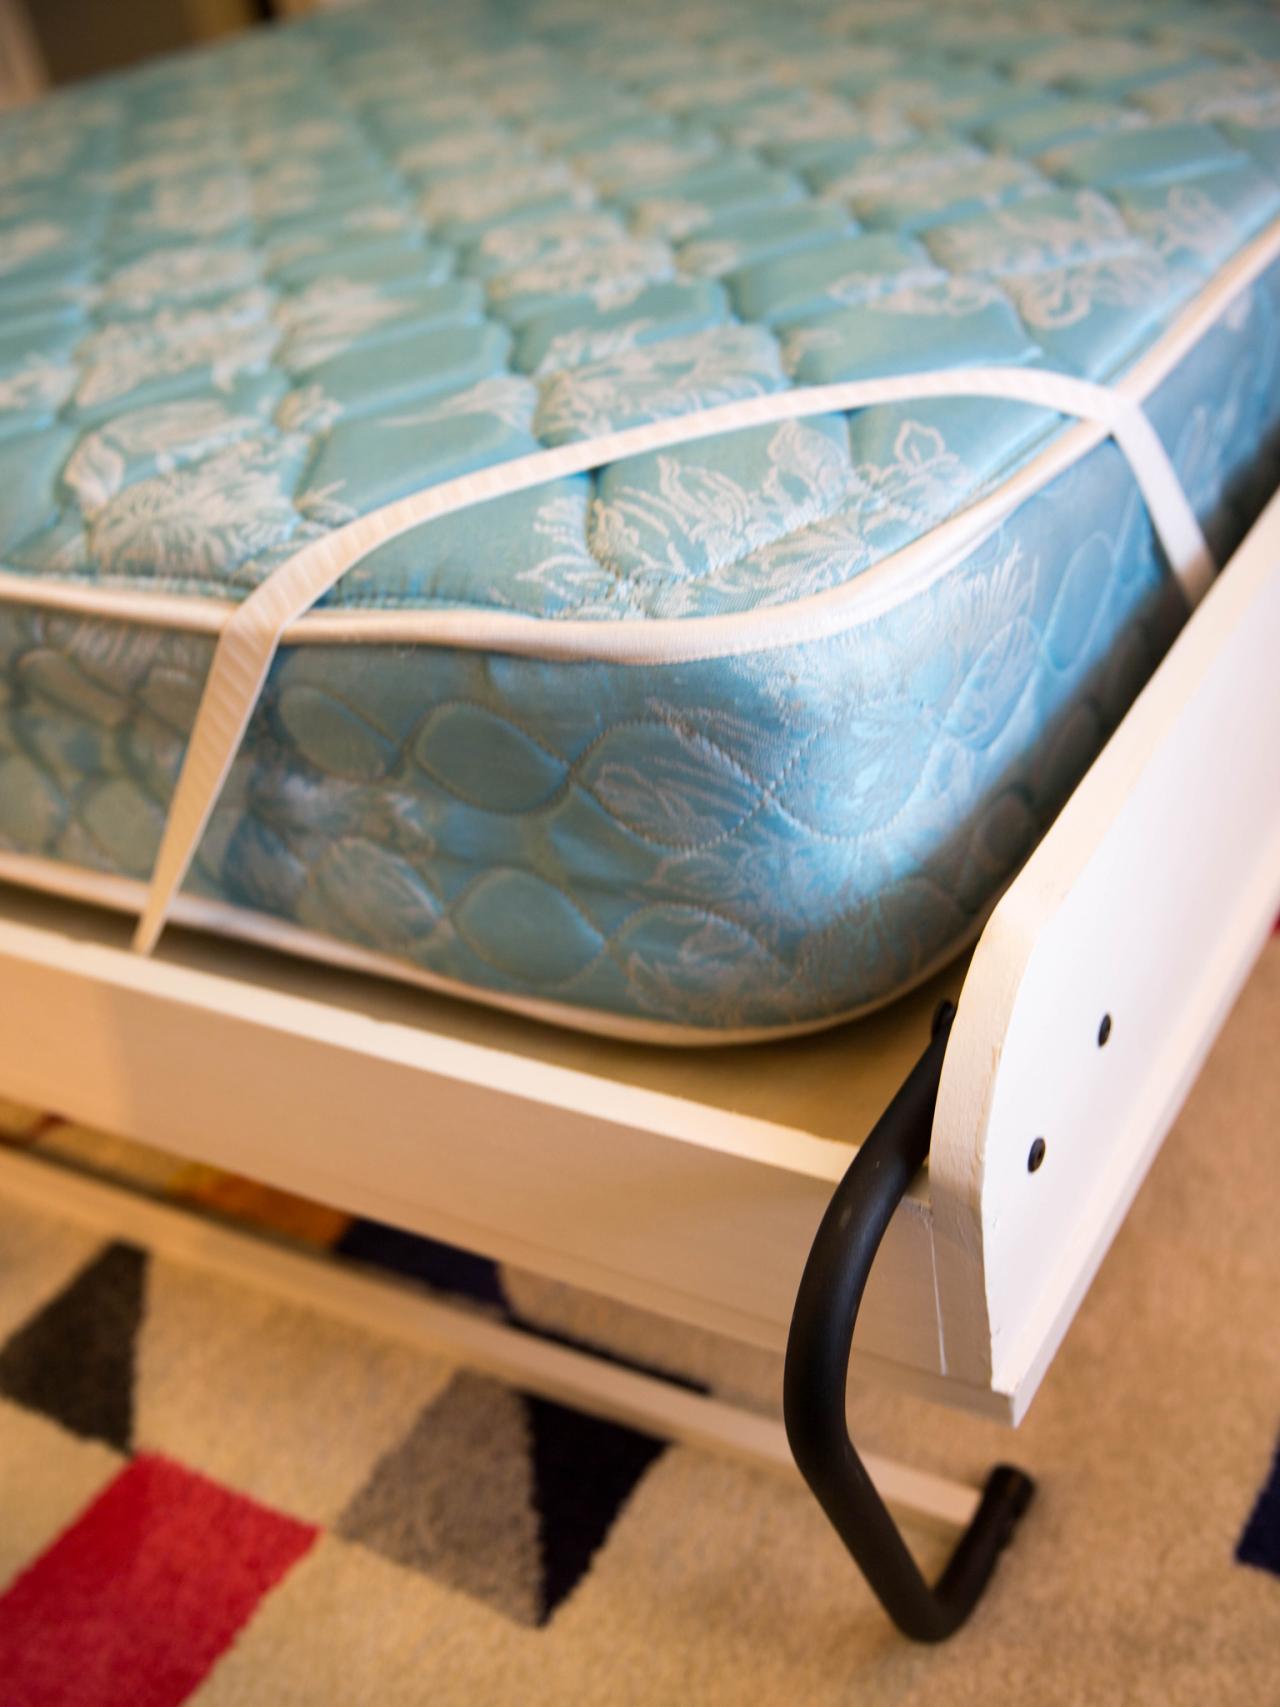
Install the mattress support panels (J) to the inside of the bed to cover the struts using 1 1/4-inch screws (Image 1). Next, attach the elastic bands (in the kit) into the struts and through the mattress supports using 1 1/4-inch screws (Image 2).


