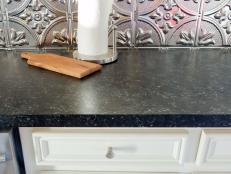
More in Kitchen
Fit the countertop sections in position, with the seam tightly closed. Place a strip of blue painter’s tape directly over the seam.
With a pencil, make two to three reference marks on the tape perpendicular to (across) the seam. Use a carpenter’s square as a guide. Use a utility knife to score the tape on the seam.
Pull the touching countertop sections about 3/4" apart. Each section will have half of the blue tape strip closely abutting the seam edge. Mix the epoxy and catalyst according to the manufacturer’s directions.
Use a disposable wood shim to butter the inside edges of both countertop sections with the epoxy.
Push the countertop sections back into place. Use your reference marks to line up the sections exactly as they were when you started.
Drag a flat, edged tool such as a utility knife blade over the tape to “squeegee” the epoxy into the seam. Repeat the process until you are sure there are no voids or air pockets. The epoxy should fill the entire seam level with the tape.
After the epoxy dries thoroughly, peel off the tape.
Finish the completed joint by carefully scraping and sanding away any tape residue and the excess epoxy.
Advertisement
All fields are required.
Signing in

Please enter your email address and we will send your password
E-mail Address
Your password has been sent and should arrive in your mailbox very soon.
Sign up with DIY Network to share tips with other do-it-yourselfers and comment and ask questions on projects.
It's free and easy.