The Best Places to Buy Wallpaper Online
Shop our go-to online wallpaper sources for every style and budget.

Bid adieu to the days of lackluster eggshell and semi-satin halls and invite texture, color and pattern into your home with decadent papered walls. Wallpaper and coverings instantly elevate a space with layered dimension and personal flair that outshines paint any day. Yes, wallpaper has a reputation with certain generations, but don’t let your mother-in-law’s horror stories scare you away. Wallpaper has evolved with the times and comes in a variety of user-friendly applications and removal styles that make beautifying your home a breeze. Ready to find the paper of your dreams but not sure where to start? Shop our go-to online retailers for every style, life stage or budget down below.
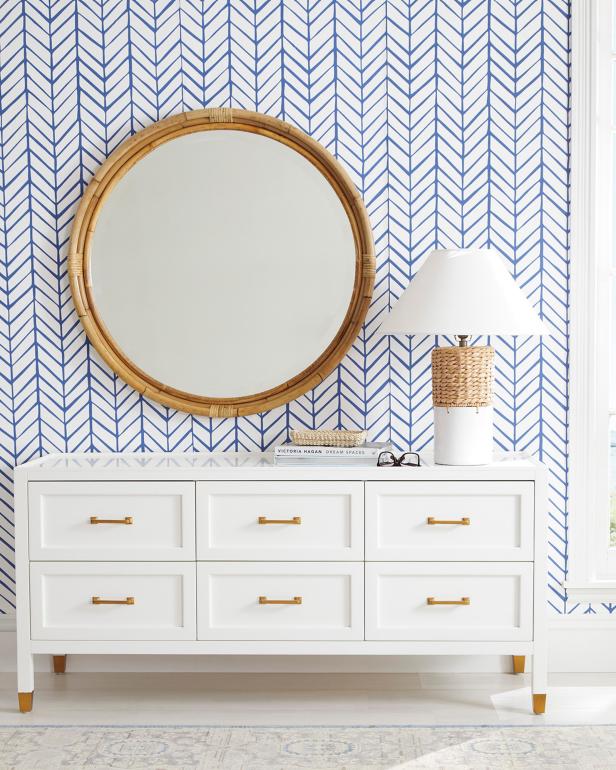
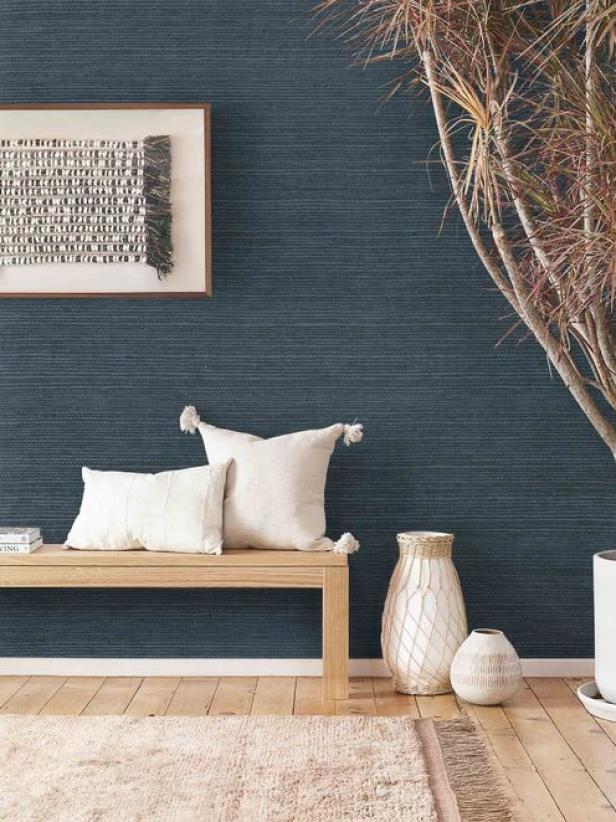
Cloak your walls in enduring coastal appeal with wallpaper from Serena & Lily. The luxurious retailer offers a dreamy wallpaper collection including blue-and-white motifs, timeless nautical prints and textural grasscloth coverings.
Bring your bohemian dreams to fruition with wallpaper from Lulu and Georgia. The brand oozes effortless cool and offers a diverse collection of drool-worthy wallcoverings to suit any space in your house. You’ll find saturated grasscloth coverings along with modern graphics, illustrated murals and whimsical woodland wallpapers for your little one.

Find yourself inspired by grand-millennial interiors? Consider Ballard Designs your go-to online retailer for sourcing transitional wallpaper. Ballard offers a lively mix of preppy prints, reimagined chinoiserie and kicky coastal motifs to dress every wall in your house.

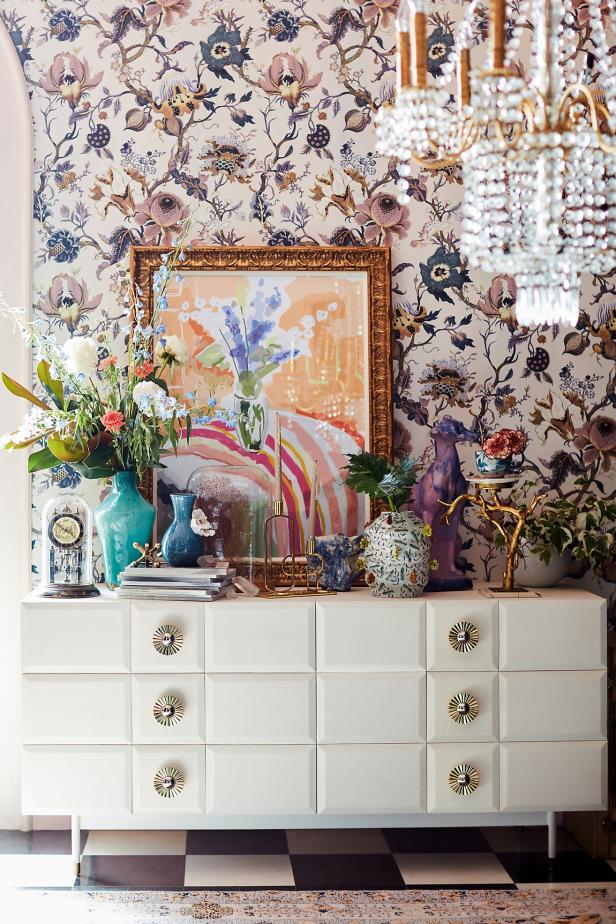
Dial up the drama with ornate and diverse wallpaper stylings from Anthropologie. You’ll find a curated mix of timeless and trendy offerings including baroque florals, black-and-white graphics, opulent palm prints and all-seeing eyes. Not prepared to paste all four walls? Sometimes less is more. Create a focal point with one of Anthropologie’s celebrated murals on one wall instead.
Treat your walls to the same divine coverings used by your favorite interior designer. Perigold offers the crème-de-la-crème wallpapers from noteworthy brands including Schumacher, The House of Scalamandre, Cole & Son, Ralph Lauren Home, York Wallcoverings and Annie Selke. Shop iconic prints and eye-catching patterns like the celebrated Schumacher Zanzibar Trellis paper pictured above.

Wrap your walls in dimension with Wayfair’s textural wallpaper offerings. Scroll through Wayfair’s selection of satin, embossed, distressed, gloss, glitter, shimmer and flocked wallpapers to bring interest and distinction to any design. Snag the embossed beadboard paper (pictured above) to finish out your hall bath, mudroom, kids’ room or laundry space.

Achieve a designer look on a budget with this limited-edition peel-and-stick wallpaper from The Inside. This budget-friendly wallpaper boasts the iconic cerulean frida motif. Snag a few rolls to make a statement in your rental or add flash to the back of your bookcase.

Give your college apartment or dorm room a facelift with trendy, quirky and eclectic wallpaper finds from Urban Outfitters. UO offers a vast and vibrant removable wallpaper collection with timely patterns, graphic illustrations and reimagined floral motifs. Expect to find fruits, astrology and animal prints aplenty.

Give your tot’s bedroom a makeover with the incomparably adorable wallpapers from Pottery Barn Kids. PBK offers a darling array of wallpapers with whimsical prints and patterns your little one will love. Expect to find starry decals, watercolor rainbows, geometric motifs and animated illustrations that will transition from their toddler years into childhood with ease.
Extend your Target obsession beyond the aisle and shop online to snag some of the top peel-and-stick wallpaper designs on the market. Explore statement-making wallpapers from your favorite in-house brands like Opalhouse, Threshold and Project 62, or shop from other noteworthy brands like Graham and Brown, Tempaper and Deny Designs.