


How to Make a Custom Dining Chair Slipcover

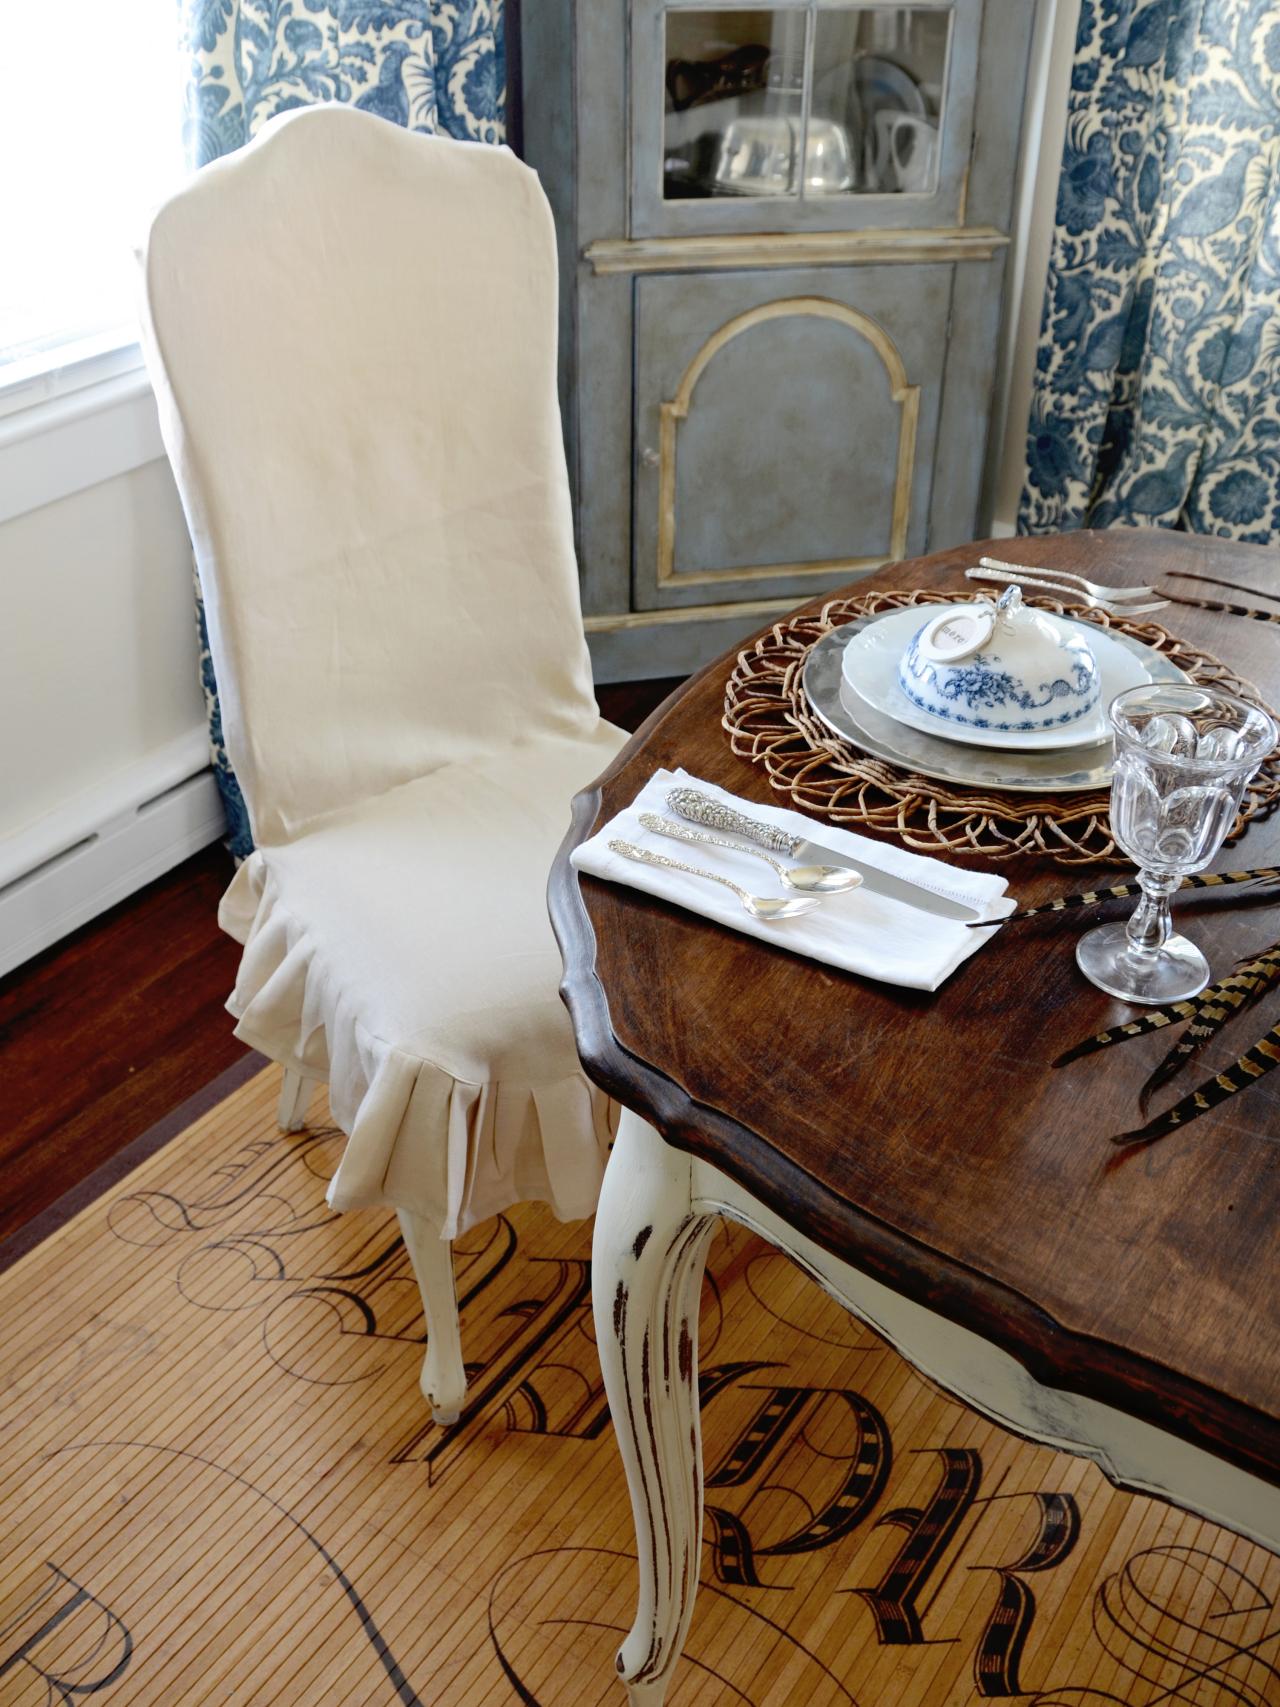
White Slipcovered Chair in Country Dining Room
Slipcovers are a great way to disguise mismatched seating or give dated chairs a quick update. This dining room chair is covered in a white linen slipcover with a flirty ruffled skirt, adding a touch of feminine elegance to this dining room.

Materials Needed:
- approximately 2-1/2 yards of 54" wide linen per chair
- coordinating all-purpose cotton thread
- sharp scissors
- pins
- sewing machine
- clear quilting ruler
- pencil
- iron and ironing board
Prep Then Cut Fabric
Prewash fabric and iron if necessary. Drape fabric over chair and use sharp scissors to cut a piece for the seat and both sides of chair back. Be sure to leave several inches of overhang when cutting these pieces, so there is plenty of fabric to work with.

Prep Then Cut Fabric for Slipcovers
Prewash fabric and iron if necessary. Drape fabric over chair and use sharp scissors to cut a piece for the seat and both sides of chair back. Be sure to leave several inches of overhang when cutting these pieces, so there is plenty of fabric to work with.
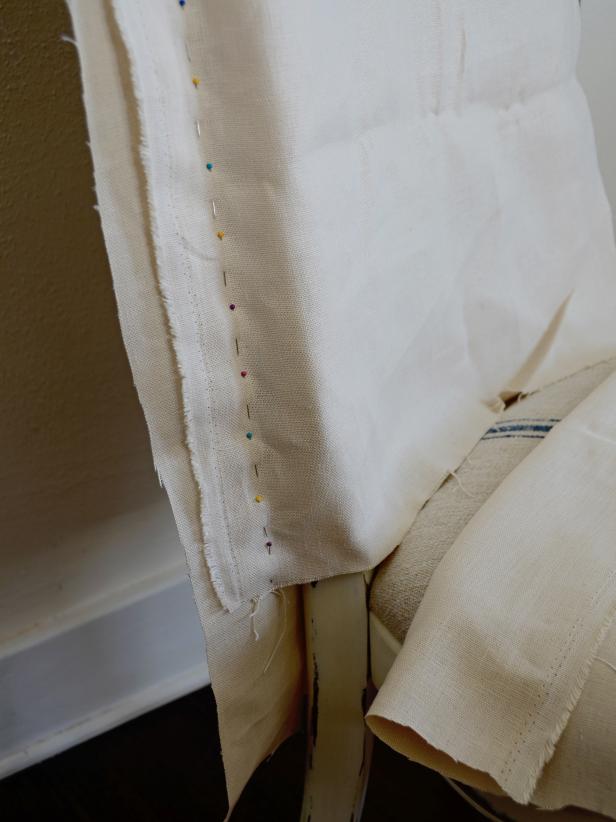
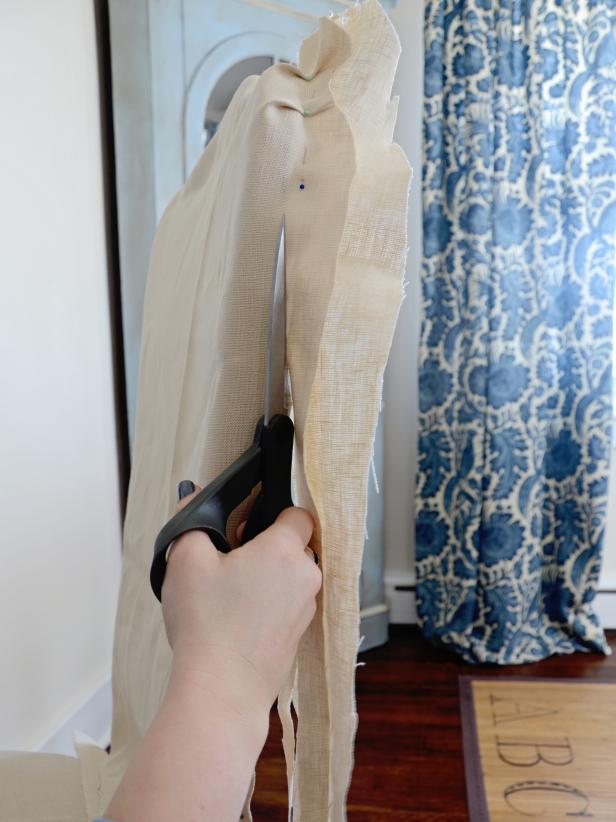
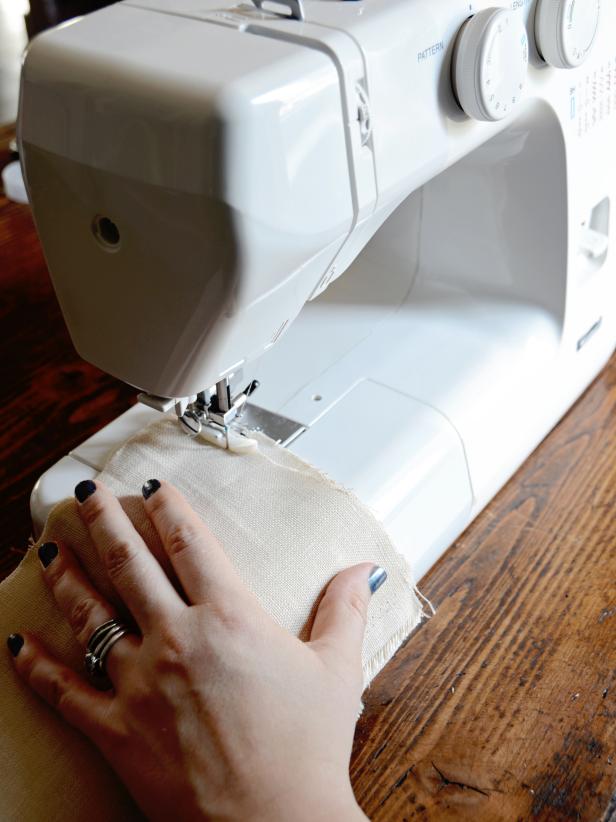
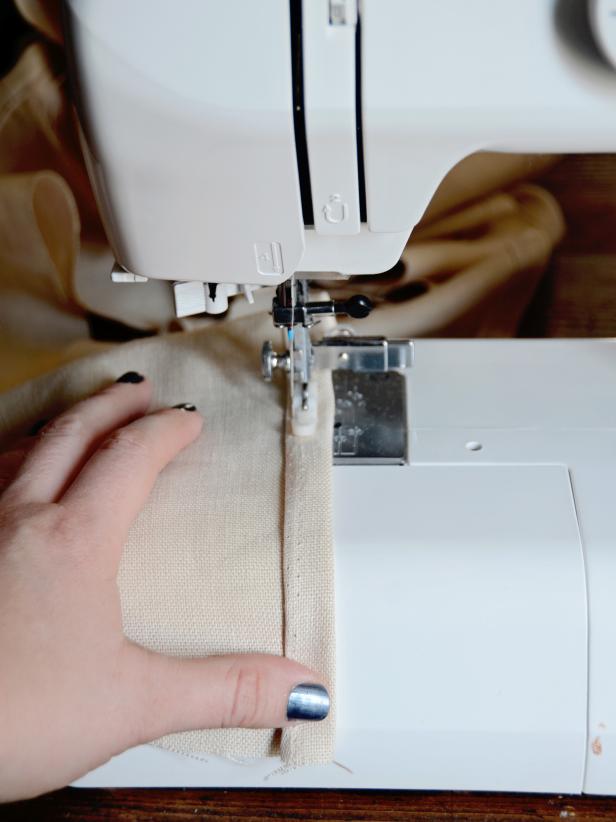
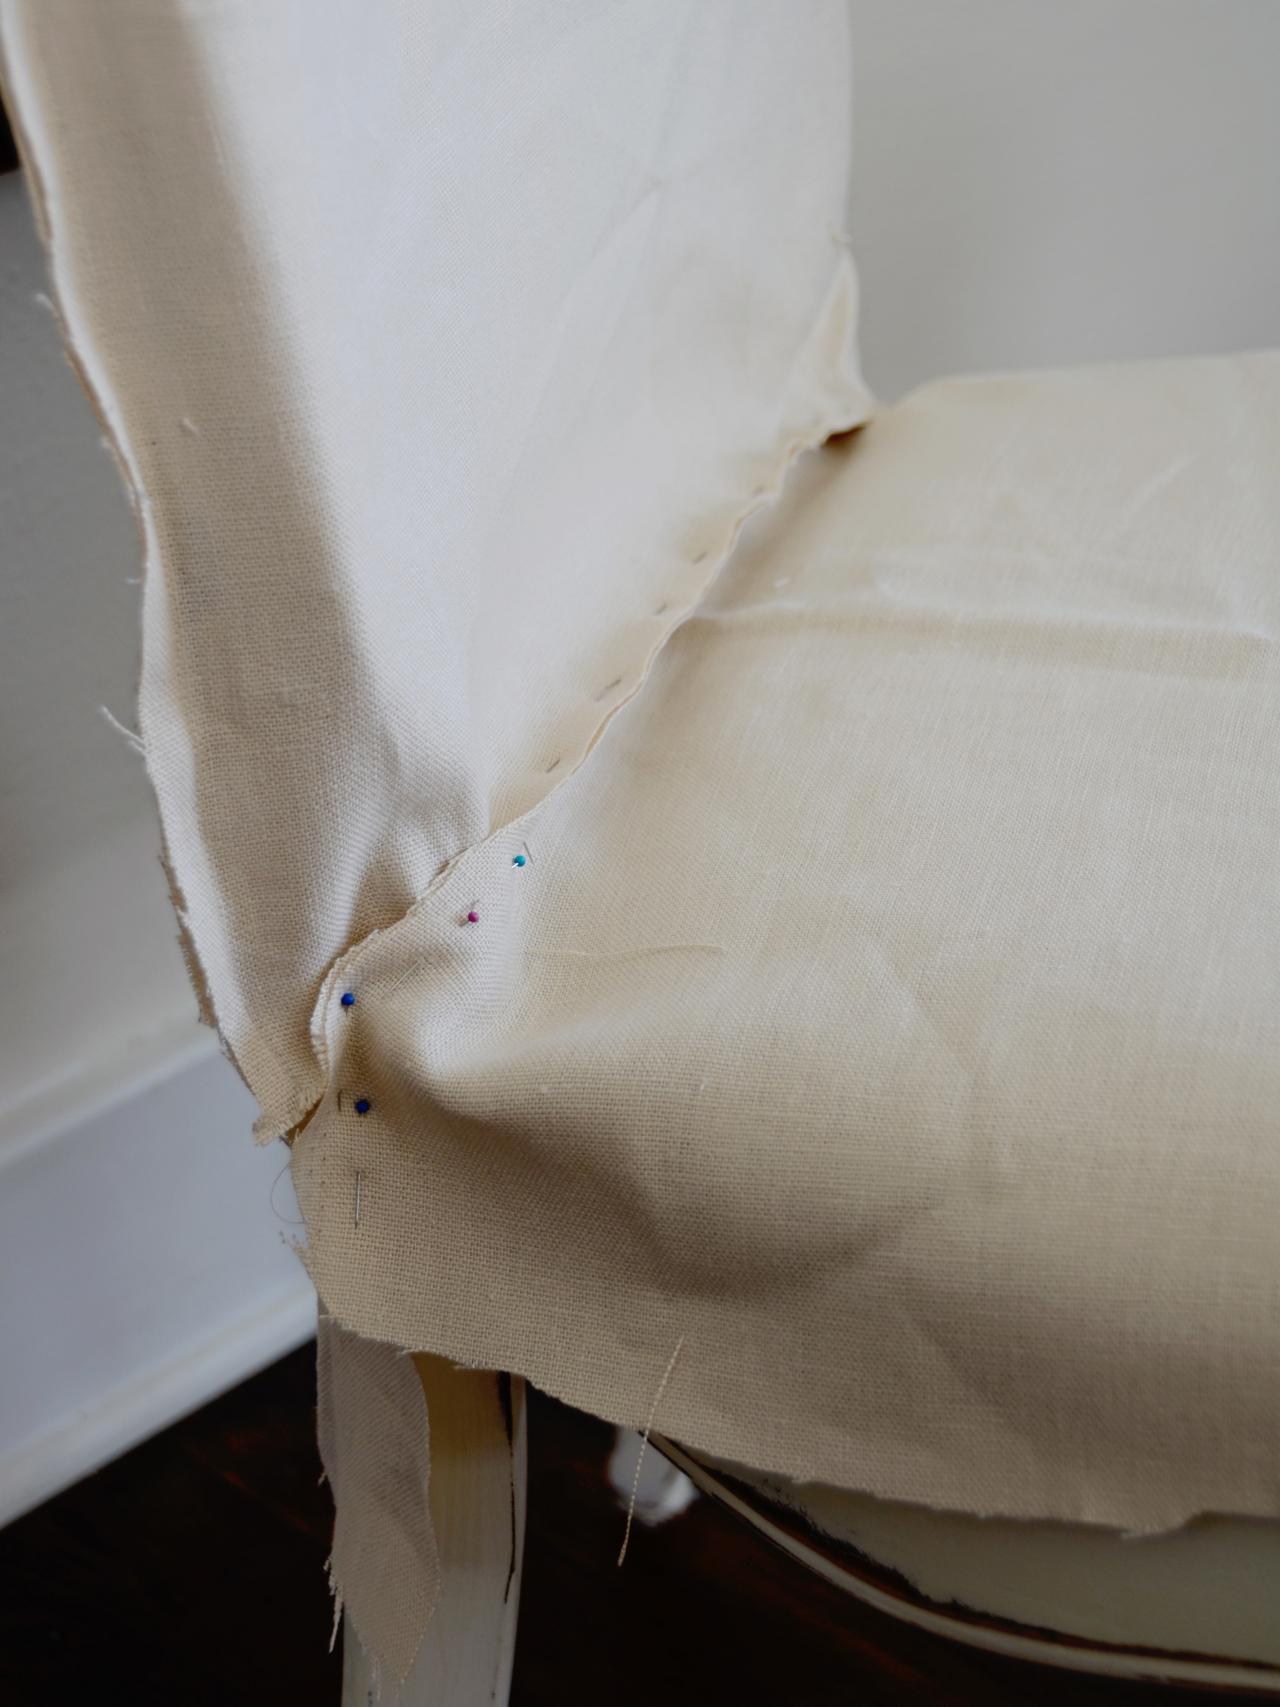
Pin Back of Chair
A slipcover is assembled or "pin fitted" inside out. If using a fabric with a clear right side, make sure right side is facing in toward the chair. Starting from the top of the chair back, pin front and back pieces together. Pin along the back line of the chair. It's best to pin the entire top, then alternate pinning a few inches down each side to prevent gaping in the back (Image 1). Put a couple of pleats where the chair back curves (Image 2). Once pinned, make sure fabric lays smooth and is fitted but not tight (Image 3). It should slide off the chair back with little resistance. Cut off excess fabric with sharp scissors (Image 4). Remove from chair and sew along pin line. Remove pins and return slipcover to chair (still inside out).
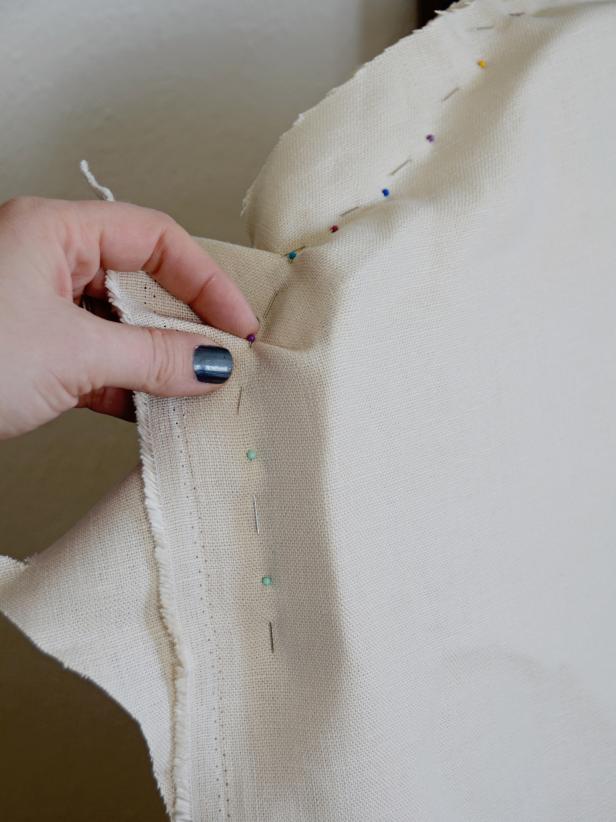

Pin Fabric to Fit Chair
A slipcover is assembled or "pin fitted" inside out. If using a fabric with a clear right side, make sure right side is facing in toward the chair. Starting from the top of the chair back, pin front and back pieces together. Pin along the back line of the chair. It's best to pin the entire top, then alternate pinning a few inches down each side to prevent gaping in the back.
Removing Extra Fabric From Custom Linen Dining Chair Slipcover
Cut off excess fabric with sharp scissors. Remove from chair and sew along pin line. Remove pins and return slipcover to chair (still inside out).
Pin Seat
Position fabric piece over chair seat, and line it up with the fabric on the chair back. Pinch right sides of fabric together where they meet and pin in place. Raw edges should face the same direction and be visible. Cut any excess fabric. Remove slipcover, sew along pin line and remove pins.

Fitted Linen Slipcover for Dining Chair
Position fabric piece over chair seat, and line it up with the fabric on the chair back. Pinch right sides of fabric together where they meet and pin in place. Raw edges should face the same direction and be visible. Cut any excess fabric. Remove slipcover, sew along pin line and remove pins.
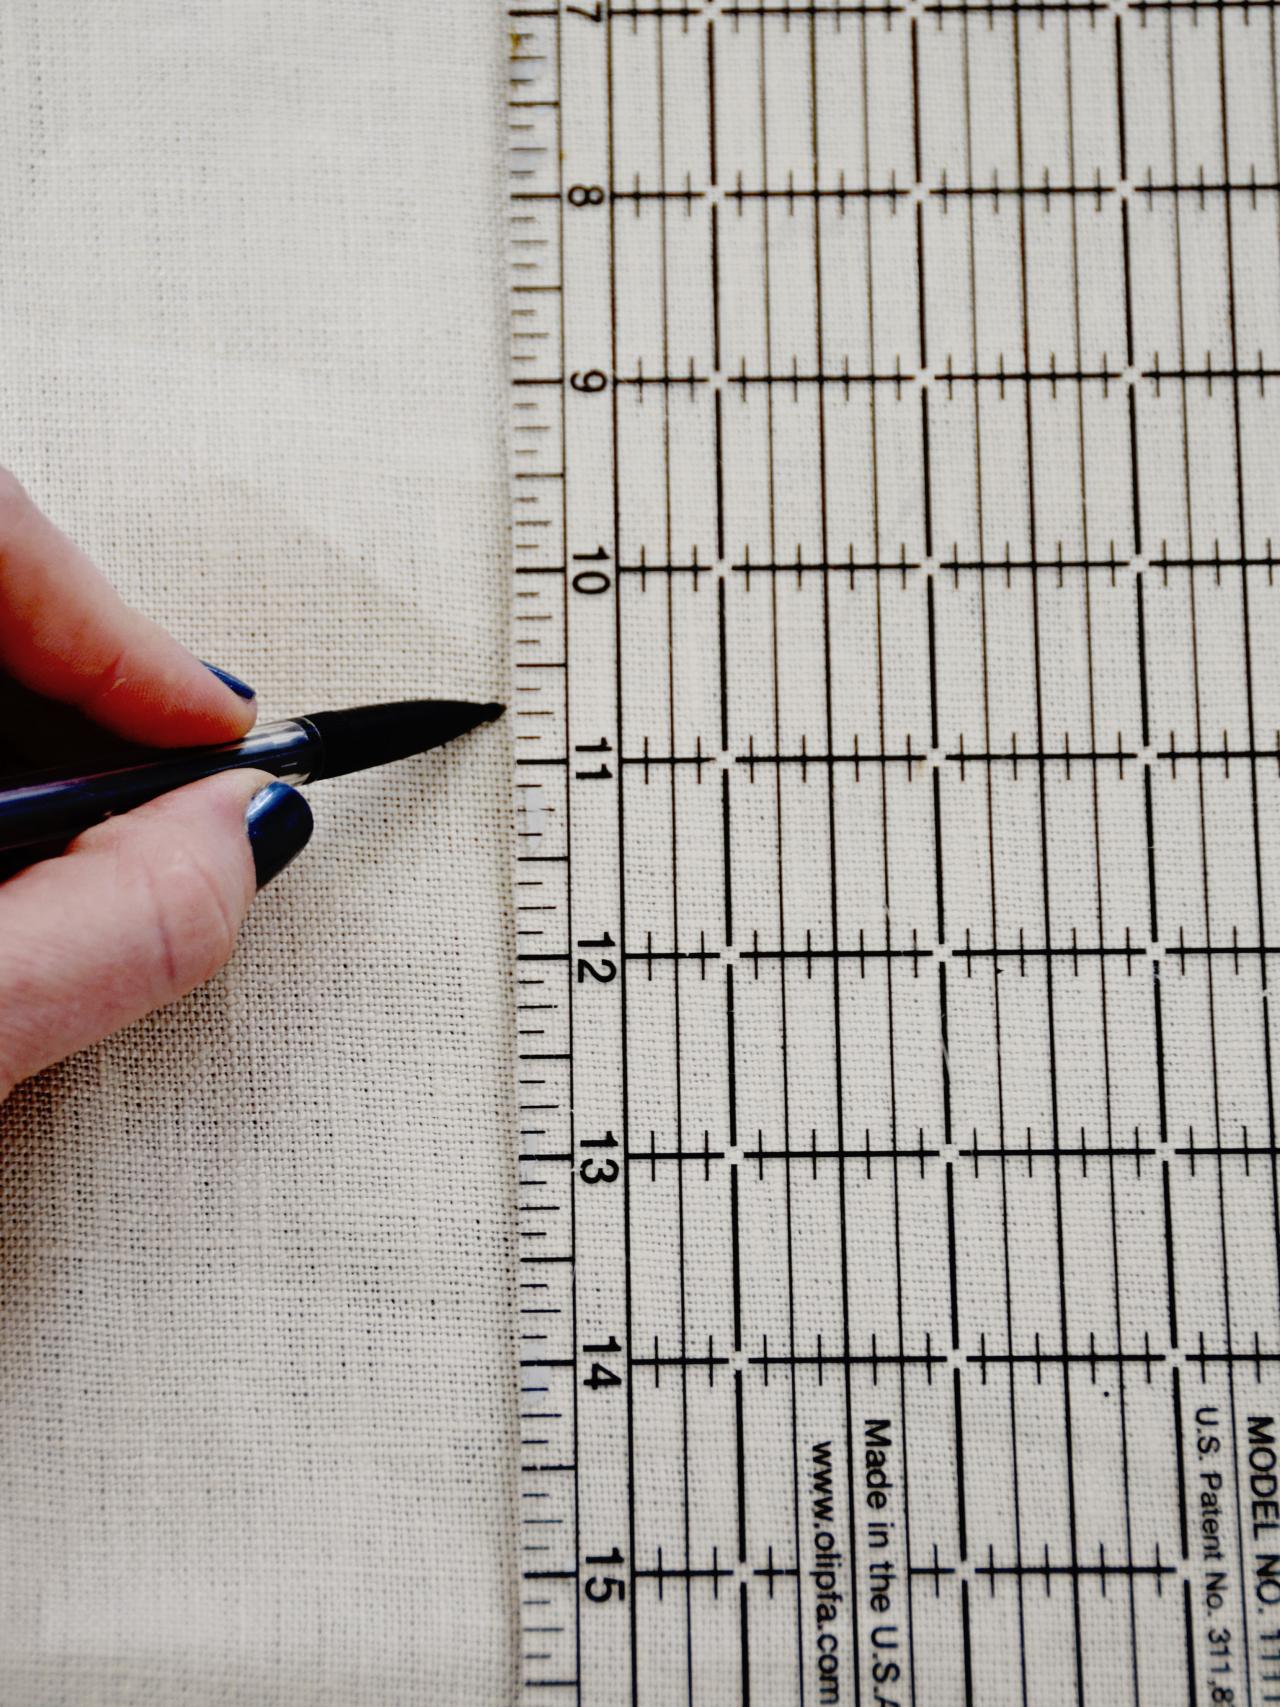
Make Skirt
Use a clear quilting ruler to mark off 6-inch-wide strips of fabric (Image 1). When sewn together, they should be about twice the length of the chair seat perimeter. Place right sides of two fabric strips together and sew end-to-end (Image 2). Make sure raw edges are facing the same direction. Repeat with a third strip if necessary. Once there is one long strip of fabric, hem one edge by folding it under 1/4-inch (Image 3) then again 1/2-inch and sew along fold. Tip: To make the hem super sharp, iron the folds and pin down prior to sewing.
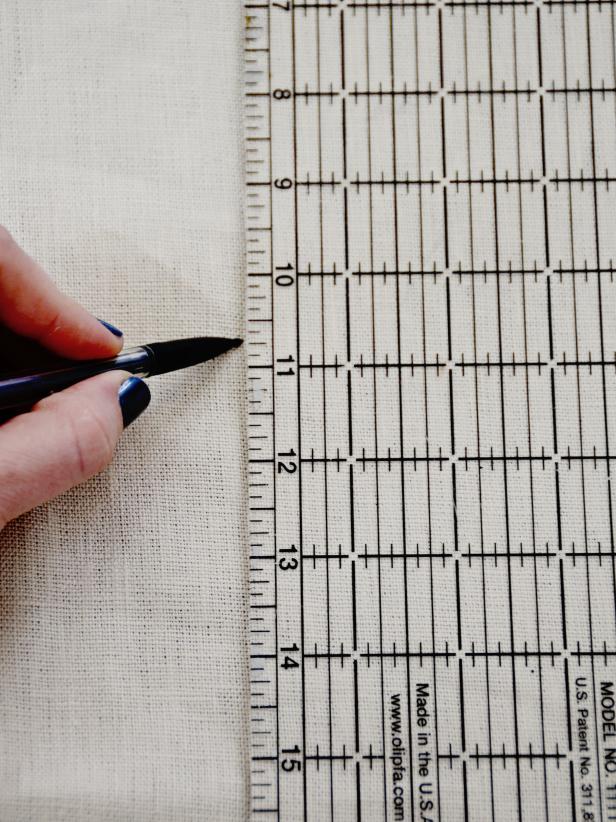
Measuring the Fabric for Ruffled Linen Skirt
Use a clear quilting ruler to mark off 6-inch-wide strips of fabric. When sewn together, they should be about twice the length of the chair seat perimeter.
Making the Skirt for Chair Slipcover
Once there is one long strip of fabric, hem one edge by folding it under 1/4-inch then again 1/2-inch and sew along fold. Tip: To make the hem super sharp, iron the folds and pin down prior to sewing.
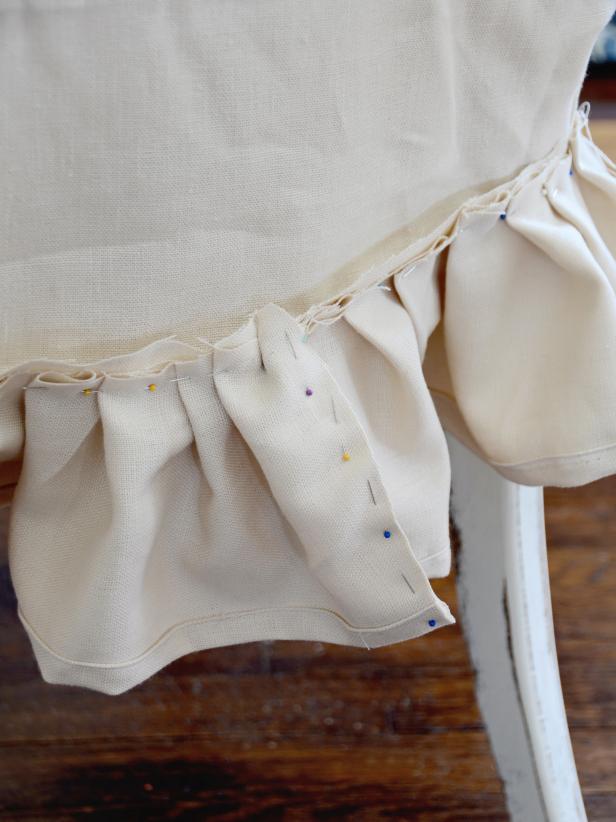
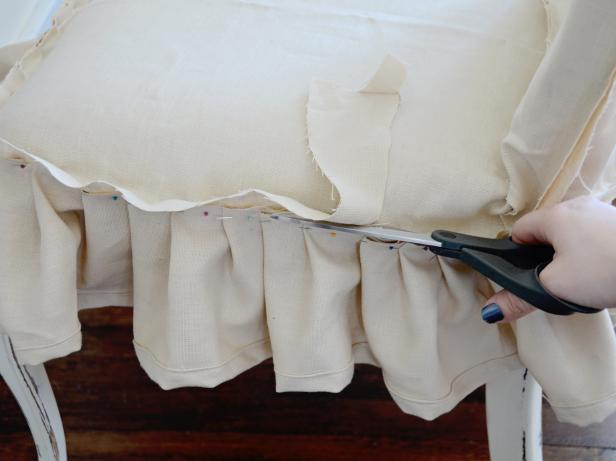
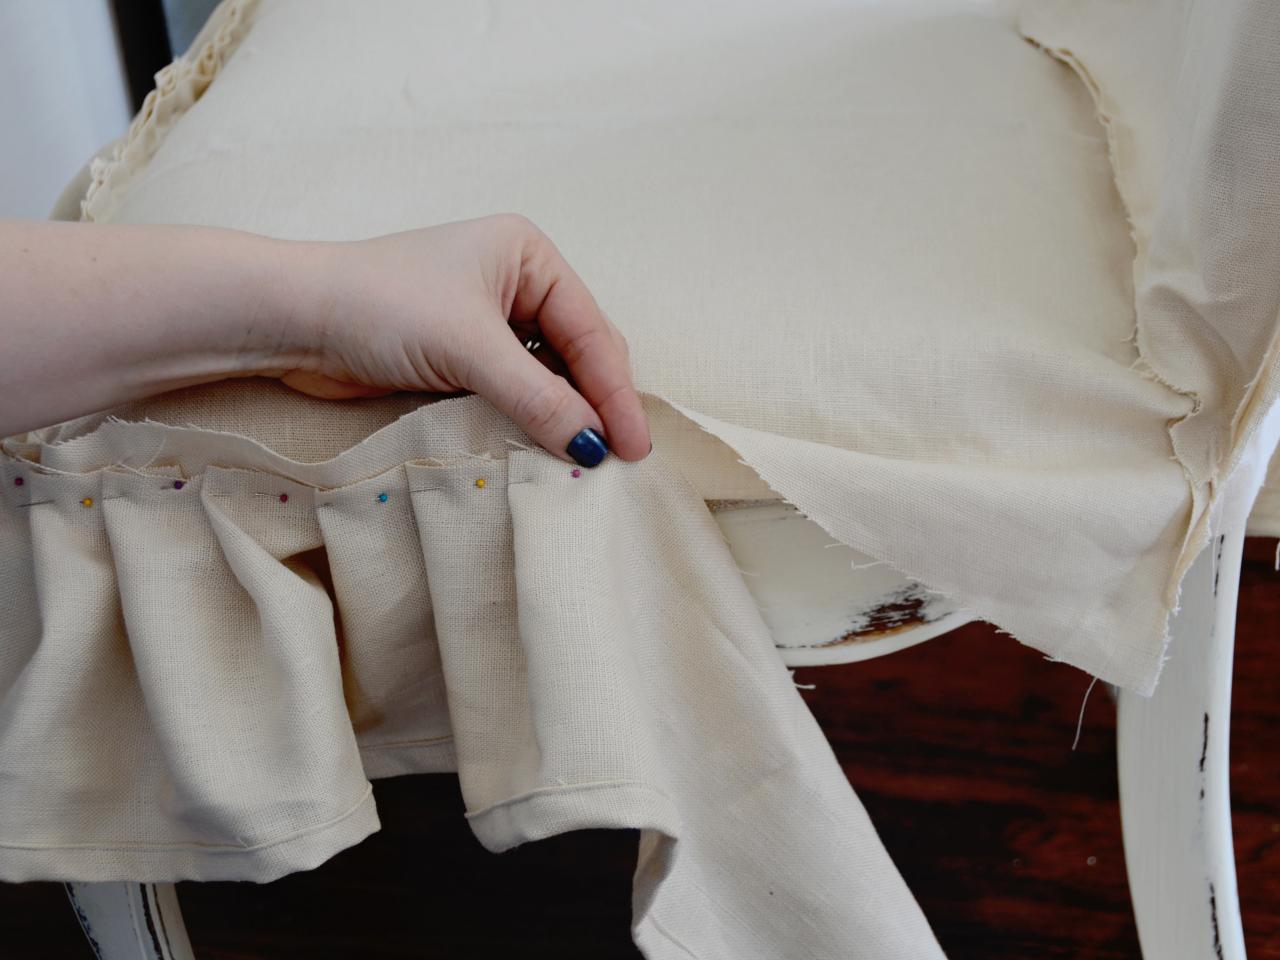
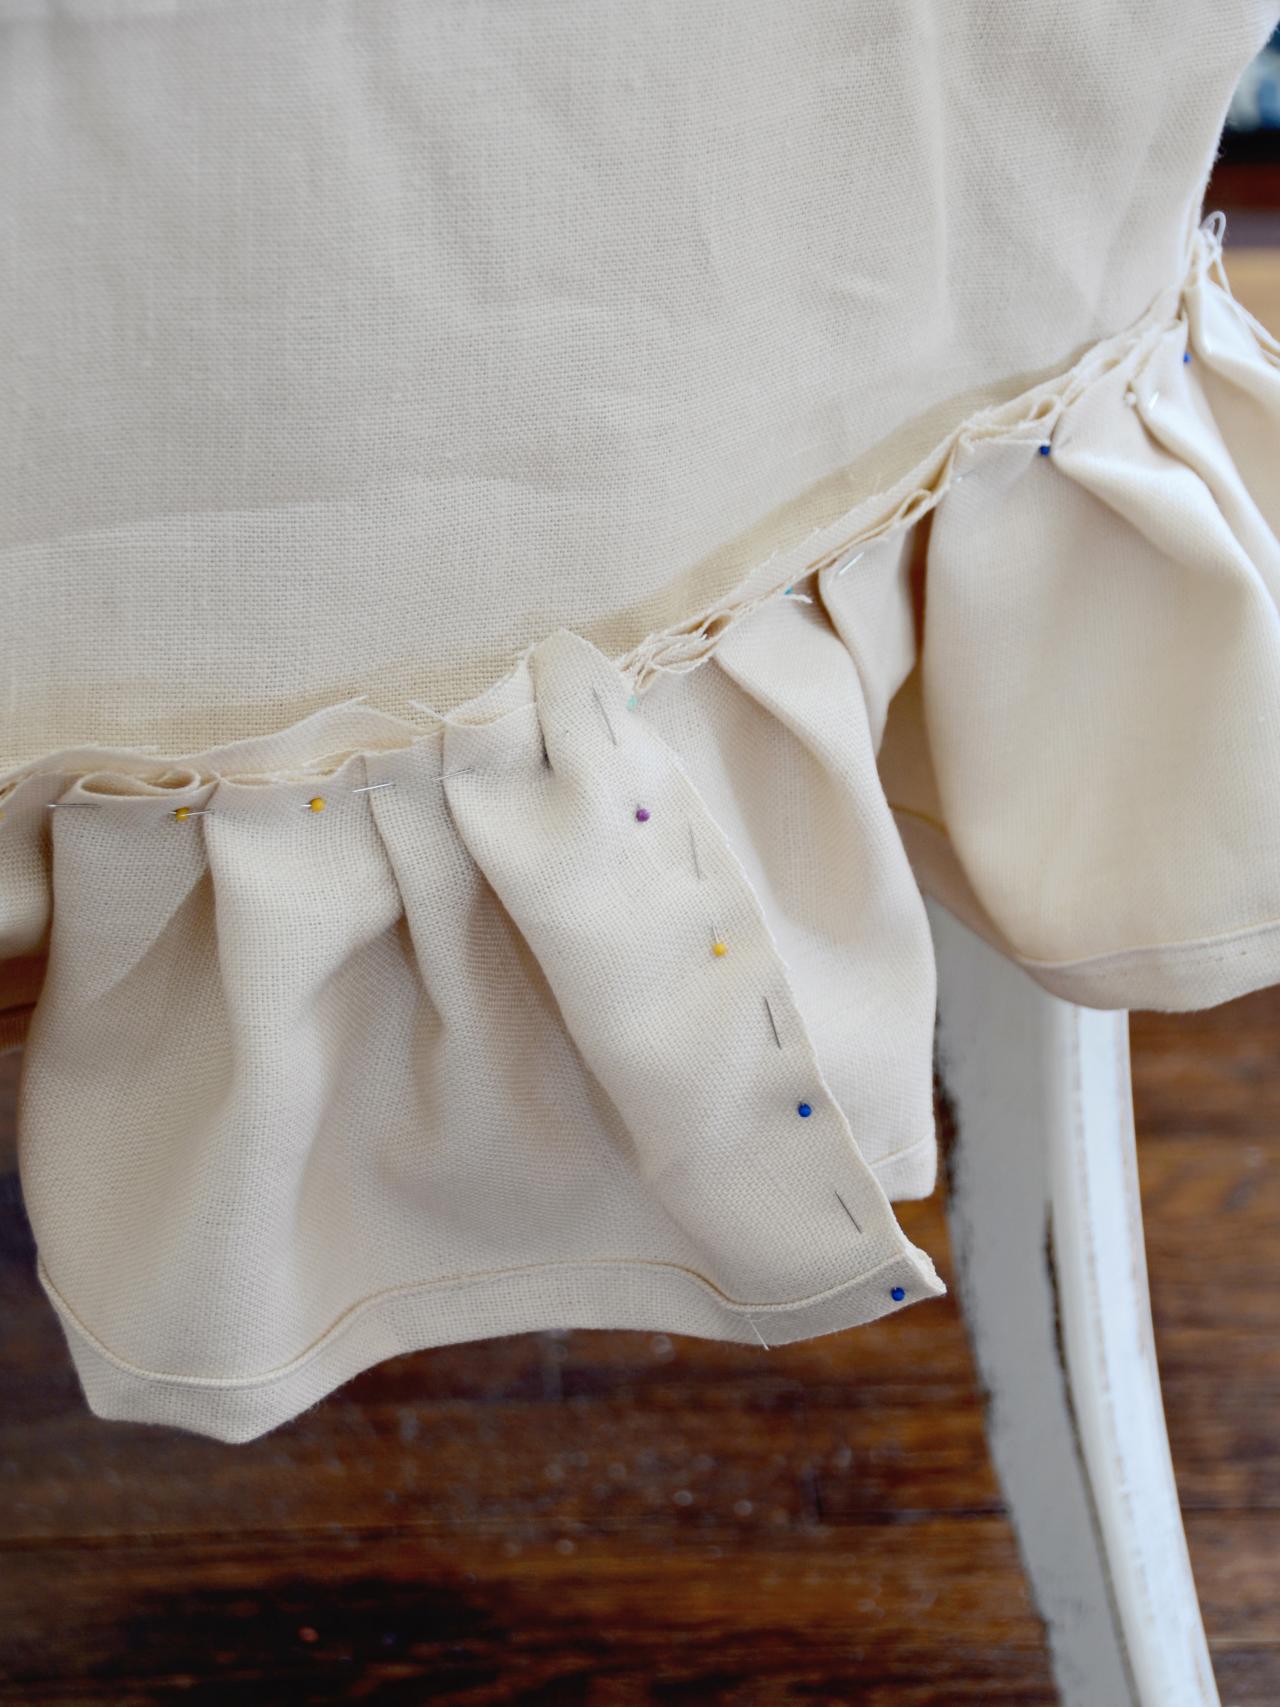
Attach Ruffled Skirt
Return slipcover to chair, still positioned inside out. Start at center chair front and pin center point of the skirt top to the slipcover seat. Make sure raw edges are pointing in the same direction. Pinch skirt fabric with fingers to pleat and pin in place, following the lines of the chair seat. Continue around the skirt, pleating and pinning (Image 1). Pin edges together where skirt ends meet (Image 2). Trim excess fabric and sew skirt and seam (Image 3). Remove pins then iron slipcover, especially the skirt, so it lies flat. Wash and iron as needed. Tip: Add piping along skirt and chair back or ribbon ties or buttons along the back to further customize your slipcover.
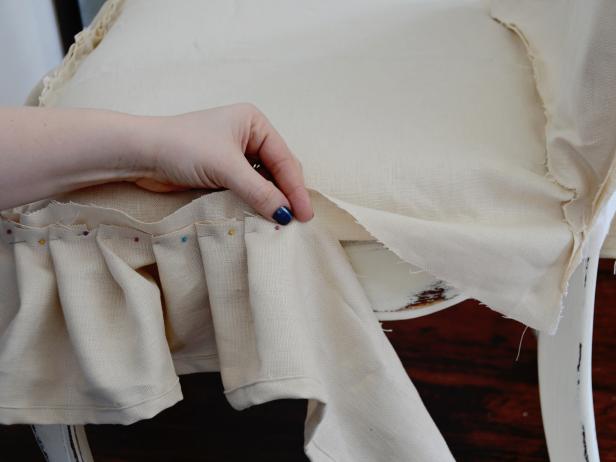
Pinning Ruffled Skirt to Chair Slipcover
Return slipcover to chair, still positioned inside out. Start at center chair front and pin center point of the skirt top to the slipcover seat. Make sure raw edges are pointing in the same direction. Pinch skirt fabric with fingers to pleat and pin in place, following the lines of the chair seat. Continue around the skirt, pleating and pinning.
Adding Ruffled Skirt to Chair Slipcover
Trim excess fabric and sew skirt and seam. Remove pins then iron slipcover, especially the skirt, so it lies flat. Wash and iron as needed. Tip: Add piping along skirt and chair back or ribbon ties or buttons along the back to further customize your slipcover.


