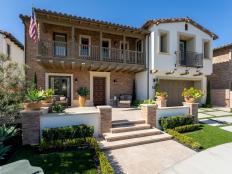
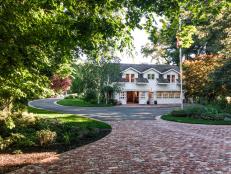
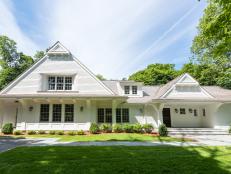
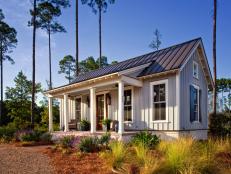
DIY Network

All Projects

TV Projects

    What Do You Want To Work On?

      What Activity Do You Want To Do?

        0

        Available Projects

        Get Results

        How to Frame the Roof of a Portico

        Adding a portico with a roof is a great addition to the front of a home.

        More in Outdoors

        Step 1: Create a Template

        Decide on a pitch for the roof that will look good. Once you know the pitch you want, you can mark where the birds-mouth will be on the rafters. This will be the template for the rafters.

        create template for rafters

        Step 2: Replace the House Wrap

        Caulk the gaps in the sheathing and replace the house wrap.

        Step 3: Cut the First Set of Rafters

        Cut the first set of rafters with the angle measurements. Rafters should be cut 3/4" short to leave room for the ridge board. Notch out a birds-mouth where the rafter will sit on the base.

        Step 4: Create a Ridge Rafter

        For the ridge rafter, first measure for the joist hanger. Line up a rafter against the house and then measure 7/8" from the center line to make room for 1-3/4" micro-lam ridge board. Hang your joist hanger and check to make sure you are level.

        create a ridge rafter

        Step 5: Attach a Temporary Brace

        Put a temporary brace on the center of the front rim board to hold the ridge rafter on the gable end. Center it on the front rim board.

        Step 6: Install the Ridge Board

        Install the ridge board at the temporary bracing. Start at the cleat end and nail the rafter boards right onto the exposed sheathing using 16-penny nails.

        install ridge board at temporary bracing

        Step 7: Mark the Frame

        Measure out the spacing for the rest of the rafters. Make the mark on the base of the frame and the ridge board.

        Step 8: Nail the Rafters in Place

        The "common rafters" are cut the same as the first rafters. Toe-nail them in place. Finish nailing in the gable end rafters.

        toe nail rafter in place

        Step 9: Create a Hole

        Square the box by measuring from corner to corner. It should be an equal measurement in both directions. Attach the bottom of the rafters to the rim by toe-nailing them, using big old pole-barn nails. This will create a bigger hole.

        attach bottom of rafters to rim

        Step 10: Attach the Fly Rafters

        Attach the sub-fascia boards on both sides and then attach your fly rafters -- these are the same as the rest of your rafters but without the birds-mouth.

        Step 11: Attach the Fascia Boards

        Put on the outer fascia boards (the 1-by pine that was pre-primed). You can tack up a couple and then scribe and cut out some outer fascia boards for the front peak of the portico and put them up.

        Was this project helpful?

        Don't forget: Read comments and leave your own

        Advertisement

        Projects

        COMMENT ON THIS PROJECT


        Sign in

        All fields are required.

        E-mail Address:

        Password:

        Remember me on this computer

        Signing in

        Please enter your email address and we will send your password

        E-mail Address

        Your password has been sent and should arrive in your mailbox very soon.

        Not a member?

        Sign up with DIY Network to share tips with other do-it-yourselfers and comment and ask questions on projects.

        It's free and easy.