


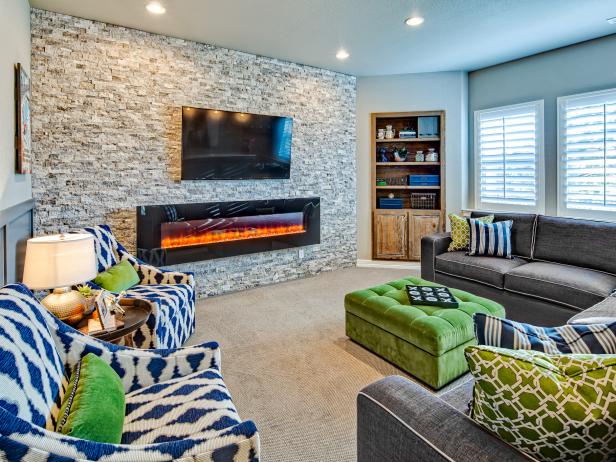
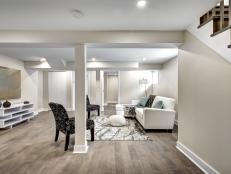
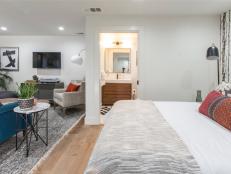
75 Beautiful Finished Basement Ideas and Designs 82 Photos
Don't let that unfinished basement just sit there. Get ideas and inspiration to turn your space into a beautiful, finished basement that's your favorite part of the house.
More Basement Ideas

The Best Products on Amazon to Organize Your Garage, Shed and Basement Jun 29, 2023
We rounded up the best organizers to tackle the worst parts of the home to clean.
How Much Value Does a Finished Basement Add? Jan 31, 2024
A finished basement is a home improvement project you get to enjoy twice: for the added living space, and again at resale when you …

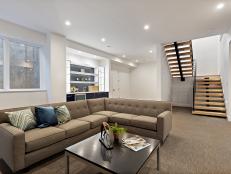
How to Maximize Space in Your Basement or Lower Level 11 Photos
Designer Amy Leferink shares her tips on how to use every square inch of your basement space to create a multi-functional lower le …

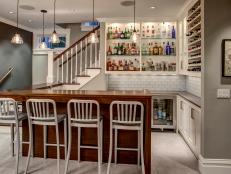
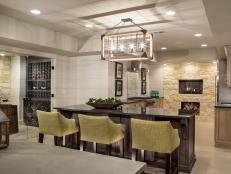
80+ Bar Design Ideas for Your Home 86 Photos
Dreaming of an in-home bar? Find inspiration in these home bars ideal for kitchens, basements, bonus rooms, lounges and more.
Basement Lighting Options and Ideas Jan 26, 2021
Whether you’re planning a home theater with indirect mood lighting or a craft space with bright work lights, we've got answers to …
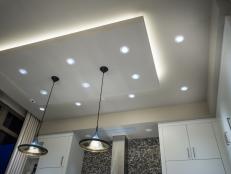
How to Replace Recessed Lighting Jan 15, 2021
Recessed or 'can' lights can be used as task lighting, accent lighting or to illuminate an entire room. They're easy to install in …
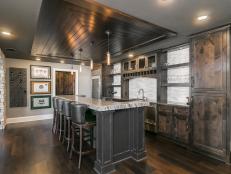
2024: Basement Kitchen Design Ideas and Construction Costs Mar 15, 2024
Building a kitchen in a basement takes some special planning and considerations. Here’s what you need to know and what you might e …

How Much Does It Cost to Finish a Basement? Feb 16, 2024
By increasing living space without adding square footage, a basement remodel can be a budget-friendly option if a home extension i …
2024: The Best Types of Basement Flooring and How Much They Cost Mar 15, 2024
Explore today's choices for finished basement floors including luxury vinyl tile, hardwood, carpet, porcelain tile, specially dyed …

How to Build Finished Walls in a Basement Feb 1, 2024
Looking to finish your basement and turn it into extra living space? Learn the steps and costs needed to turn cinderblock walls in …

How to Prevent a Flooded Basement and How Much It Will Cost to Fix Mar 27, 2024
Waterproofing a basement can prevent structural damage, improve air quality, lower utility bills and make a finished basement a po …
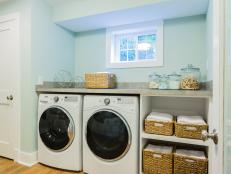
20 Tips for Creating a Stylish Basement Laundry Room 20 Photos
Doing laundry in the basement doesn’t have to be a dark and dank experience. We’ve got easy ways to make your subterranean laundry …

20 Basement Paint Color Ideas 20 Photos
Brighten, heighten and highlight your basement walls with these flattering paint colors.
19 Clever Storage Ideas for Your Basement 19 Photos
Whether you use your basement as a playroom, home office, media room or crafting space, we've got smart ways for keeping it all ne …

38 Amazing Basement Bars for Small or Large Spaces 38 Photos
Get design ideas for turning your basement into the perfect place to serve up a cocktail, or two.

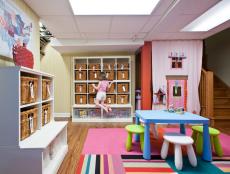
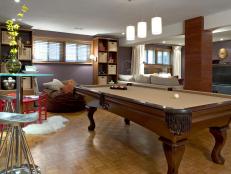
Fun, Family-Approved Basement Designs 16 Photos
Turn your forgotten basement into a lively family room for over-the-top movie nights, pool tournaments and game nights.
Basements and Bonus Rooms From Our Favorite TV Shows 15 Photos
Looking to give your basement or other under-utilized space in your home a makeover but don't know where to start? Take a look at …

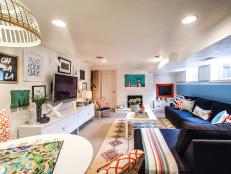
Before and After: A Bright and Colorful Basement Makeover Sep 1, 2020
This basement used to just need an update — then a tropical storm struck. HGTV Magazine shows you a remarkable comeback.
82 Beautiful Finished Basement Ideas and Designs 82 Photos
Don't let that unfinished basement just sit there. Get ideas and inspiration to turn your space into a beautiful, finished basemen …
Man Cave Ideas: 50+ Fresh Looks to Inspire Your Space 54 Photos
Forget about dark and dingy, these sleek home theaters and handsome billiards rooms shed a whole new light on the way guys (and ga …

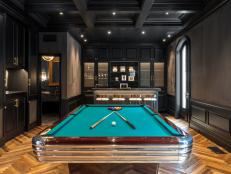
Basement Game Room Pictures From HGTV Smart Home 2020 28 Photos
Emerald-colored walls are combined with modern black-and-white furnishings to create a striking and fun game room in the basement …

Brother Vs. Brother, San Francisco: Slam Dunk Bonus Spaces 34 Photos
As round 4 of the Scott Brothers’ San Francisco showdown begins, Jonathan and Drew both find themselves trying to make something o …
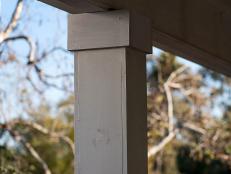
How to Re-Cover Metal Columns in Wood Jun 7, 2022
If the columns in your home are all function and no style, then dress them up. Learn how to install a simple wood wrap to turn bor …
Family Room Built on LEGO Oct 1, 2018
Jeff Pelletier designed a dream basement that features a bar for the adults and a devoted LEGO play area and storage for the kids, …
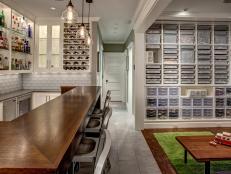
Transitional Basement Features Custom Wall Storage Unit 11 Photos
A transitional basement perfect for entertaining received a full renovation that added a custom sliding barn-door system with cubb …
10 Basement Remodels and Renovations by Candice Olson 20 Photos
Renovate your underused basement with decorating ideas from Divine Design's Candice Olson.

Maximum Value Big Ticket Upgrade Projects: Basement Build Out Jan 16, 2020
Get tips and advice for your basement build out or remodeling project that will also increase your home’s value.

Maximum Home Value Storage Projects: Basement Jan 16, 2020
Your basement is packed with design potential. Here's how to turn it into truly useful—and valuable—space.

How to Install a Basement Vapor Barrier Jan 16, 2020
A vapor barrier is useful for keeping moisture from making its way into a basement, keeping mold and water damage at bay. Get the …
A Dazzling Basement Update With Open Floor Plan 6 Photos
This impressive remodel by Pineapple House Interior Design shows just how much potential an unfinished basement can have. See how …


