


.jpg.rend.hgtvcom.196.196.suffix/1738870169237.jpeg)


50 Beautiful Backyard Landscaping Ideas from HGTV Shows and Pros 50 Photos
Need backyard design inspiration? Try these backyard landscaping ideas for a sloped, shady or boring backyard.
More Gardening Ideas

24 Can't-Kill Flowers for Beginners 25 Photos
Try these easy-to-grow flowers for your garden and watch your beginner's thumb turn green.


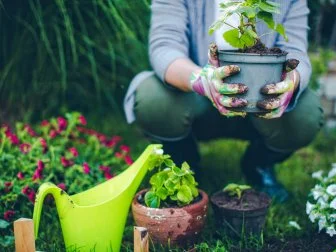
Get to Know Our Gardening Editors
With years of hands-on experience, HGTV garden editors and writers publish and update stories year-round, bringing you the latest on gardening trends, how-to-grow info, product picks and more.
Our Favorite Outdoor Buys


.jpg.rend.hgtvcom.231.174.85.suffix/1738869678995.webp)


Spring Gardening

25 Bulbs to Plant in Spring for Summer and Fall Blooms 25 Photos
Create an oasis of color, form and fragrance with these spring-planted bulbs that bloom in summer and fall.

Spring Gardening Checklist 17 Photos
Tackle spring garden prep with confidence. Use our tips to craft your own checklist.
What's New in Gardens
Browse our latest gardening tips, design ideas and product picks.


Garden Tours
Need design inspiration? Explore these incredible gardens from around the world.


Cozy Cottage Gardens
More in Garden Styles and TypesThis charming garden style is known for its colorful, carefree plantings.


Small-Space Gardens
No backyard? No problem! Learn how to start a garden on a small deck or patio.


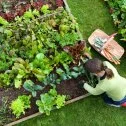
Vegetable Garden Ideas
More in Vegetable GardeningWe've got the advice you need to start growing your own veggies, herbs and fruit.


Shop Gardening Products

30 Gifts for Garden-Loving, Outdoorsy Dads May 15, 2025
Dad doesn't need another tie. Find the perfect garden-centric gift that he'll want to use year-round.
I've Tested Dozens of Weeding Tools — Here's Why the Fiskars Stand-Up Weed Puller Is the One I Keep Using May 13, 2025
I also bought one for my mom, so she doesn't have to kneel or bend to weed her garden.

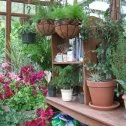
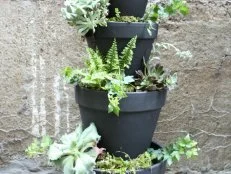
58 Best Pots and Planters for Every Style and Budget May 13, 2025
Perk up your porch, patio or indoor space no matter your budget with these stylish planters and flowerpots.
6 Best Hose Reels of 2025, Tested and Reviewed May 9, 2025
Organize and transport your garden hose with our top picks for hose reel carts, boxes, wall mounts and more.

Our Gardening Expert Tried the Back-to-the-Roots Mushroom Grow Kits; Here's Her Honest Opinion May 6, 2025
“You don't need a green thumb or gardening experience. This easy-to-use kit has everything you need to grow a crop of mushrooms."

28 Front Porch Planters for Every Style and Budget May 5, 2025
Add easy curb appeal and a warm, welcoming vibe with one of these pots, boxes or planters.

25 Budget-Friendly Buys You Didn't Know You Needed for Your Garden Apr 18, 2025
Add a special touch to your outdoor space with these beautiful and functional finds under $50.

28 Best Gardening Gifts for Mom Apr 7, 2025
From lavish to low-cost, surprise Mom with one of these garden-inspired gift picks.
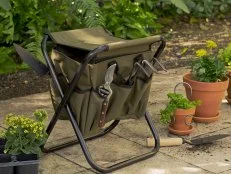
8 Best Gardening Seats and Kneelers of 2025, Tested and Reviewed Mar 27, 2025
Get a little extra support in the garden with these comfortable seats, stools and kneelers, making it easier to plant, weed and do …

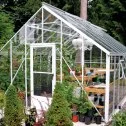
11 Backyard Greenhouses You Can Buy Online Mar 28, 2025
Extend your growing season and protect your plants from the elements with these backyard greenhouses.

The Best Garden Tools and Essentials, According to HGTV Gardening Experts Mar 21, 2025
When you're ready to grow, use our green-thumb shopping list to find great garden tools, gear and more, with top picks from season …
8 Best Garden Hoses of 2025, Tested and Reviewed Mar 20, 2025
Learn the basics of garden hoses, and choose the right one for your yard and garden with HGTV editors' top recommendations, from l …

63 Gift Ideas for Gardeners Mar 17, 2025
For those on your gift list with green thumbs, we've rounded up ideas that are sure to inspire some nature-loving activities.

We Tested the Rotoshovel and Here's Our Honest Opinion Mar 15, 2025
This rechargeable trowel with an auger makes planting annuals, perennials and bulbs quick and easy in many kinds of soil, includin …

Top-Rated Gardening Buys You Need Now, According to Amazon Shoppers Mar 12, 2025
These tried-and-true lawn and garden products are backed by thousands of positive customer reviews.

Our Favorite Trendy Gardening Gadgets + Gizmos Apr 23, 2025
Refresh your flowerbeds and manicure your lawn with the help of these hardworking garden tools from QVC.

Mill Food Recycler Review: This High-Tech Alternative to Composting Generates Less Mess in Less Time Feb 7, 2025
For an avid composter and gardener, it’s a promising new solution. But is it worth the high price?
8 Best Gardening Gloves of 2025, Tested and Reviewed Jan 9, 2025
We put top-rated gloves to the test in order to find the best options for planting, weeding and daily garden chores.

The Best Gifts for Plant Lovers Oct 14, 2024
You don’t need a green thumb to unearth the ultimate gift.
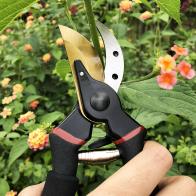
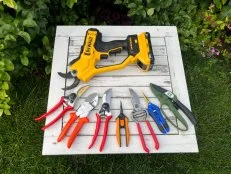
8 Best Pruning Shears of 2025, Tested and Reviewed Jan 8, 2025
Make every garden clean-up a breeze with the right pair of pruners.
5 Best Expandable Garden Hoses of 2025, Tested and Reviewed Jan 8, 2025
Check off all your yard to-dos and save major storage space with these lightweight expandable garden hoses.
8 Best Weeding Tools of 2025, Tested and Reviewed May 13, 2025
Conquer those pesky garden weeds once and for all with these top-rated removal tools.

The Best Sun Hats to Protect Your Face Jun 27, 2024
Keep your skin protected from the sun's harmful UV rays with a chic, hard-working sun hat. Shop these top-rated UPF 50+ finds for …
6 Best Hori Hori Knives of 2025, Tested and Reviewed Jan 8, 2025
One of these Hori Hori knives is about to be your next favorite gardening tool.
8 Best Watering Cans of 2025, Tested and Reviewed Jan 8, 2025
A good watering can is a must in the garden, and our top picks won't disappoint.

Our Honest Review of the AeroGarden 2.0 Feb 26, 2025
The future of farming is here, and it’s the size of a shoebox.
6 Best Garden Carts of 2025, Tested and Reviewed Jan 8, 2025
These wagons and carts will make your life easier, whether you need to tote around your tools on a low-key gardening day or transp …

The 10 Best Indoor Herb Garden Kits, According to a Master Gardener Jun 7, 2024
Snip fresh herbs right when you need them with one of these indoor herb garden kits to grow thyme, cilantro, basil, parsley and mo …

Shop Spring Gardening Essentials From Hilton Carter's New Plant Care Line at Target Apr 4, 2024
Hilton Carter is back with a new line at Target, launching a stylish collection of planters, garden tools, home decor, live housep …

10 Best Garden Starter Kits on Amazon Mar 12, 2024
Get your grow on with these easy-to-follow gardening kits for beginners.


.jpg.rend.hgtvcom.231.174.85.suffix/1738870169237.webp)