


36 Backyard Pergola and Gazebo Design Ideas 36 Photos
Add shade and style to your outdoor living space with one of these unique structures.
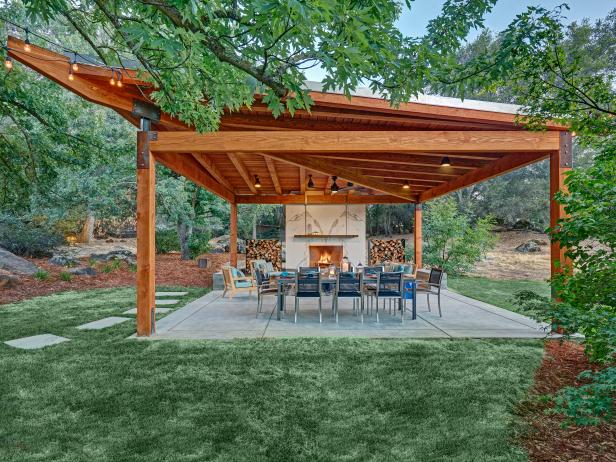
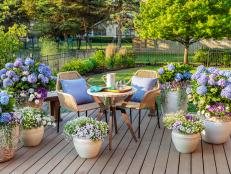
Dreamy Decks
More in Decks


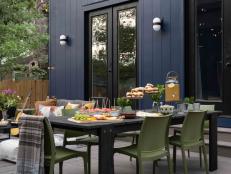


Patio Inspiration
More in Patios


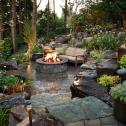
Fire Pit Ideas


Swimming Pools
More in Pools and Hot Tubs


Watch: Easy Outdoor Design Ideas

More DIY Outdoor Videos


What's New in Outdoor Spaces
33 Ways to Brighten Up Your Yard for Summer May 13, 2024
Give your outdoor space a happy update for the season with design ideas, colorful decor and tips from the HGTV stars.

42 Cute Doormats You Need for Summer May 8, 2024
Make a statement for the season ahead with these fun and fabulous doormats.

8 Best Stadium Chairs, Tested and Reviewed May 6, 2024
The best stadium chairs provide ample back support and cushioning for watching the home team for hours.

What is Electroculture Gardening, Does It Work and How to Try It Apr 29, 2024
Electroculture uses the power of atmospheric electricity to boost plant growth. It has a long history and many gardeners swear by …

Our Honest Review of the AeroGarden 2.0 Apr 26, 2024
The future of farming is here, and it’s the size of a shoebox.

6 Best Garden Carts of 2024, Tested and Reviewed Apr 26, 2024
These wagons and carts will make your life easier, whether you need to tote around your tools on a low-key gardening day or transp …
The Best Patio Chairs for Every Style and Budget Apr 21, 2024
These weather-resistant chairs are just what you need to transform your outdoor space into a summer oasis.

DIY Concrete Planters: A Step-by-Step Guide Apr 12, 2024
Learn to craft your own concrete planters with this tutorial from HGTV.

13 Best Adirondack Chairs for Every Style and Budget Apr 15, 2024
Because sunny afternoons are best enjoyed in an Adirondack chair.
105 Best Patio Furniture Buys for Every Style and Budget Apr 12, 2024
From Adirondack chairs to benches to gliders, refresh your space with our top picks for patio furniture seating so you can kick ba …
7 Best Smokeless Fire Pits of 2024, Tested and Reviewed May 7, 2024
Enjoy the inviting warmth of a campfire without the accompanying face full of smoke and watery eyes with one of these editor-appro …
Spruce Up Your Outdoor Space With These Bestselling Patio Buys on Amazon Apr 4, 2024
Discover which outdoor furniture sets, patio accessories and porch essentials Amazon customers are raving about this season.

5 Best Outdoor Mosquito Repellers of 2024, Tested and Reviewed Apr 4, 2024
Keep annoying bugs at bay all season long with these mosquito repellers we tested and loved.

No-Till Gardening Methods Apr 3, 2024
No-till gardening saves time, conserves water and reduces weeds. There are several methods including Hugelkultur, Ruth Stout, back …

49 Beautiful Outdoor Rugs for Every Style and Need Apr 3, 2024
Make your outdoor space an inviting place to lounge by adding a pretty and practical rug.

12 Best Outdoor Playsets for Toddlers and Kids Apr 2, 2024
Keep little ones busy and active with these backyard playsets for kids of all ages.
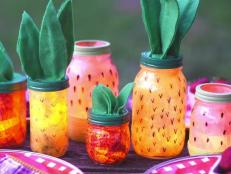
25 Budget-Friendly Buys You Didn't Know You Needed for Your Garden Apr 1, 2024
Add a special touch to your outdoor space with these beautiful and functional finds under $50.
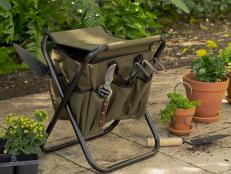
8 Best Gardening Seats and Kneelers of 2024, Tested and Reviewed Apr 24, 2024
Get a little extra support in the garden with these comfortable seats, stools and kneelers, making it easier to plant, weed and do …

Would You Buy a Pink House? Mar 26, 2024
No need for rose-colored glasses when you’re living in one of these.
The Best Outdoor Fire Tables Mar 26, 2024
Have the best of both worlds — a cozy fire pit and table to gather around. We break down the best fire tables for your outdoor spa …

The Best Backyard Swing Sets for Kids Mar 26, 2024
Create a backyard made for entertaining your kids all year round with a ready-for-play swing set.

28 Best House Numbers for Every Architectural Style Mar 26, 2024
Crank up your curb appeal with these head-turning house numbers and address signs.
The Best Wicker Patio Sets for Every Budget Mar 25, 2024
Shop the summer mainstay to bring timeless style to your porch, deck or patio.
Top-Rated Gardening Buys You Need Now, According to Amazon Shoppers Mar 29, 2024
These tried-and-true lawn and garden products are backed by thousands of positive customer reviews.
The Best Fire Pits Under $350 Apr 25, 2024
Warm up your outdoor space with one of these budget-friendly fire pits you can buy online.
11 Best Outdoor Dining Sets Under $600 Mar 20, 2024
Snag one of these stylish outdoor dining sets without breaking your budget.

20 Best Porch Swings for Every Style and Budget Mar 15, 2024
Take a load off this summer with these top-rated porch swings.
12 Best Propane Fire Pits Mar 14, 2024
Cool or warm evenings, roasting hot dogs or marshmallows, small or large gatherings — fire pits are the ultimate hangout spot. Dis …
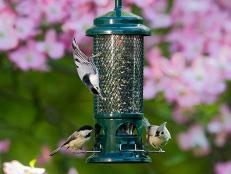
35 Best Bird Feeders and Accessories for Your Yard Mar 14, 2024
Want to attract songbirds to your yard and garden? Check out our recommendations for the best bird feeders, including window feede …
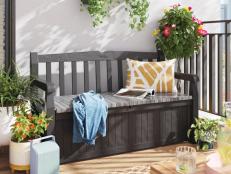
The Best Outdoor Storage Benches Under $200 Apr 12, 2024
Because we could all use a few more hiding spots for our backyard gear.


