


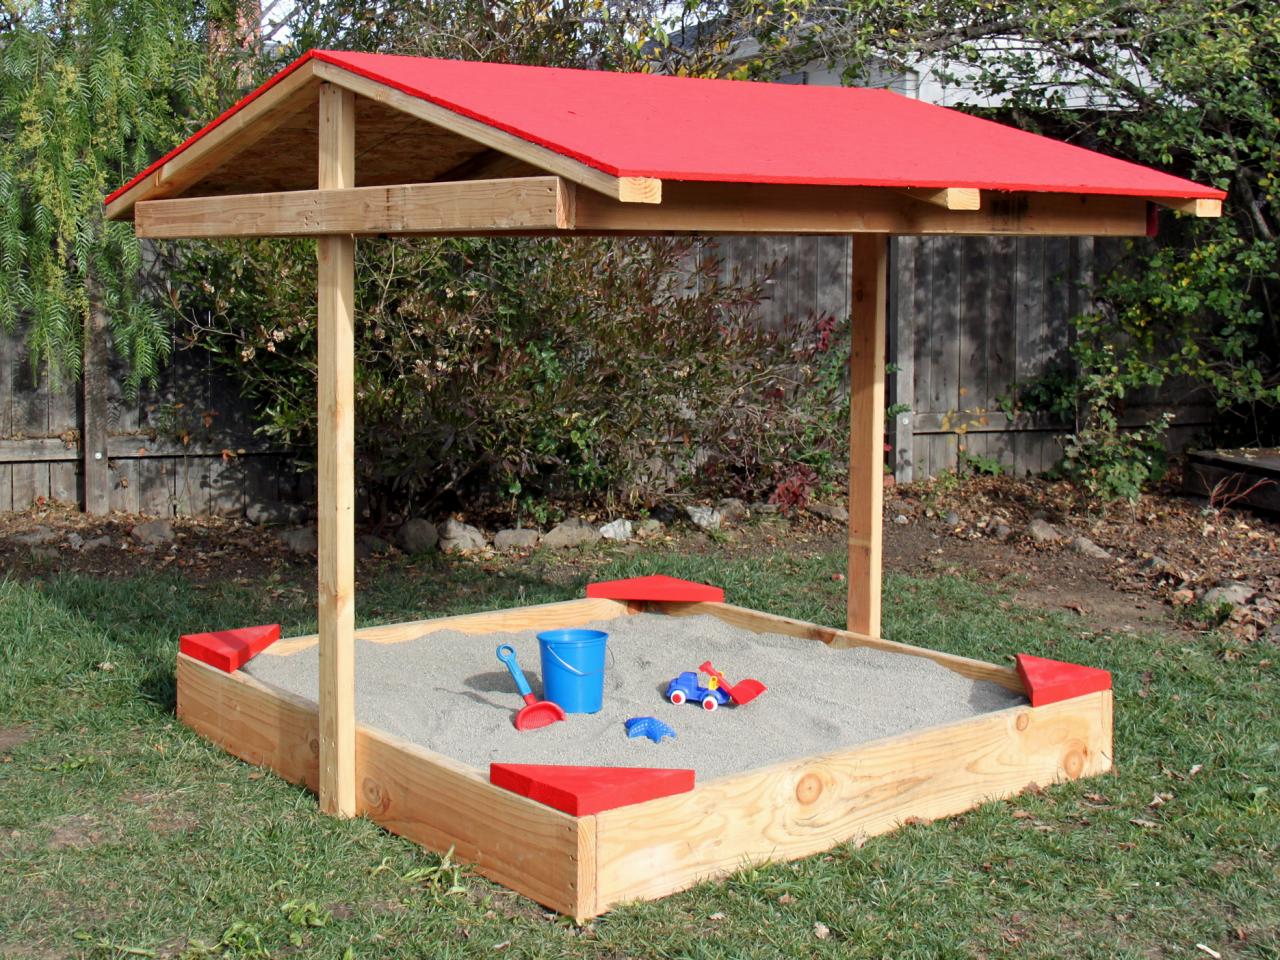
How to Build a Covered Sandbox
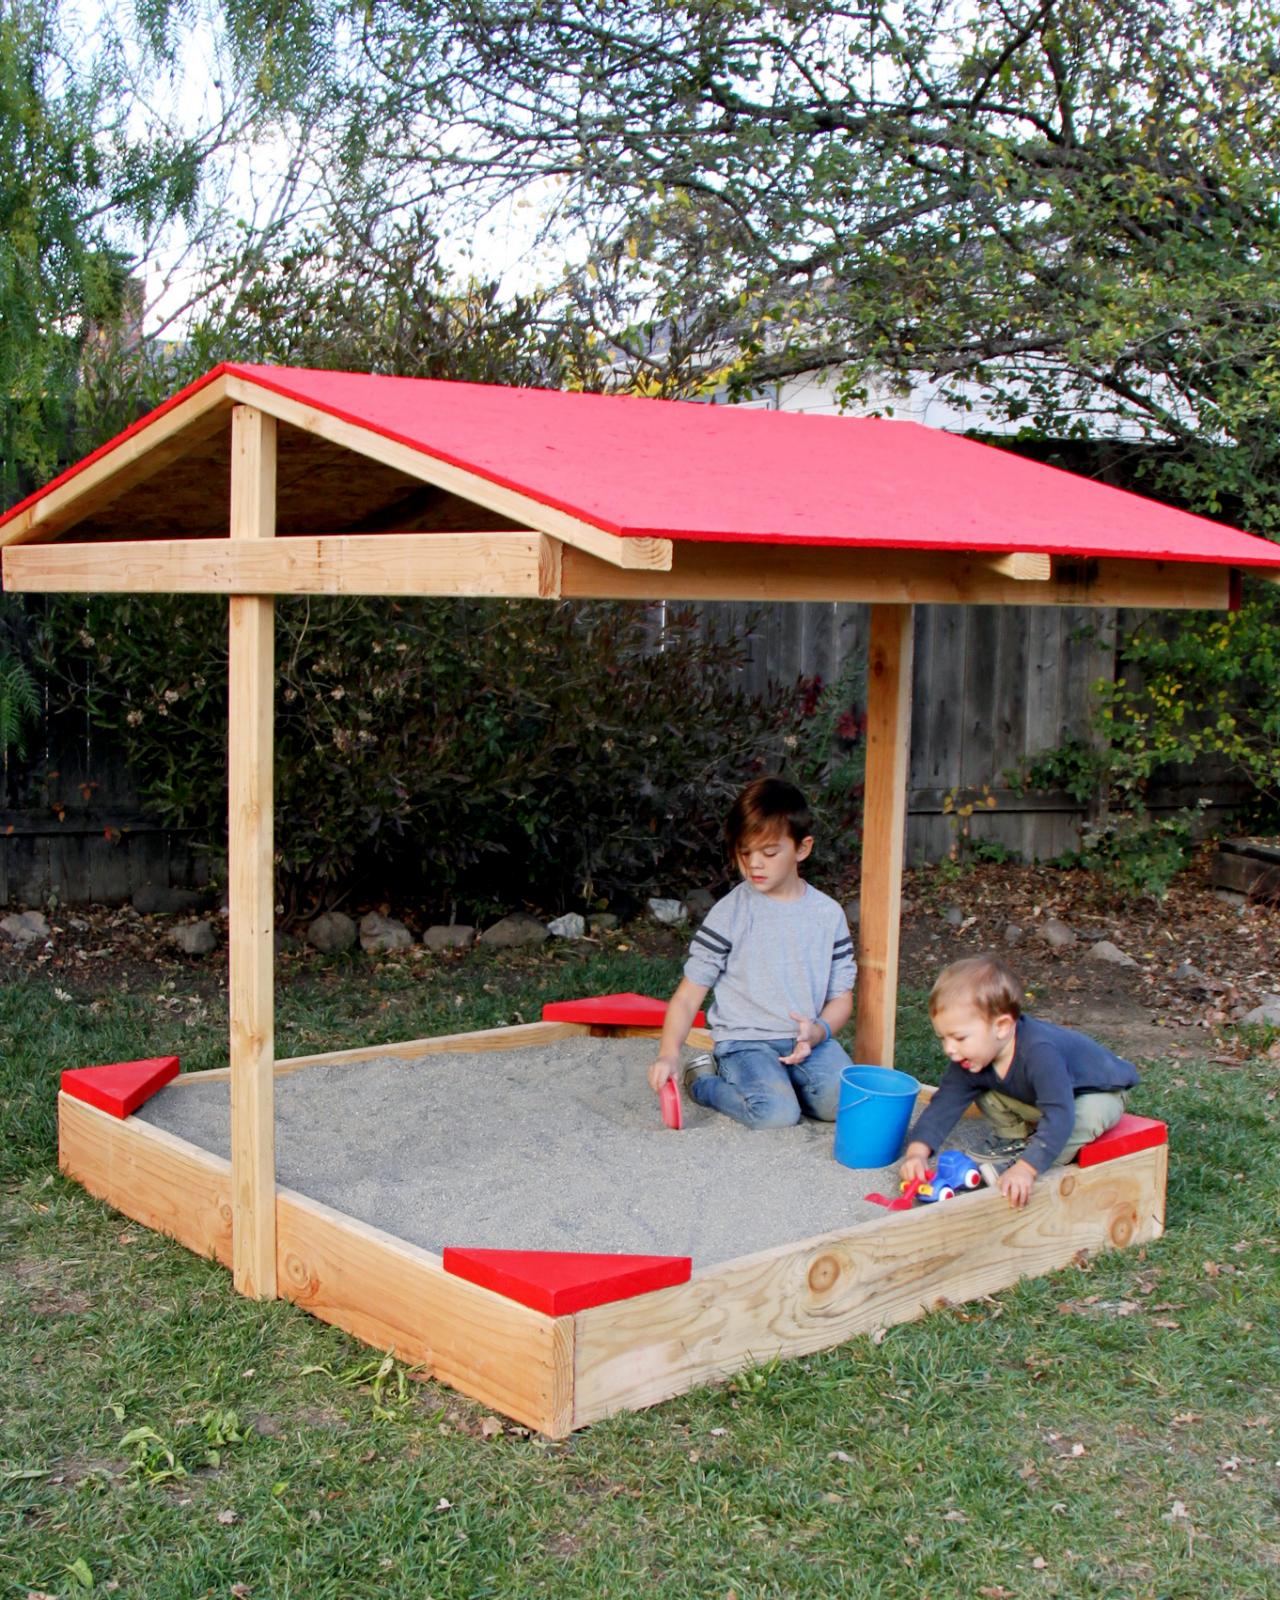
This weekend, build a covered sandbox for the kids. The roof on this DIY sandbox will keep the play area well-shaded and free of leaves, twigs and rain.

The plans for this sandbox include corner seats where kids or adults can sit. Also, we made the opening over 3 feet tall so little kids could easily walk in and out of the sandbox, and adults won't have to duck too much to join their kids in the sand.
Tools and Materials:
- circular saw
- miter saw
- drill
- speed square or framing square
- tape measure
- (2) sheets 4' x 8' x 1/2" plywood
- (2) 2x8 x 12' pressure-treated boards
- (7) 2x4 x 10' pressure-treated boards
- 1 large box (approx. 90 screws) 3” trim-head screws (for main construction)
- staple gun with galvanized staples
- 30 sq. ft. of landscape fabric
- paintbrush, roller and painter' tape
- exterior-grade paint
- kid-safe sand
Sandbox Plans


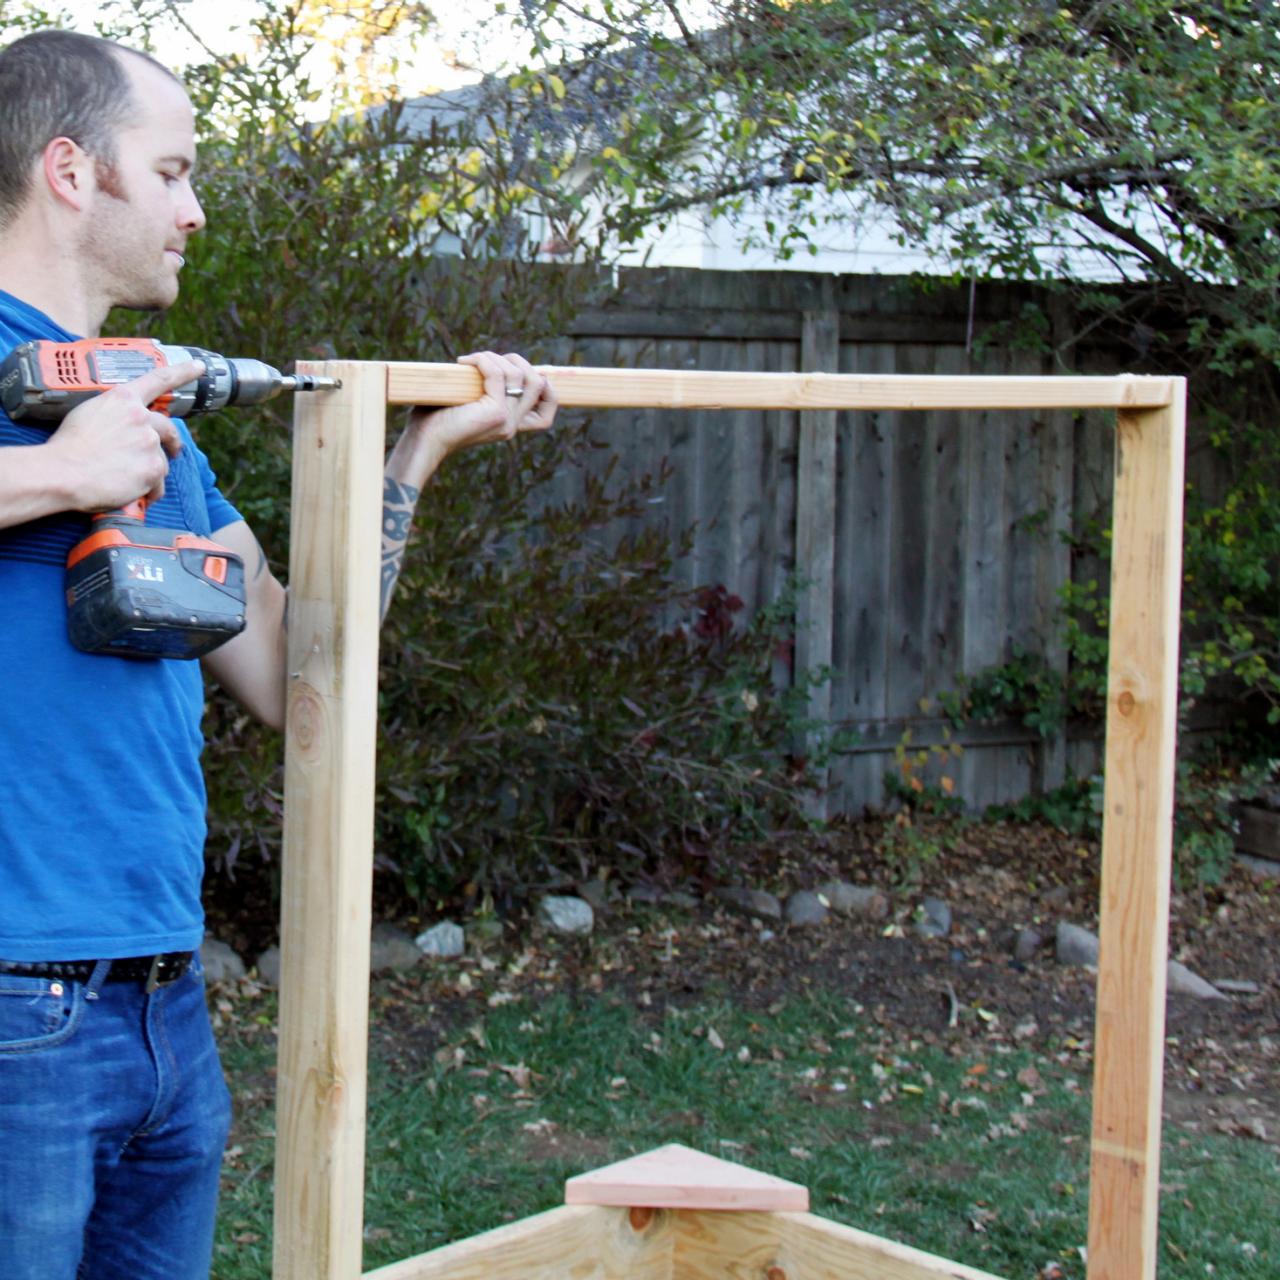
Step 1: Create the Main Box
Create the main box. Cut two 60” lengths of 2x8. Pre-drill four vertical holes into the face on each end of the 60” boards; drill each hole 3/4” in from the edge and space them evenly. Partially screw a 3” screw into each hole, so it doesn’t quite poke through. Cut two 57” lengths of 2x8. Fit them between the pre-drilled 60” boards, screw them together as shown, and use the framing square to make sure the corners are correct.

Step 2: Add Corner Benches
Use the remaining 2’ pieces of the 2x8 boards to cut four triangular benches; they should be approximately 10-1/2” x 10-1/2” x 15”. Place each triangle onto a corner of the box and pre-drill a hole through each corner of the triangle bench before screwing them down.

Step 3: Add Vertical Roof Supports
Cut two 5’ lengths of 2x4 board. Pre-drill and screw each board vertically into opposite sides of the sandbox. Make sure each 2x4 is exactly centered on the box, and use your framing square to make sure each 2x4 is perpendicular to the 2x8 box.

Step 4: Attach Horizontal Roof Support
Cut one more 5’ length of 2x4. Pre-drill two holes into the face of each 2x4 x 5’ vertical riser 3/4” down from the very top and insert screws. Screw the new board in between the two vertical boards from the previous step. Make sure the board is flush and square with the very top of each 2x4 x 5’ riser.

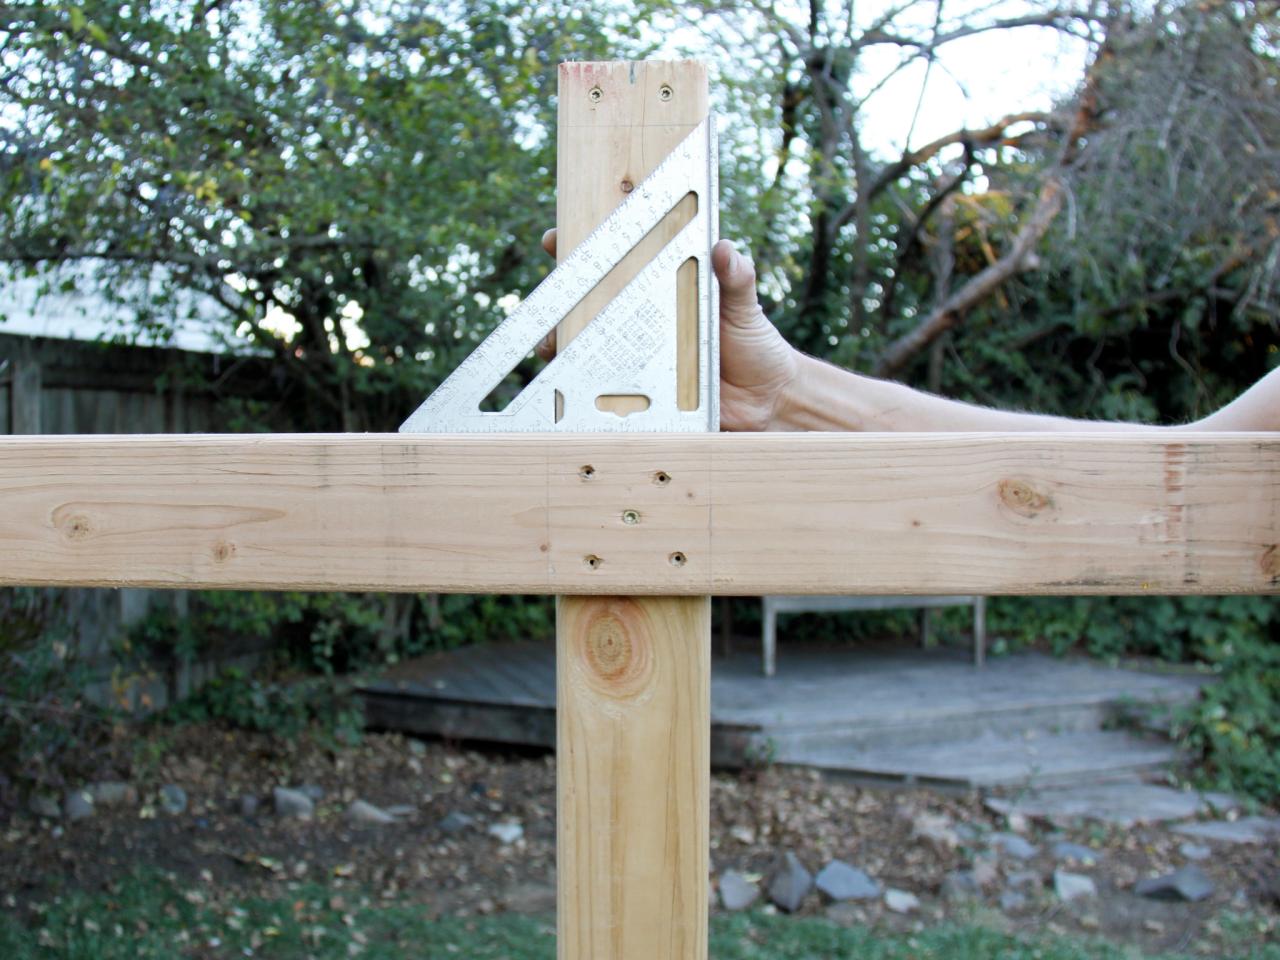
Step 5: Attach Cross Supports for Roof
Cut four 5’-3” lengths of 2x4. Use your square to mark a horizontal line 12” down from the top of the 2x4 x 5’ riser boards. Take one 5’-3” piece and pre-drill a hole in the very center of the face of the board (center top to bottom, and center left to right); place a screw in the hole. Hold up this cross piece perpendicular to the 5’ riser board, and line the bottom of the 5’-3” board up with the line you just drew, and screw it to the exact center (left to right) of the 2 x4 x 5’ riser board. You should be able to swivel the cross piece, so use your framing square to make sure the 5’-3” cross piece is perpendicular to the riser, and then pre-drill and screw four more screws into the face of the cross piece.

Step 6: Attach Opposite Piece
Repeat the previous step on the other side.

Step 7: Complete Frame for Roof
Pre-drill two vertical holes into the face on each end of the cross pieces; drill each hole 3/4” in from the edge and space them evenly. Insert a screw into each hole (this will make things easier). Now fit the other 5’-3” boards between each end of the cross pieces and screw them together.

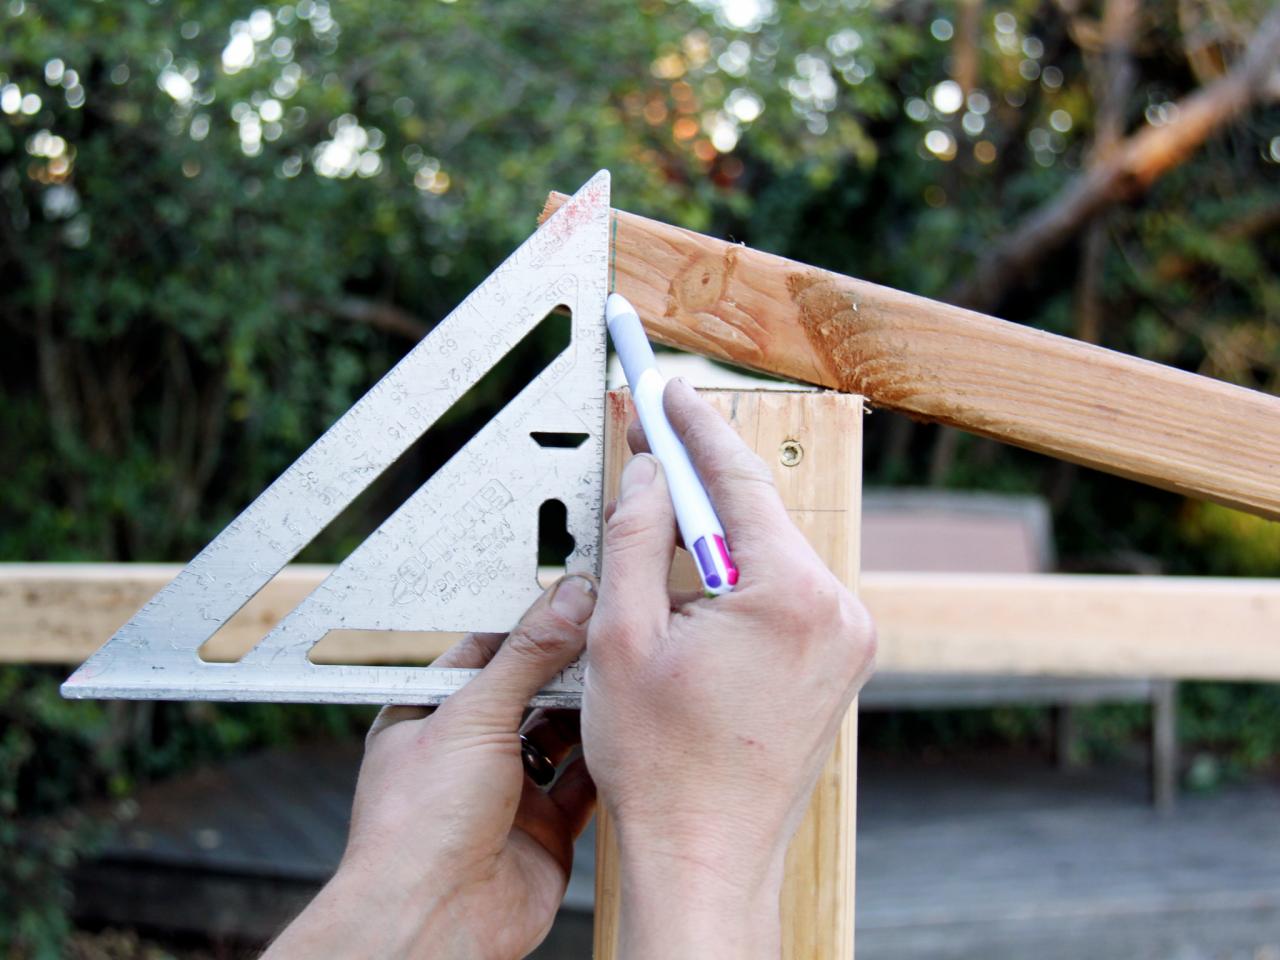
Step 8: Cut Rafters
Set a length of 2x4 face down onto the roof and mark the angle of the pitch. Cut six 40” lengths of 2x4 at about 16 or 17 degrees, and place on the roof so that the ends of each meet together at the peak. Note: Be sure to measure and mark the wood at the exact center of roof peak, so you know where the pieces should meet.
Step 9: Install Rafters

Space three of the 2x4 x 40” boards evenly on each side of the roof; one in the middle and one on each end. Pre-drill and screw down to the peak of the roof, and pre-drill and screw down to the 2x4 roof box frame. Note: Make sure the 2x4 x 40” pieces on each end stick out 1-1/2” over the face of the peak, but line up with the edge of the roof box. This will ensure that each side of your roof is a perfect rectangle.

Step 10: Install Plywood Roof
Measure the face of each slope of your roof and cut an appropriately sized piece of plywood. It should be about 40” x 66”, but if you would like the plywood to hang over a little on each side, make it larger. Optional note: We cut the “top” edge of our plywood pieces at the same 16 to 17 degree angle used for the 2x4 x 40” pieces in Step 8. Once the plywood is cut, set the pieces in position and use 1” screws to attach to the 2x4 x 40” pieces underneath.

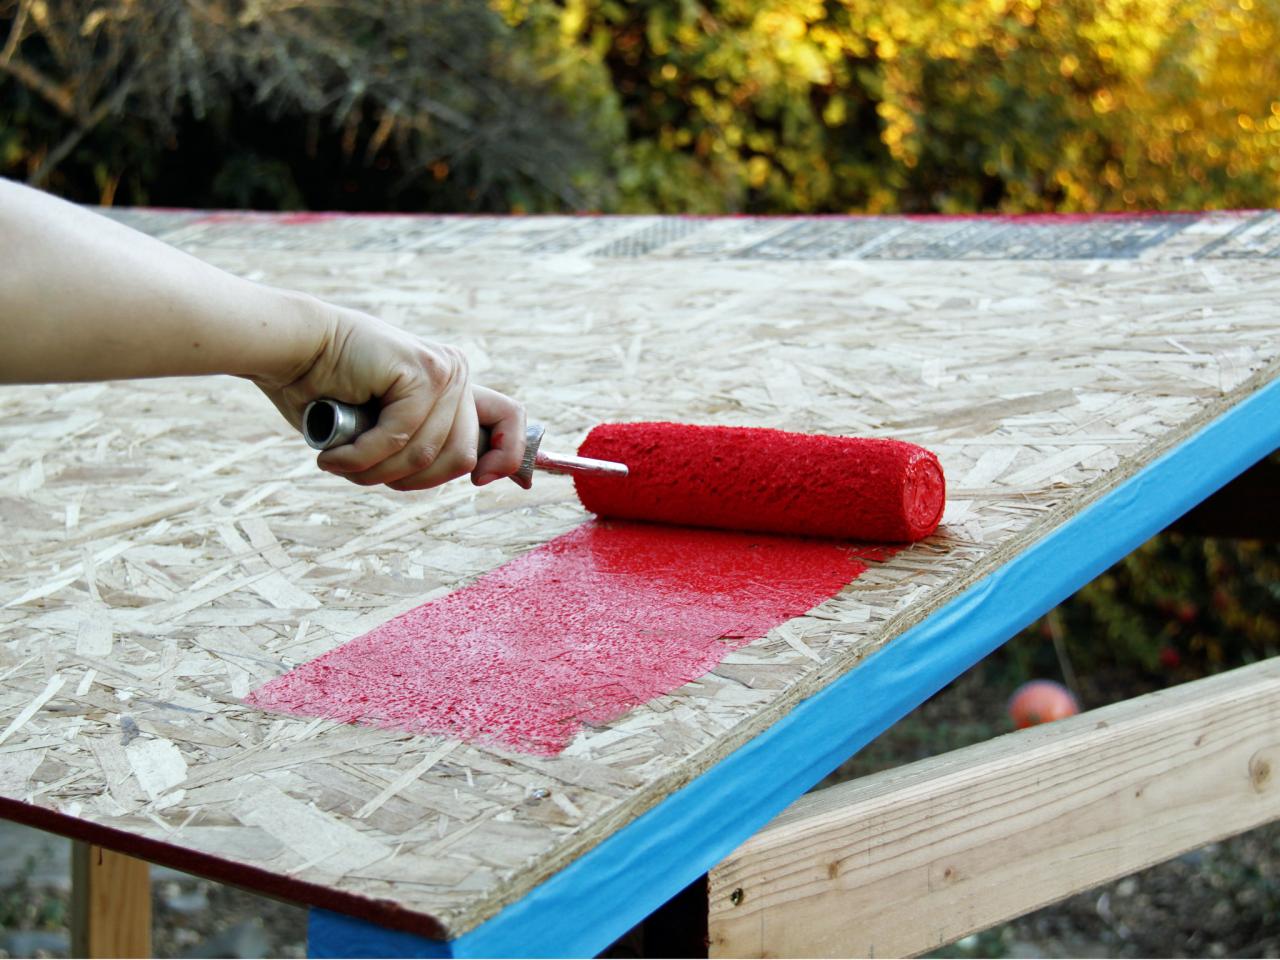
Step 11: Paint
Use painter’s tape to block off any areas you would like to avoid painting. Paint the roof and any other sections, as desired, with exterior paint.

Step 12: Install Landscape Fabric
Roll and staple landscape fabric inside the bottom of the main 2x8 box.

Step 13: Fill With Sand
Fill the box with play sand to a desired depth and enjoy your new sandbox!


