


3 Ways to Make Paper Flowers For a Wedding Bouquet
Learn to make budget-friendly flowers that will last long past the big day.
Wedding flowers don’t have to cost a fortune. Paper bouquets are a budget-friendly alternative, they’re fun to make and they’ll last a lot longer than real flowers. We have instructions on how to make three styles of flowers, peonies, roses and carnations.

Tools and Materials
- tissue paper
- floral wire
- floral sticks with wire attached
- floral tape
- sharp/heavy-duty scissors
- Styrofoam cone
- ribbon
- embroidery needle or other small pointy object
- green construction paper for leaves and floral pins
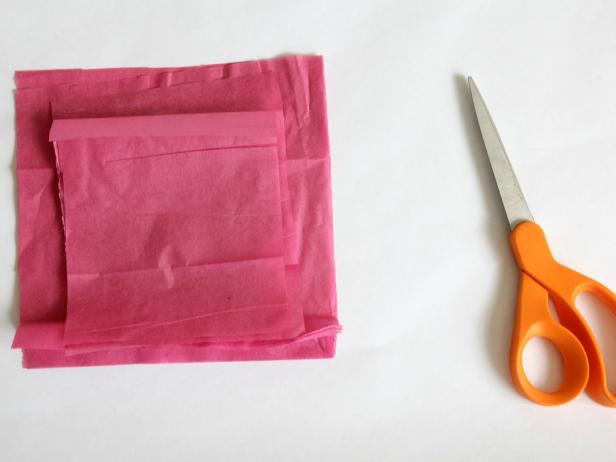
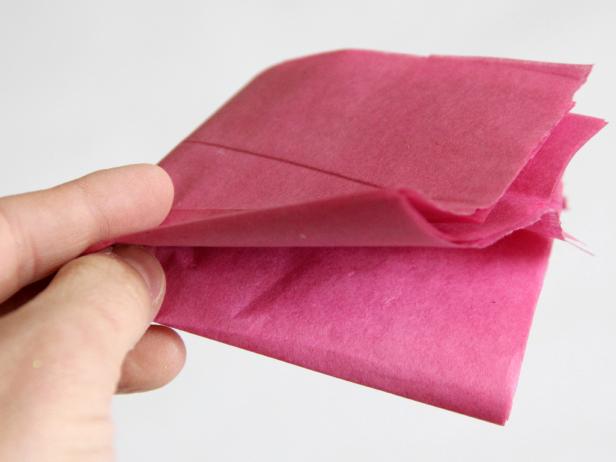
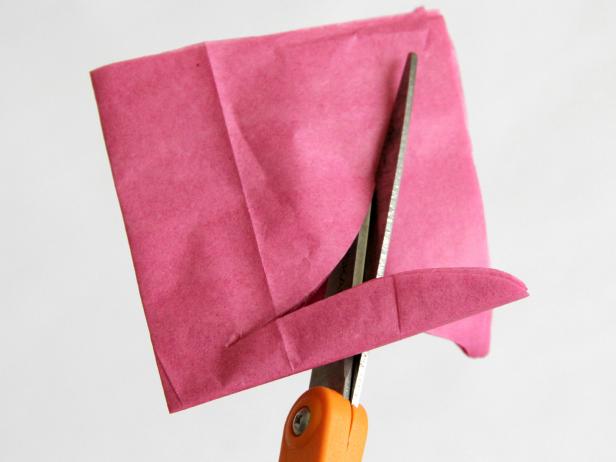
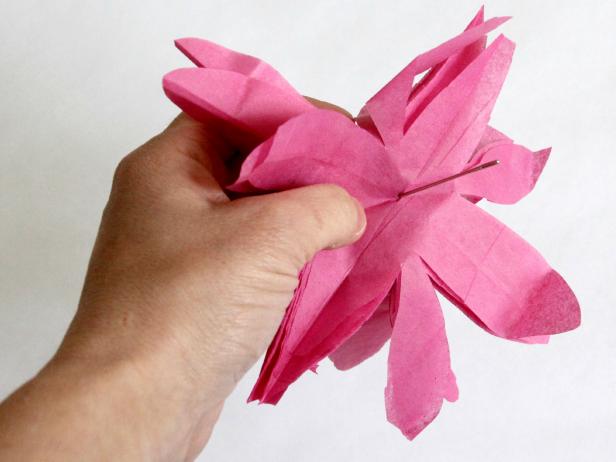
Peonies: Fold and Cut Paper Squares
To make a peony, cut about eight pieces of tissue paper into a square. You can have some squares smaller than others; simply layer the smaller ones in the top center (image 1). Fold the square in half and then fold it in half again — quartering it (image 2). With the folded edge in the center, cut some petal shapes around the outside edges. Keep the folded center attached (image 3). When you're done, you should have something that looks like image 4.

Peonies: Add Stem and Shape
Unfold the flower-shaped tissue paper. Use an embroidery needle or other small pointy object to poke a hole in the very center of the flower (image 1). Thread the top wire of a flower stick through the hole in the center of the flower (image 2). Gently push down the tissue paper around the top of the stick, and wrap the wire around the flower center to secure, about 1/8 inch from the top (image 3).
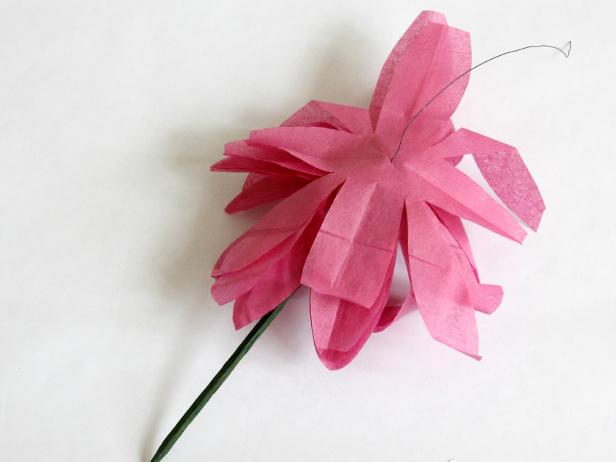
Peonies: Tape the Stem
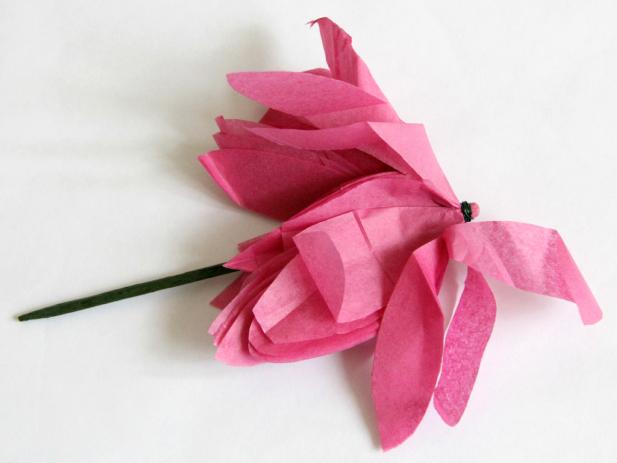
Bring flower petals back up towards the top, covering the wire center. Wrap the floral tape tightly around the base of the flower. Continue to wrap around the stick until you get at least one inch from the bottom of the flower (image 1). Repeat to make more flowers in various colors (image 2).


Peonies: Add Leaves
Cut a leaf shape from construction paper. Fold the leaf down the center to create a crease (image 1). Secure the leaf to the stem of the flower in your desired location. Wrap floral tape around the bottom of the paper leaf directly onto the stem. We put ours is directly underneath the flower (image 2). Insert the bottom of the flower stick into the Styrofoam cone. Fill the cone with as many flowers as possible (image 3).


Roses: Fold and Cut Paper Squares
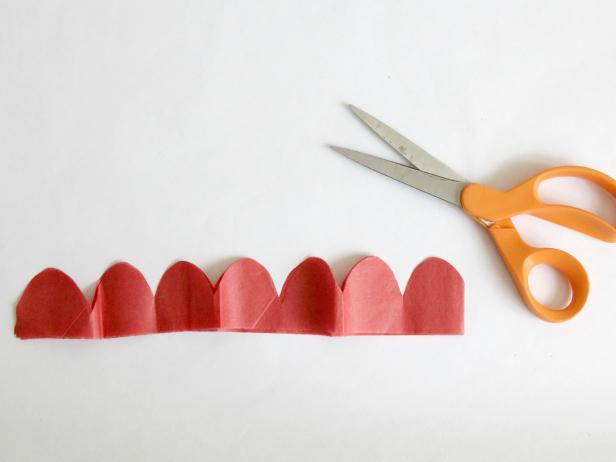
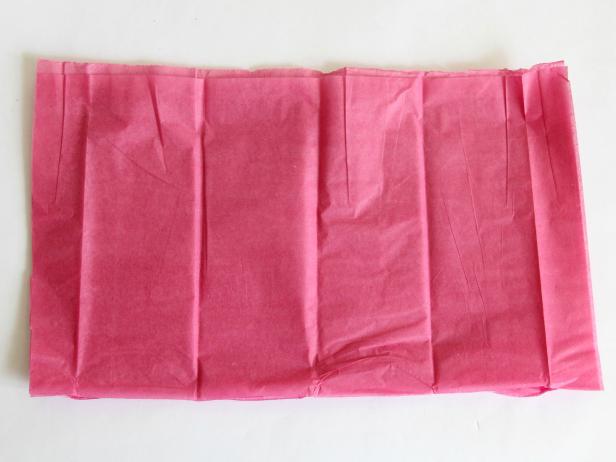
To make roses, cut long strips of tissue paper. Layer the tissue paper so that you'll be working with two or three pieces at once (image 1). Fold the strip of tissue paper in accordion style until it is close to a square shape. Cut an arc around the top edge (image 2). Unfold and you should have something that looks like image 3.


Roses: Add Stem and Shape
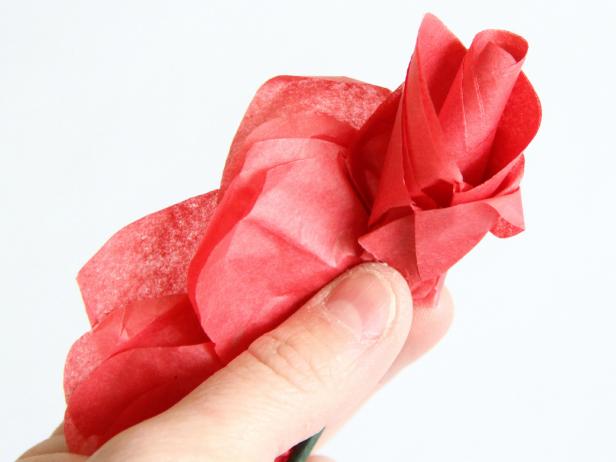
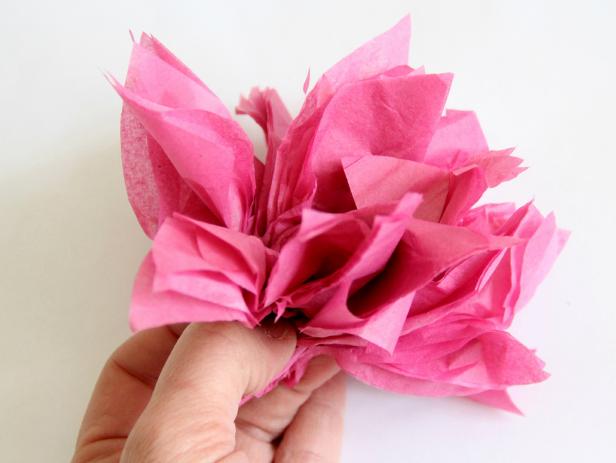
Using a floral stick, wrap the wire around one bottom edge of your scalloped tissue paper. Only wrap around once or twice leaving the wire to dangle off (image 1). Continue to wrap around the scalloped tissue paper. Pinch together the bottom as your wrap, and fold the wire over the bottom edge as you go to hold it in place (image 2). When you finish you should have something that looks like image 3.


Roses: Tape the Stem
Wrap the floral tape tightly around the base of the flower, continuing onto the floral stick stem (image 1). The only thing that's missing is the sweet smell. Insert the roses into the Styrofoam cone and continue filling up the bouquet (image 2).


Carnations: Fold and Cut Paper Squares
This carnation flower works great as a filler in any arrangement. Cut a rectangle piece of tissue paper, using about seven layers (image 1). Fold tissue paper accordion style (image 2). Use either basic floral wire or the wire on top of a floral stick to wrap around the center of the accordion tissue paper (image 3). Cut notches in either side of the paper for a smaller center, making sure not to cut all the way through. Use scissors to cut the ends of tissue paper into a petal shape (image 4).


Carnations: Add Stem and Shape
Grab the wire center, pinch together, and fluff out the tissue petals. Be careful not to rip them (image 1). Wrap floral wire around the bottom center, attaching a stick stem if you haven't already done so. Wrap again with floral tape. Insert the flowers into the Styrofoam cone to fill up any empty space (image 2).

Make Leaves for the Bouquet
This step is optional, but it adds a really nice touch to the paper bouquet. Cut long, thin green leaves from the construction paper (image 1). Fold each piece of paper down the center to create a crease. Wrap the bottom edge of each leaf around a smaller floral stick, wrapping the wire of the stick around the bottom of the leaf to secure (image 2). Repeat the process for two to three leaves on each stick (image 3). Insert leaves into the bouquet so that the tops are peaking out above flowers. Trim down the top ends to the desired size (image 4).


Complete Bouquet
Wrap around the entire Styrofoam cone with the floral tape. Wrap silk or grosgrain ribbon around the handle. Use a floral pin to secure the ribbon along the top and bottom edge. Wrap silk or grosgrain ribbon around the handle. Use a floral pin to secure the ribbon along the top and bottom edge. Add a bow around the top if desired and you are finished.


